Showing posts with label desserts. Show all posts

Wednesday, February 19, 2014

Honeycomb Candy (aka Seafoam, aka Fairy Food)


I first tasted the ethereal confection called honeycomb candy at the South Bend Chocolate Company Cafe in South Bend, Indiana, where the treat was dubbed "Seafoam."

I made that first purchase because I wondered what could possibly be lurking beneath that layer of dark, glossy chocolate to elicit such a mysterious name.

What I sank my teeth into that day was like nothing I had tried before. With the color of honey, the taste of a deeply toasted marshmallow, the crunch of hard toffee, and the airiness of . . .well . . . sea foam, could this be everything I'd ever wanted in a candy?

Most of my subsequent trips to the chocolate cafe were driven almost exclusively by my desire for more of that light, crunchy, caramelized goodness cloaked in chocolate.

Here in Texas, at least at my local grocery store where it's sold in the bulk bins, this candy is called honeycomb. The name is more of a visual description than anything else, as the recipe does not traditionally contain honey.


My recipe is heavily adapted from Nina Wanat's wonderfully instructional book, Sweet Confections, Beautiful Candy to Make at Home (2011, Lark Crafts, page 52). The main difference is that my recipe contains half the baking soda and adds a small amount of apple cider vinegar, which I feel yields a slightly more even airiness. Instructions here are in my own words.


Honeycomb Candy
1 cup granulated sugar
1/4 cup light corn syrup
1/4 cup water
1/4 tsp apple cider vinegar
1 tsp baking soda, sifted through a fine sieve to remove any clumps
8 oz dark chocolate, finely chopped (I used a combination of Chocolove Strong Dark 70% and Green and Black's Organic Maya Gold 60%, which added a tantalizing hint of orange and spices to the mix. Do not use chocolate chips as they contain stabilizers and will result in a clumpy coating.)

Line a cake pan or rimmed baking sheet with parchment paper. The size of the pan is not critical, but a smaller pan will produce thicker (taller) honeycomb.


Place the sugar, corn syrup, water, and apple cider vinegar in a very large saucepan over med-high heat and do not stir. Run a wet pastry brush along the edges to dissolve any sugar crystals.

Allow the mixture to boil just until it turns golden.


At this point, put on oven mitts if desired, remove the saucepan from the heat, quickly stir in the baking soda using a heatproof spatula (the mixture will bubble up immensely), and immediately pour the mixture into the prepared cake pan. Do not spread it out, and try not to agitate it as it cools, as you want to maintain all those airy "sea foam" bubbles.


Let cool completely before using a large serrated knife to cut into irregular pieces.
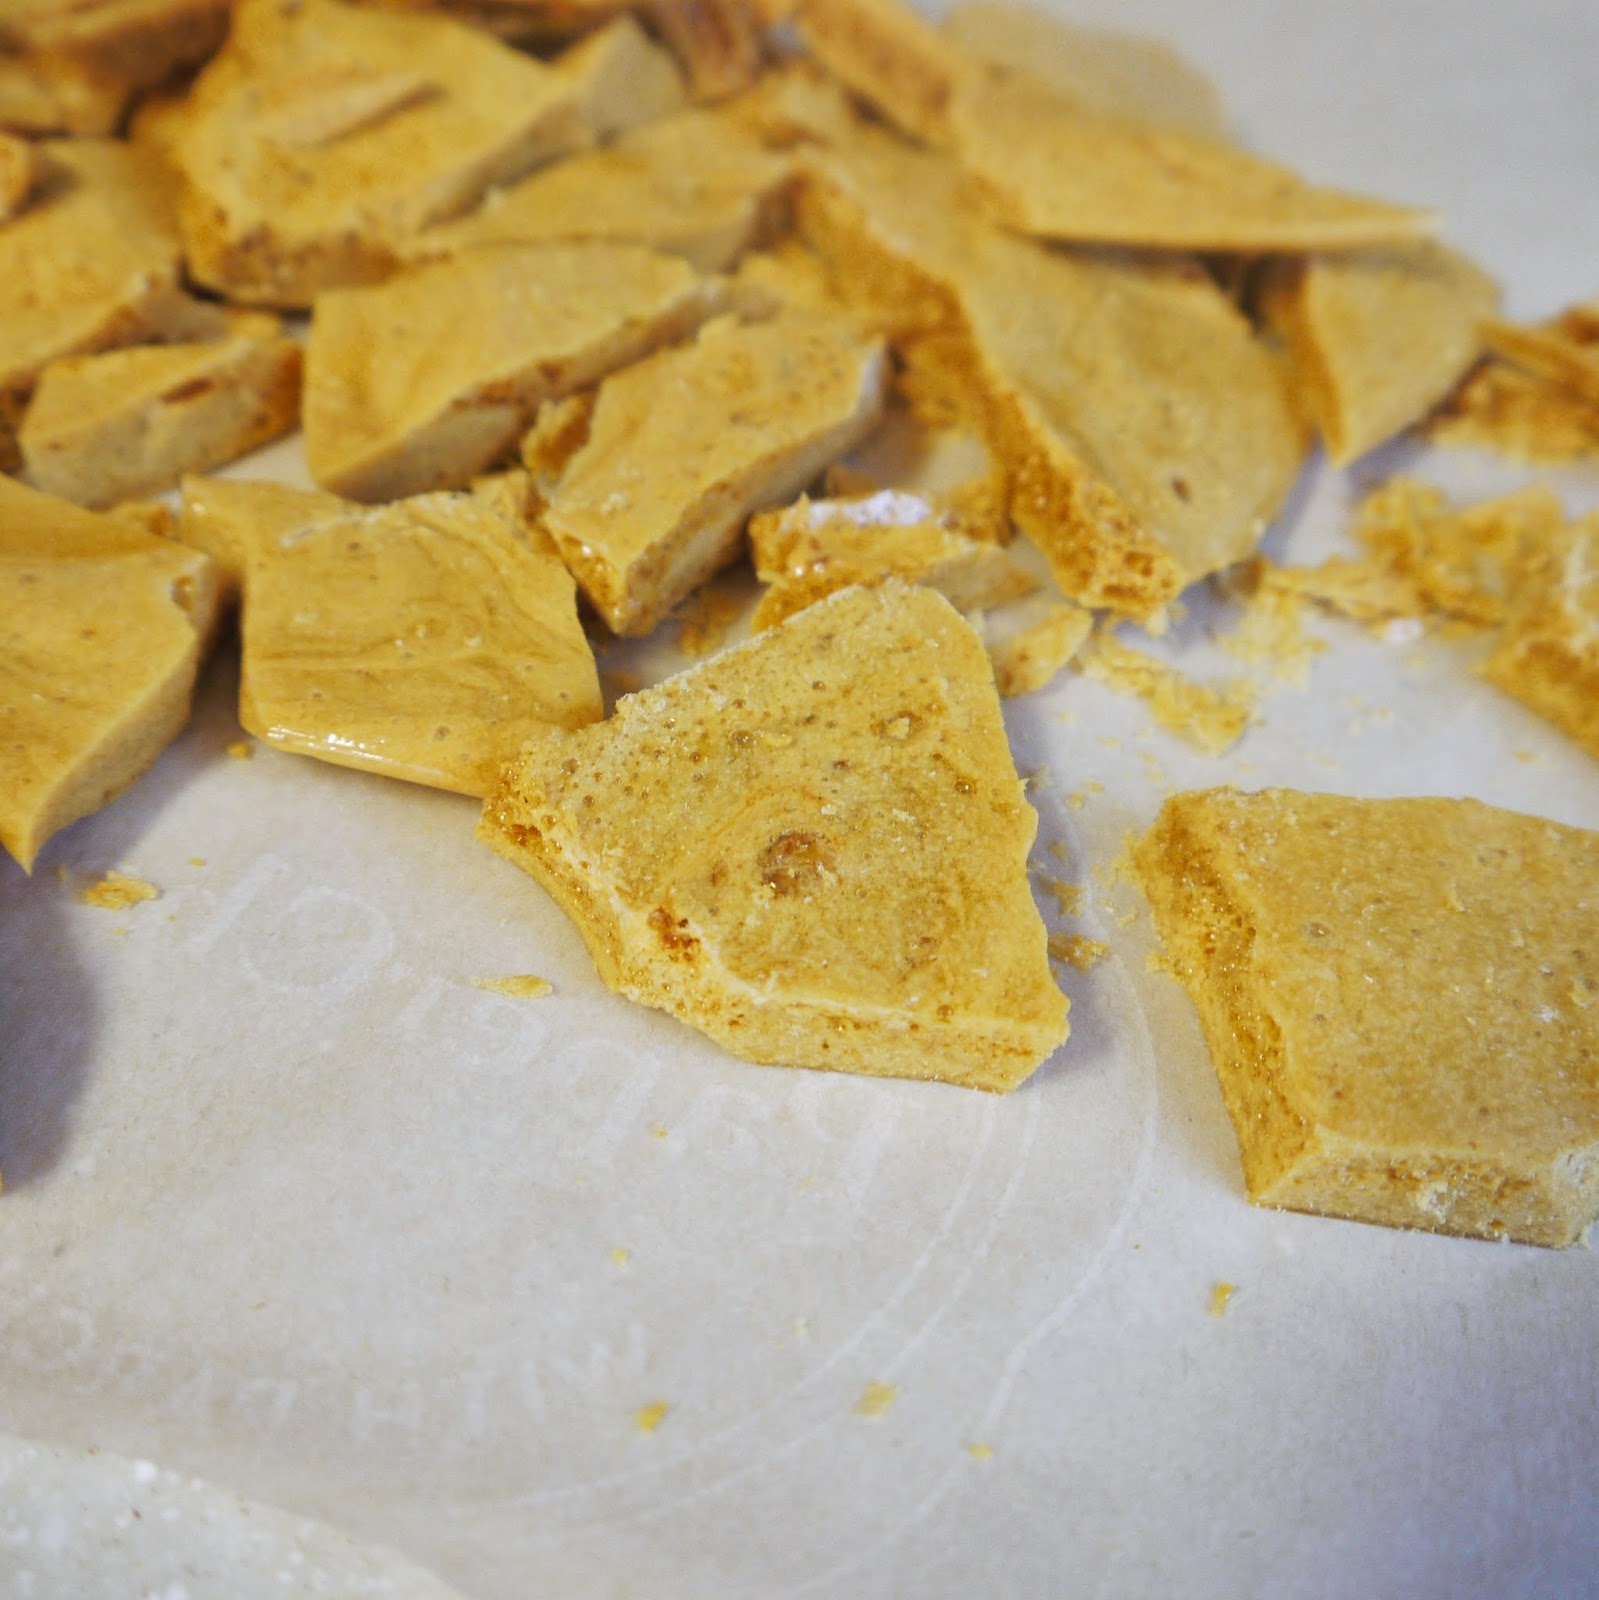

Little fragments make great nibbles and can also be stored for another use in an airtight container for 3-5 days.

To melt the chocolate, place two thirds of the chocolate in a stainless steel bowl set over barely simmering water, and stir gently until totally melted. Carefully remove the bowl from the simmering water (you might want to wear oven mitts when you do this, as the steam can be rather intense . . . yes, I burned myself), and add the reserved chocolate to the melted chocolate, stirring gently until completely smooth.

Note: For once I actually tempered my chocolate, using a candy thermometer to check for precise temperatures and all, but as you can tell from the gray-ish streaks in the photos, that dark, flawless sheen of perfectly tempered chocolate evaded me. If the gray-ish streaks attack your confections as well, never fear: the flavor of the chocolate will not be affected. 

Place a fresh sheet of parchment paper on the counter and drop a piece of honeycomb into the chocolate. Use a fork to gently turn the honeycomb over in the chocolate to coat it. Scoop the honeycomb out with the fork and shake the fork back and forth very gently with slight movements of your wrist so that the excess chocolate drizzles back down into the bowl.


Carefully slide the coated honeycomb off the tines of the fork and onto the parchment to set.


Repeat with remaining pieces of honeycomb, gently reheating and stirring the chocolate until smooth as needed. Allow the coated candies to set completely at room temperature (ideally in a 60-to-70-degree Fahrenheit room) before transferring to an airtight container to store at room temperature for up to a week . . . as if they'll last that long.


Thanks for reading! Here's to Being the Secret Ingredient in your life.

Thursday, January 23, 2014

Savannah Smiles Pudding


It's that time of the year again--Girl Scout Cookie Season!

So in honor of those intrepid Girl Scouts, pushing wagons of cookies up and down our streets and bravely knocking on our doors, hoping we'll shell out four dollars a box, here's a little recipe inspiration featuring one of this year's tasty new flavors.

If you have fond memories of Lemon Coolers (a long-ago-retired cookie originally produced by Sunshine Biscuits), the Girl Scouts' crunchy, lemony, powdered-sugar-coated Savannah Smiles will be a pleasantly familiar indulgence.

You could easily adapt this recipe to work with any variety of Girl Scout cookie, but I just love the creamy-tart combination of lemon, cream cheese, and vanilla bean. Hoosband is generally in the "lemon is not for desserts" camp, but even he was pleasantly surprised with the results.

Finally, please don't judge this recipe by the photos. I made this dessert to take to dinner with friends and didn't have the opportunity to snap any glamour shots. But there wasn't any left at the end of the night, so that's a good sign, right?


Savannah Smiles Pudding
If you do not have a food processor, the cookies can be placed in a gallon-sized zip-top bag and crushed with a cast-iron skillet or rolling pin, and the cream-cheese mixture can be beaten with an electric mixer, or even a very sturdy whisk, as long as the cream cheese has been fully softened.

1 box Savannah Smiles Girl Scout Cookies
8 oz cream cheese (reduced fat is fine), softened for at least 30 minutes at room temperature (longer if not using a food processor)
3/4 cup heavy whipping cream, divided
1/4 cup granulated sugar
1 vanilla bean

Place the cookies in a food processor and pulse until the largest pieces are about the size of a pea.


Transfer the cookies to another container and set aside.

Wipe out the bowl of the food processor, and add the cream cheese, 1/4 cup heavy whipping cream, sugar, and the seeds from the vanilla bean (split the bean lengthwise with a paring knife, and use the dull edge of the knife to scrape out the tiny seeds). Process until completely smooth, pausing to scrape down the bowl if necessary.

In a large bowl, use an electric mixer or a wire whisk to whip the remaining 1/2 cup heavy cream until very fluffy and capable of holding a soft peak when the beater or whisk is lifted out.


Add the cream cheese mixture to the whipped cream, and use a spatula to gently blend until smooth.


Evenly distribute 1/3 of the cookie crumbs within the bottom of a Pyrex loaf pan.


Top with half of the cream-cheese mixture.


Repeat with another 1/3 of the cookie mixture and the remaining half of the cream-cheese mixture. Finish with remaining crumbs. Cover the loaf pan with plastic wrap and refrigerate for at least two hours, or up to 24 hours before serving.

Serves approximately 8.


Thanks for reading! Here's to Being the Secret Ingredient in your life.


Wednesday, February 27, 2013

Gluten-Free Double Chip Cookies


The Setting: A toasty apartment in the snow-strewn Midwest.

The Soundtrack: Soft snores from the sweet toddler asleep on my lap.

On the Stovetop: Chicken stock.

The Scenario: Giving gluten the old heave-ho.

Okay, so I'm not actually giving up gluten (at least not at the moment).

I recognize, however, that more and more people these days are finding better health and happier lives avoiding  gluten-y grains like wheat, barley, and rye. So I thought I'd do a little experimenting to see how my go-to chocolate-chip cookies would fair from the gluten-free treatment.

I had both brown-rice and tapioca flours in my pantry from previous endeavors, so I threw a little of each into the mix.

The results were suburb. They looked and tasted like...well...chocolate-chip cookies.

If there were any downsides to my recipe's GF makeover, they would be these:

1) For some reason the butter and brown-sugar flavors seemed to be somewhat muted compared to my regular cookies, and I was missing a slight nutty flavor from the flour I typically use. Next time, I think I'd add chopped pecans and toffee bits to amp things up a little in the flavor department.

2) I felt like there was an ever-so-slight chalkiness in my mouth after eating these cookies. Nothing major, just the feeling that I needed to brush my teeth--I get the same sensation after eating an under-ripened banana.

3) The alternative flours tend to be more expensive, so people who do not find their health improved by avoiding gluten might want to stick to wheat flour.

Nevertheless, the cookies were delicious. Hoosband, whose nickname ought to be The Glutenator for his love of all things wheat-related, went back for seconds..and thirds...and fourths.


Gluten-Free Double Chip Cookies
1 stick (8 T or 1/2 cup) unsalted butter, softened at room temperature
1 cup brown sugar
1 tsp pure vanilla extract
1 large egg
1 cup brown-rice flour
3/4 cup tapioca flour (aka tapioca starch)
1/2 tsp fine salt
1/2 tsp baking powder
1/2 tsp baking soda
1/2 cup milk chocolate chips
1/2 cup semisweet chocolate chips

Preheat the oven to 350 degrees F. Line two baking sheets with parchment paper. Make sure your oven racks are in the two center-most slots.

Beat together the butter and brown sugar until the mixture is light and fluffy--this should take about 4 minutes on med-high speed.


Scrape down the bowl, add the egg and vanilla, and beat on medium speed for about 2 minutes or until the mixture is once again light, fluffy, and voluminous.

In a small bowl, whisk together the flours, salt, baking powder, and soda.


Add this mixture to the butter mixture and beat on med-low speed until fully incorporated, about 1 minute. Add the chocolate chips and beat on low just to distribute (alternatively, fold them in by hand with a rubber spatula or wooden spoon).


Use a medium-sized cookie scoop to distribute dough mounds between the two prepared cookie sheets, leaving at least two inches between each mound. If, like me, you (or someone in your house) like(s) to sneak spoonfuls of raw dough, you should end up with just enough dough for two large cookie sheets, or about 24 dough mounds. If there are no dough-devourers to be found, refrigerate any leftover dough and crank out a few more cookies when you have an available (and cooled) cookie sheet.


Bake the cookies at 350 degrees Fahrenheit for 11-12 minutes, rotating the sheets halfway through for even cooking. The cookies will look slightly golden around the edges and very underdone in the middles--don't worry, they will set.


Allow the cookies to cool at least 5 minutes on the baking sheets before transferring to cooling racks to cool completely.


Makes 24-30 cookies.


Thanks for reading! Here's to Being the Secret Ingredient in your life.

Tuesday, October 16, 2012

Homemade Oreos


The Setting: On again, off again blue skies and rain.

The Soundtrack: The Wire.

Steaming up the Oven: Nothing yet...but I'm hungry.

The Scenario: What's black and white and delicious all over?

Grocery shopping a few weeks ago, I came scarily close to plopping a package of Double Stuf Oreos in my cart--a very strange occurrance in my typical "only if it's all-natural" world. But the end-cap display was so appealing, the doubly-stuffed cream between the dark, chocolaty wafers was practically reaching through the plastic packaging and gripping my hand, chanting, "You know you want me."

My hand was set free only by the memory of my last junk-food-induced stomach ache and sugar crash--much in the same way a crippling hangover one weekend will curb a college student's drinking the next. Oreos in my cart today would mean an empty package of Oreos by the morning.

No, I thought. If I'm going to binge on Oreos, I'm going to work for it.

I made a mental note to move Homemade Oreos up a few spots on the recipes-to-develop queue and went about my shopping.

A few days later I was following through with a long-awaited plan to make another addictive childhood treat: Oatmeal Creme Pies.

I was delighted with the way they came out, but I ended up with far more filling than I needed for one batch of cookies.

As I fashioned the remaining filling into a log and wrapped it in plastic wrap for safe-keeping, a light went off. This filling would be perfect for Oreos!

The next day I set to work on a chocolate wafer recipe.

The requirements were these:
  1. The dough must be dark--like, black.
  2. The dough must be easy to roll out.
  3. The cookies must not spread during baking.
  4. The cookies must be crisp--not cakey, not chewy--but also not too brittle or rock-like.
  5. (In summation) The cookies must look as much like, taste as much like, and have as similar a texture to Oreos as possible.
I figured a combination of baking chocolate and cocoa would deliver the best chocolate flavor, color, and texture.

Generally, I prefer natural cocoa to Dutch-process cocoa, which has been treated with alkali to soften the acidity. The thing is, natural cocoa is a lighter, rosier shade of brown, while "Dutched" cocoa is the deep, dark color of devil's-food-cake mix. And I needed dark. Also, I had a feeling the flavor of the alkali-softened cocoa would better approximate the packaged, processed cookies.

To get the best of both worlds, I used Hershey's Special Dark cocoa, which is a blend of natural and Dutched cocoa powders.

To make sure my dough would roll out well and resist spreading in the oven (and that the baked cookies would have the proper crunch), I took a cue from my Homemade Graham Crackers and the Golden Cookies from my Homemade MoonPies. In both these recipes, a large proportion of flour and minimal leaveners help keep spread in check so that the small, flat disks you put in the oven are equally small and flat when you take them out.


Homemade Oreos
While the filling for the Oreos is the same as the filling for the Oatmeal Creme Pies in the last post, here the filling is shaped into a log and sliced into rounds instead of piped onto the cookies.

~for the cookies~
2 1/4 cups all-purpose flour
3/4 cup unsweetened cocoa (preferably a blend of Dutched and natural cocoas such as Hershey's Special Dark)
1/2 tsp fine-grain salt
1/4 tsp baking soda
2 sticks (1 cup) unsalted butter
2/3 cup granulated sugar
3 T corn syrup
2 oz semisweet baking chocolate (I used Baker's), finely chopped, melted, and cooled (but still pourable)
1 tsp pure vanilla extract

~for the filling~
1 stick (1/2 cup, or 8 T) unsalted butter
pinch salt
3 T refined coconut oil, cool room temperature (solid but soft)
1 tsp pure vanilla extract
2 1/2 cups powdered sugar
1 cup white "chocolate" chips, melted and cooled but still pourable (I used Nestle)

Preheat oven to 350 degrees F. Position a rack in the center of the oven.

In a medium-sized bowl, whisk together the flour, cocoa, salt, and baking soda. Set aside.

Beat the butter and sugar together until light and fluffy. Beat in the corn syrup, chocolate, and vanilla until smooth. Add the flour mixture, beating on low speed until fully incorporated. The dough should be firm, black and malleable.

Turn the dough out onto parchment paper and divide in half.

Note: At this point you can refrigerate one or both of the halves for up to 5 days if desired. If refrigerating, flatten the dough into a disk approximately 2 inches thick (this will make it much easier to roll out when you are ready to use it). Wrap the flattened disk tightly in plastic wrap and refrigerate. Remove the dough from the fridge 20 minutes before you are ready to roll it out.

Working with one half (or disk) of the dough at a time, sandwich the dough between two baking-sheet-sized sheets of parchment paper and use a rolling pin to roll out the dough to a thickness of about 1/4 inch between the sheets. Remove the top sheet of parchment and use the cardboard cylinder from a roll of paper towels to cut out perfect, Oreo-sized cookies.

Carefully lift up the excess dough, leaving the circles on the parchment.


If desired, use a toothpick or the tip of a paring knife to create designs (such as family initials) on the cookies.


Transfer the parchment with the dough rounds to a baking sheet and bake at 350 degrees F for 12 minutes. Let cookies cool on the baking sheet for 3-5 minutes before transferring to a cooling rack to cool completely.


Re-roll dough scraps and repeat, using fresh sheets of parchment as needed. Repeat whole process with remaining half of dough.


To prepare the filling, beat the cold butter along with a pinch of salt until smooth. Add the coconut oil and vanilla, beating just to combine. Add the powdered sugar and beat till well-mixed. Beat in the melted white chocolate. The mixture should be thick, white, and almost dough-like.


Turn the filling out onto a sheet of parchment paper and shape into a log.

Roll the filling into a log the thickness of the cardboard paper-towel roll.

Place a long string of unflavored dental floss under the log, about 1/4-inch back. Crisscross the floss over the top of the log and pull, slicing a 1/4-inch thick round of filling.


Place the filling round on a cooled cookie, top with another cookie, and press very gently to adhere.


Repeat with remaining cookies and filling.


Makes about 40 sandwich cookies.


Thanks for reading! Here's to Being the Secret Ingredient in your life.

Thursday, September 20, 2012

5-Spice Gingersnaps

The Setting: A day torn between beautiful bright blue skies and the currently prevailing cloud cover. Which one will win out?

The Soundtrack: The Barefoot Contessa. Oia loves Ina.

Steaming up the Oven: Nothing at the moment, but I'm about to drop some pork in the slow cooker!

The Scenario: On a bit of a 5-spice kick...

Lately I've been throwing 5-spice powder in everything from lentils to pastries. I can't get enough of the stuff.

So when I needed to develop a gingersnap recipe for a little project I'm working on, the inclusion of this versatile Chinese spice blend was pretty much a given.

Instead of using dried, powdered ginger to give the cookies their namesake flavor, I prefer a combination of moist, freshly grated ginger root and chewy candied (crystallized) ginger for greater complexity.

These spicy cookies are classically crispy (hence the "snap"), but decresing the cooking time by a couple of minutes will result in a chewier cookie.

Crispy, they make a perfect accompaniment to a steaming cup of chai (my breakfast for the past few mornings).

And chewy, they make incredible bookends to vanilla ice cream in a palate-cleansing ice-cream sandwich.

The choice is up to you.

Gingersnaps
I always hear the best way to peel ginger root is to scrape it with a metal spoon, but I have never had much success with this method. Instead, I simply slice off all the edges with a chef's knife, leaving a perfect, peel-less piece of ginger, ready to be grated. It may seem a little wasteful, but let's be honest, the time and energy you save is worth the little bit of ginger flesh lost.

1 1/4 sticks (10 T) cold, unsalted butter
2 cups brown sugar
1 T freshly grated ginger root
4 tsp (1 T + 1 tsp) finely chopped candied ginger
1 large egg
2 cups unbleached all-purpose flour
1 tsp baking soda
1 tsp fine-grain sea salt
1 tsp baking powder
1 tsp Chinese 5-spice powder
granulated sugar for rolling, if desired

Preheat the oven to 350 degrees Fahrenheit and line a large baking sheet with parchment paper.

Beat the butter with the brown sugar and both gingers until very well combined (2-3 minutes on medium speed).

Scrape down the bowl if needed, add the egg, and beat just until light and fluffy (about 1 minute on medium speed).

Whisk together the dry ingredients, add to the butter mixture (with the mixer turner off), and beat on low speed till fully incorporated.

Use a medium-sized cookie scoop to scoop out 2-T-sized balls of dough and place 2-3 inches apart on the prepared cookie sheet. If desired, roll each ball in granulated sugar before placing on the baking sheet and flatten slightly with your palm to keep it in place.

Bake one sheet at a time at 350 degrees F for 15 minutes for classically crunchy gingersnaps, or for 12-14 minutes for chewier cookies.

Allow cookies to cool slightly on the baking sheet before transferring them to a cooling rack to cool completely.

Repeat with remaining dough.

Dough you do not wish to use immediately may be stored in an airtight container in the fridge for up to one week

Cookies will keep for up to 5 days stored in an airtight container at room temperature.


Makes about 28 cookies.


Thanks for reading! Here's to Being the Secret Ingredient in Your life.