Showing posts with label chocolate. Show all posts

Friday, October 17, 2014

Chocolate Saucepan Cookies


I love chocolate in just about any form or fashion--except chalky-dry chocolate cakes or other treats that seem to be chocolate in name only. I pretty much want to be hit over the head with chocolate flavor.

That, my friends, is what these cookies deliver.

Made with almond meal instead of flour, they are effortlessly gluten free and have a delightfully mealy texture almost reminiscent of moist, cakey cornbread.

About as easy to throw together as cookies from a mix, Saucepan Cookies are so called because the ingredients are all mixed up in the saucepan used to melt the chocolate, butter, and sugar.

For the best and deepest chocolate flavor, use a chocolate with a cacao content of at least 60%. Flavored chocolates can add subtle interest as well. I particularly love these cookies made with 1.5 oz Green and Black's Organic Ginger Dark Chocolate and 2.5 oz Green and Black's Organic Maya Gold Dark Chocolate (both 60% cacao). The Maya Gold chocolate is flavored with notes of orange and spices, and the Ginger has flecks of crystallized ginger throughout. I love the combination of chocolate and spices, but plain dark chocolate will work equally well if you want to keep it simple.


Chocolate Saucepan Cookies
4 oz dark chocolate
4 oz salted butter (I prefer Kerrygold)
3 oz sugar
1/4 tsp kosher salt
1 tsp pure vanilla extract
6 oz almond flour (aka almond meal)
2 eggs

Preheat oven to 350 degrees Fahrenheit and line a baking sheet with parchment paper.

Melt the chocolate, butter, and sugar together in a medium-sized saucepan over med-low heat, stirring occasionally. Remove from the heat and thoroughly stir in the salt, vanilla, and almond flour/meal, allowing the mixture to cool a bit.  Add the eggs, one at a time, stirring to fully incorporate. Use a small-to-medium-sized cookie scoop to transfer blobs of dough to the parchment, spacing about two inches apart.

Bake the cookies for 9-10 minutes. Allow to cool 1-2 minutes on the baking sheet before transferring the whole sheet of parchment to a cooling rack to cool completely. These cookies are best after resting for at least 30 minutes and are even better the next day. Store in an airtight bag or container at room temperature for up to 5 days.


Thanks for reading! Here's to Being the Secret Ingredient in your life.

Tuesday, April 15, 2014

Individual Peanut Butter and Jelly Pies


If you read the last post, you saw solution number one to Hoosband's peanut-butter-pie deprivation issues: Individual Peanut-Butter S'mores Pies.

Today I present variation number two: Individual Peanut Butter and Jelly Pies.

Not exactly a novel concept, but easy and delicious all the same.


I have to admit, growing up I was never a fan of the peanut-butter-and-jelly combo. Peanut-butter-and-honey sandwiches were the pride of my lunchbox--no jelly allowed.

But somehow, over the years, as I've sampled variations on the PB and J (especially variations that include chocolate) I've grown to find the combo not only appealing but down right addictive.


This recipe layers strawberry jelly, simple peanut-butter-custard filling, and easy chocolate ganache in homemade graham-cracker crusts to create perfectly portioned pies that effortlessly elevate a childhood favorite to something truly party worthy.


Individual Peanut Butter and Jelly Pies
2 cups graham cracker crumbs (preferably homemade)
2 T dark brown sugar or coconut palm sugar
3 T melted butter
1/3 cup strawberry jelly
1 (14 oz) can sweetened condensed milk
1/3 cup peanut butter (I used Jiff Natural)
2 egg yolks (the whites can be frozen and thawed for later use if desired)
1/2 cup heavy whipping cream
1/2 cup dark chocolate chips (I used Guittard Extra Dark)


Preheat the oven to 350 degrees Fahrenheit and line a 12-cup, standard-sized muffin pan with muffin liners.

Use a fork to thoroughly combine the crust ingredients. Divide the mixture evenly among the prepared cups, and use your fingers to press the mixture firmly into the bottoms and up the sides of the liners. Place a rounded teaspoon of jelly into the bottom of each prepared crust (use the bottom of the spoon to gently spread out the jelly blob if desired). Set aside.

In another bowl, whisk together the condensed milk, peanut butter, and egg yolks until very thoroughly combined. Divide the mixture evenly among the prepared crusts, and bake at 350 degrees Fahrenheit for 20 minutes. Remove from the oven and allow to cool completely.

While the pies are cooling, place the heavy whipping cream in a two-cup, microwave-safe bowl or Pyrex measuring cup. Microwave on high for one minute. Add the chocolate chips and stir until completely smooth--this will take a few minutes. Divide the chocolate mixture evenly among the pies and allow to cool completely at room temperature before placing in airtight containers to store in the fridge. The pies will keep, stored this way, for up to one week.


Makes 12 Individual Peanut Butter and Jelly Pies.


Thanks for reading! Here's to Being the Secret Ingredient in your life.

Friday, April 11, 2014

Individual Peanut-Butter S'mores Pies


I can't remember what we were watching, but Hoosband and I saw some reference to peanut-butter pie on TV a couple weeks ago, and he got that dreamy look in his eye. There might have also been an audible tummy response and a rogue drop of drool making a run for his chin.

"Oh man, I used to make peanut-butter pie all the time," I reminisced. 

He looked at me as if he'd learned I'd been skimming half his income into a private account in the Caymans. "And you've been keeping this from me?" the betrayed inquired.

My penance was clear. 

A bag of homemade graham crackers leftover from creating a fresh chevre cheesecake for a Mother Earth News post sat on my counter, so the timing was perfect for pie.


Now a custard-y peanut-butter filling in a crumbly homemade graham cracker crust is a fine thing on its own, but I wanted to have a little fun with it. I settled on two variations, and since I'm only really fond of one of my pie pans, I decided to make a bunch of mini-pies instead of two large ones. Portion control is an added bonus.


I knew right away I wanted to do a Peanut-Butter S'mores Pie, but I didn't have time to make homemade marshmallows, and I really didn't want to go to the store to get the Jet-Puffed variety.

Then I realized I had a perfectly marshmallow-y substance right at my disposal in the two egg whites I'd be reserving from the filling. Since crunchy-on-the-outside, marshmallow-y-on-the-inside meringues are an all-time Hoosband favorite on their own, I figured it was a fair swap out.

What do you think?


Individual Peanut-Butter S'mores Pies

~for the crust~
2 cups homemade-graham-cracker crumbs
2 T dark brown sugar or coconut palm sugar
3 T melted butter

~for the filling~
1 (14 oz) can sweetened condensed milk
1/3 cup peanut butter (I use Jiff Natural)
2 egg yolks
3/4 cup chocolate chips (I used Guittard Extra Dark)

~for the meringue~
2 egg whites
1/8 tsp cream of tartar
3/4 cup sugar (I used Wholesome Sweeteners Organic)
1 tsp pure vanilla extract

Preheat the oven to 350 degrees Fahrenheit and line a 12-cup, standard-sized muffin pan with muffin liners.

Use a fork to thoroughly combine the crust ingredients. Divide the mixture evenly among the prepared cups, and use your fingers to press the mixture firmly into the bottoms and up the sides of the liners. Set aside.

In another bowl, whisk together the condensed milk, peanut butter, and egg yolks until very thoroughly combined. Divide the mixture evenly among the prepared crusts, and bake at 350 degrees Fahrenheit for 20 minutes. Remove the pan from the oven and wait about two minutes for the filling to settle before evenly distributing the chocolate chips among the pies. Set aside.

Place the egg whites and cream of tartar in the bowl of an electric stand mixer and beat on medium speed until foamy, voluminous, and just able to hold very soft peaks when the beater is lifted out of the mixer. With the mixer on, beat in the vanilla and one tablespoon of sugar at a time until the mixture is extremely white and glossy and able to hold stiff peaks.

Transfer the mixture to a large piping bag, and pipe the meringue in a climbing spiral over the top of each pie so that no chocolate or filling is showing.

Reduce the oven temperature to 300 degrees Fahrenheit and bake 20 minutes more.

Remove pies from the oven and allow to cool completely before very carefully lifting them out of the pan--a fork may be helpful in this process to avoid cracking the meringue.


Store the pies in an airtight container at room temperature for up to 5 days, and stay tuned for variation number two, coming soon!


Thanks for reading! Here's to Being the Secret Ingredient in your life.

Wednesday, February 19, 2014

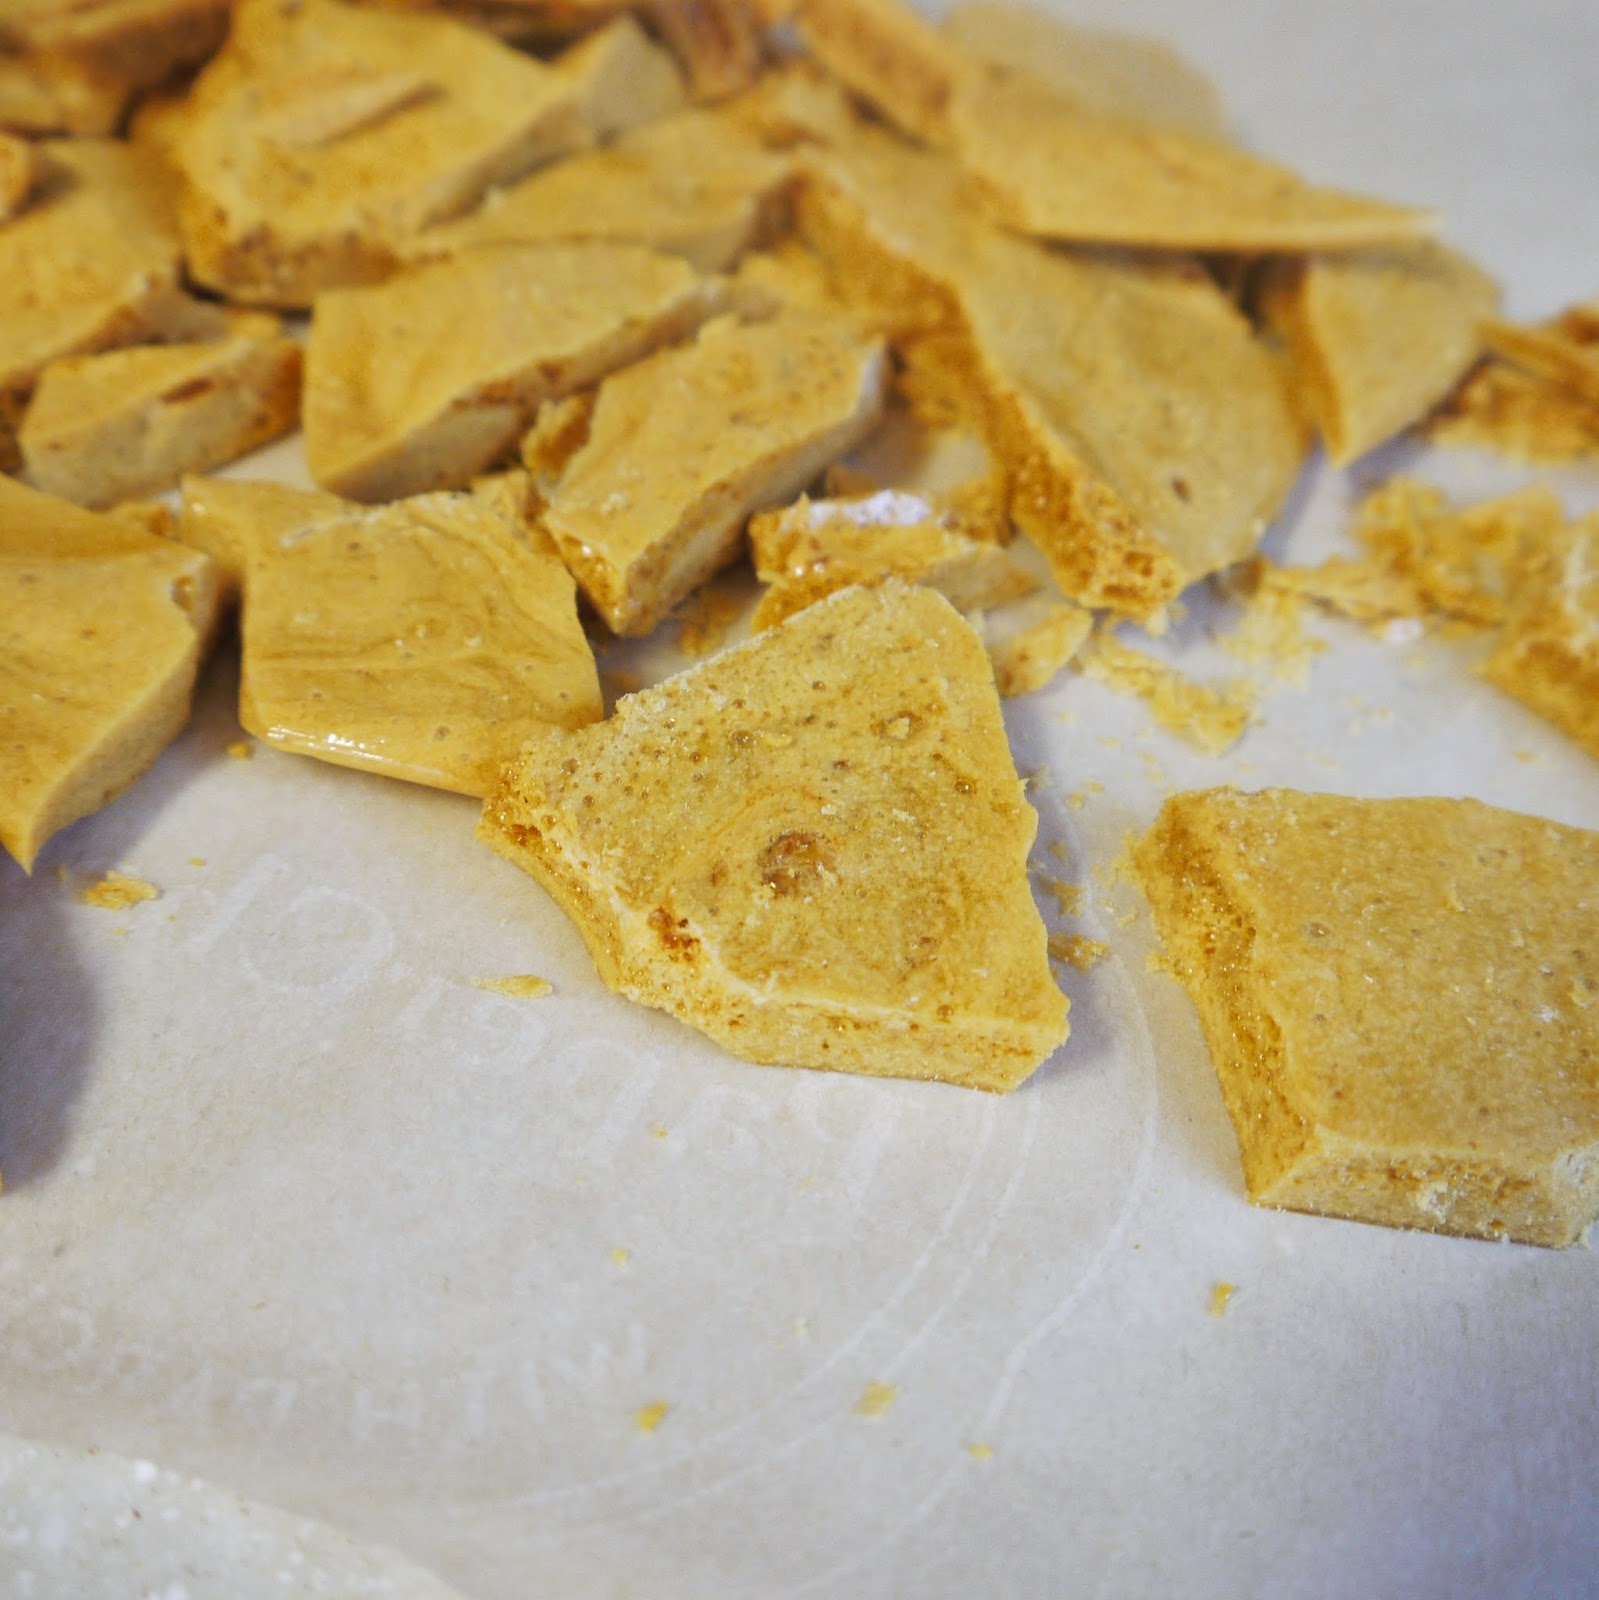
Honeycomb Candy (aka Seafoam, aka Fairy Food)


I first tasted the ethereal confection called honeycomb candy at the South Bend Chocolate Company Cafe in South Bend, Indiana, where the treat was dubbed "Seafoam."

I made that first purchase because I wondered what could possibly be lurking beneath that layer of dark, glossy chocolate to elicit such a mysterious name.

What I sank my teeth into that day was like nothing I had tried before. With the color of honey, the taste of a deeply toasted marshmallow, the crunch of hard toffee, and the airiness of . . .well . . . sea foam, could this be everything I'd ever wanted in a candy?

Most of my subsequent trips to the chocolate cafe were driven almost exclusively by my desire for more of that light, crunchy, caramelized goodness cloaked in chocolate.

Here in Texas, at least at my local grocery store where it's sold in the bulk bins, this candy is called honeycomb. The name is more of a visual description than anything else, as the recipe does not traditionally contain honey.


My recipe is heavily adapted from Nina Wanat's wonderfully instructional book, Sweet Confections, Beautiful Candy to Make at Home (2011, Lark Crafts, page 52). The main difference is that my recipe contains half the baking soda and adds a small amount of apple cider vinegar, which I feel yields a slightly more even airiness. Instructions here are in my own words.


Honeycomb Candy
1 cup granulated sugar
1/4 cup light corn syrup
1/4 cup water
1/4 tsp apple cider vinegar
1 tsp baking soda, sifted through a fine sieve to remove any clumps
8 oz dark chocolate, finely chopped (I used a combination of Chocolove Strong Dark 70% and Green and Black's Organic Maya Gold 60%, which added a tantalizing hint of orange and spices to the mix. Do not use chocolate chips as they contain stabilizers and will result in a clumpy coating.)

Line a cake pan or rimmed baking sheet with parchment paper. The size of the pan is not critical, but a smaller pan will produce thicker (taller) honeycomb.


Place the sugar, corn syrup, water, and apple cider vinegar in a very large saucepan over med-high heat and do not stir. Run a wet pastry brush along the edges to dissolve any sugar crystals.

Allow the mixture to boil just until it turns golden.


At this point, put on oven mitts if desired, remove the saucepan from the heat, quickly stir in the baking soda using a heatproof spatula (the mixture will bubble up immensely), and immediately pour the mixture into the prepared cake pan. Do not spread it out, and try not to agitate it as it cools, as you want to maintain all those airy "sea foam" bubbles.


Let cool completely before using a large serrated knife to cut into irregular pieces.


Little fragments make great nibbles and can also be stored for another use in an airtight container for 3-5 days.

To melt the chocolate, place two thirds of the chocolate in a stainless steel bowl set over barely simmering water, and stir gently until totally melted. Carefully remove the bowl from the simmering water (you might want to wear oven mitts when you do this, as the steam can be rather intense . . . yes, I burned myself), and add the reserved chocolate to the melted chocolate, stirring gently until completely smooth.

Note: For once I actually tempered my chocolate, using a candy thermometer to check for precise temperatures and all, but as you can tell from the gray-ish streaks in the photos, that dark, flawless sheen of perfectly tempered chocolate evaded me. If the gray-ish streaks attack your confections as well, never fear: the flavor of the chocolate will not be affected. 

Place a fresh sheet of parchment paper on the counter and drop a piece of honeycomb into the chocolate. Use a fork to gently turn the honeycomb over in the chocolate to coat it. Scoop the honeycomb out with the fork and shake the fork back and forth very gently with slight movements of your wrist so that the excess chocolate drizzles back down into the bowl.


Carefully slide the coated honeycomb off the tines of the fork and onto the parchment to set.


Repeat with remaining pieces of honeycomb, gently reheating and stirring the chocolate until smooth as needed. Allow the coated candies to set completely at room temperature (ideally in a 60-to-70-degree Fahrenheit room) before transferring to an airtight container to store at room temperature for up to a week . . . as if they'll last that long.


Thanks for reading! Here's to Being the Secret Ingredient in your life.

Tuesday, February 18, 2014

Cherry-Chocolate Chewies


My love for meringues has been well documented:

Meringue Ghosts
Raspberry Pavlovas
Strawberry Colada Pavlovas
Peppermint Bark Meringues

But why not add one more variation to the list?

With a higher moisture-content, thanks to the bounty of tart, dried cherries running throughout, these two-bite treats have a purely chewy, marshmallow-y texture, without the exterior crunch of my usual meringues.

Even better the day after baking, these little chewies will last up to a week, stored in an airtight container at room temperature.


Cherry-Chocolate Chewies
3/4 cup granulated sugar
1/2 cup dried tart cherries
2 large egg whites
1/8 tsp cream of tartar
1 tsp pure vanilla extract
1/4 cup finely chopped dark chocolate (I used Chocolove Strong Dark 70%)

Line two baking sheets with parchment paper and preheat the oven to 300 degrees Fahrenheit.


Place the sugar and the dried cherries in the bowl of a food processor and pulse for 20-second intervals until the sugar is evenly freckled with flecks of cherries.


Set aside.

Place the egg whites and cream of tartar in the bowl of an electric stand mixer and beat until the egg whites are thick, foamy, and just able to hold a very soft peak.


With the mixer on low, add the sugar mixture one tablespoon at a time. Slowly add the vanilla and the chopped chocolate.


Transfer the mixture to a piping bag, and pipe out small "kisses" onto the prepared baking sheets. The kisses can be fairly close together, as the mixture should not spread much while baking.


Bake one sheet at a time at 300 degrees F. for 20 minutes, giving the sheet a 180-degree rotation halfway through. Allow cookies to cool for at least 5 minutes before using a spatula to transfer to a cooling rack to cool completely.

Store in a zip-top bag or other airtight container at room temperature for up to one week.

Makes about 30 little chewies.


Thanks for reading! Here's to Being the Secret Ingredient in your life.

Sunday, September 1, 2013

Chocolate, Pistachio, and Mascarpone Tartlets


The inspiration for this recipe was threefold:

1) We haven't been eating a lot of dessert lately, and Hoosband asked if we could try making some small tarts-- nothing too out-of-control on the healthometer, but something that would still seem like an indulgence.

2) On a recent trip to Central Market (a fabulous, Whole-Foods-esque, Texas chain), I picked up a Chocolate Almond Butter Hail Merry Miracle Tart (a heavenly, raw, vegan, and gluten-free tartlet) that was too good not to borrow from.

3) I had some raw pistachios on hand and a little mascarpone leftover from my Goat-Cheese-Stuffed Cherries that were just begging to be turned into something scrumptious.

Like the incredible Hail Merry tarts, my creation is miraculously gluten free. It is also is raw in the sense that no baking is required.* With the addition of the mascarpone, however, I clearly departed from the truly raw (as in none of the components have ever been exposed to high heat) and vegan aspects.

While I typically prefer to use natural cocoa, I used dutch-process cocoa (which has been treated with alkali) in the crust here to achieve a deeper chocolate color and slightly less-acidic flavor.

Pistachios can be a pain to shell, and raw, unsalted, shelled pistachios can be hard to find. Mine were labeled "raw pistachio meats" and found in the bulk section.

As for the sweeteners, I have just begun to experiment with coconut palm sugar, and I love it. With a production method somewhat similar to that of maple syrup, coconut palm sugar is minimally processed and has a rich, caramel color, scent, and flavor. Not surprisingly, it can be pretty pricey, so I always look for it on sale. Substitute with brown sugar if desired.

In the filling I turn to honey, which, enlivened with a sprinkle of cinnamon, is a perfect pairing for pistachios, reminiscent of baklava and a myriad of Mediterranean confections.

Don't go overboard with the cinnamon, but definitely don't leave it out. You don't want the tarts to taste like Christmas, you just want to compliment the other flavors.

Because of the pistachios, the filling will be green. If left ungarnished, the surface of the filling will darken and become glossy, which can look a little unappetizing--so don't skip that garnish!


Chocolate, Pistachio, and Mascarpone Tartlets
for the crust:
1/3 cup raw, shelled pistachios
1/3 cup dutch-process cocoa
3 T coconut palm sugar
2 T coconut oil at warm room temperature (liquid but not hot)
dash ground cinnamon

for the filling:
1/2 cup raw, shelled pistachios
2 oz mascarpone cheese
2 T honey

for the garnish:
1/4 cup raw, shelled pistachios, finely chopped
2 T finely chopped dark chocolate

*Note: If you plan to keep the tartlets out of refrigeration for more than 10 minutes before/during serving, or if you plan on serving them in a very hot environment (such as outdoors in the summer), you may want to bake the crusts prior to filling them. If desired, bake the crusts at 350 degrees F for 6 minutes and allow them to cool completely before filling. Baked crusts may be stored in their liners in an airtight container at room temperature for up to two days before being filled. Filled tartlets should be refrigerated until ready to serve.

Place muffin liners in each of six large muffin cups. I use regular-sized muffin liners in large cups--the larger cups just allow the liners to lay out a little wider. If you do not have a large-cup muffin pan, just use six cups in a standard-size muffin pan.


Place the crust ingredients in a food processor and process until the mixture resembles wet, black, sand.


Deposit a tablespoon of the mixture into each prepared muffin cup.


Use clean fingers to firmly press the mixture evenly across the bottom and about 1/2 inch up the sides of each muffin liner, creating little tart shells.


Chill (or bake--see above note) the shells in the muffin tin while you prepare the filling.

Rinse and dry the food processor bowl, and add the filling ingredients.


Process until the mixture is very smooth, almost like a dense mousse, pausing to scrape down the bowl every 45 seconds or so. It will take a few minutes to get to the right consistency, so keep at it and taste as you go. Evenly divide the mixture between the six prepared crusts, using a piping bag if desired.


Cover the tops completely with the chopped pistachios and chocolate.


For the best flavor, let the tarts rest in the fridge for at least 6 hours. The flavors will intensify even more overnight.

Store tartlets in airtight containers in the fridge until ready to serve (up to five days).

Makes six tartlets.


Thanks for reading! Here's to Being the Secret Ingredient in your life.