Showing posts with label honey. Show all posts

Monday, September 16, 2013

Macadamia-Coconut-Lime Tartlets


It's official: I have tartlet fever.

If you read my recent Chocolate, Pistachio, and Mascarpone Tartlets post, you saw my attempt at a semi-healthy dessert, perfectly portioned for those who crave moderation, and rich and delicious for those who crave decadence. 

In addition to moderation and decadence, Hoosband and I have been craving desserts we actually feel good about sharing with our two-year-old. These particular tartlets are made from nuts, coconut, coconut oil, lime juice, and a modest combo of unrefined sweeteners. I feel pretty good about that. 

Their coconut-lime flavor profile is inspired by a frozen drink Hoosband and I had years ago on our honeymoon in Mexico called a white sand--something else I've been craving. 

Macadamia nuts pair well with the flavors of coconut and lime, while adding creaminess and body to the filling and structure and crunch to the crust. 

Like the chocolate-pistachio tartlets, today's tartlets are no-bake and grain/gluten free. With the subtraction of the mascarpone, however, these tartlets are also dairy-free, though still not technically raw or vegan, due to the coconut palm sugar in the crust and the honey in the filling, respectively.

It is important to use virgin coconut oil in this recipe, as refined coconut oil lacks the essential coconut flavor and aroma. 

Due to their high coconut-oil content, these tartlets require at least 8 hours in the fridge to set up and should be stored in the fridge right up until consumption for best results. When the filling is set, the texture should be like a cross between lime curd and custard, similar to a key lime pie, and firm enough to slice if desired.

The tartlets can also be frozen overnight, resulting in a much firmer, more ice-cream-like texture.


Macadamia-Coconut-Lime Tartlets

for the crust
2/3 cups grated coconut (raw and unsweetened)
3 T coconut palm sugar (substitute with brown sugar if desired)
1/4 tsp fine salt
2/3 cups raw macadamia nuts
2 T virgin coconut oil

for the filling
2/3 cup raw macadamia nuts
1/4 cup freshly squeezed lime juice
1/4 tsp freshly grated lime zest (try to avoid using any of the white pith)
3 T honey (I used Texas brush honey)
1/4 cup virgin coconut oil

Place muffin liners in each of six large muffin cups. I use regular-sized muffin liners in large cups--the larger cups just allow the liners to lay out a little wider. If you do not have a large-cup muffin pan, just use six cups in a standard-size muffin pan.

Place 1/3 cup grated coconut, the coconut palm sugar, and salt in the bowl of a food processor, and process till very finely ground. Add 2/3 cup macadamia nuts, the coconut oil, and remaining grated coconut, and process just until the nuts are ground to very small pieces and the mixture looks like very coarse, damp sand. 


Be sure not to over-process the mixture, as it will become nut butter and be too goopy to work with. If this does happen accidentally, add a an extra 3-4 tablespoons of grated coconut and pulse just enough to combine. The coconut will absorb some of the excess liquid and add more structure.

Divide the mixture evenly among the six prepared cups (1 1/2-2 T per cup). 


Use your fingers to press the mixture firmly into the bottom and about 1/2 inch up the sides of each cup.


Chill while you prepare the filling. 

Rinse and dry the food processor bowl, blade, and lid. Place 2/3 cup macadamia nuts in the processor and process until very smooth, the consistency of freshly ground peanut butter. 
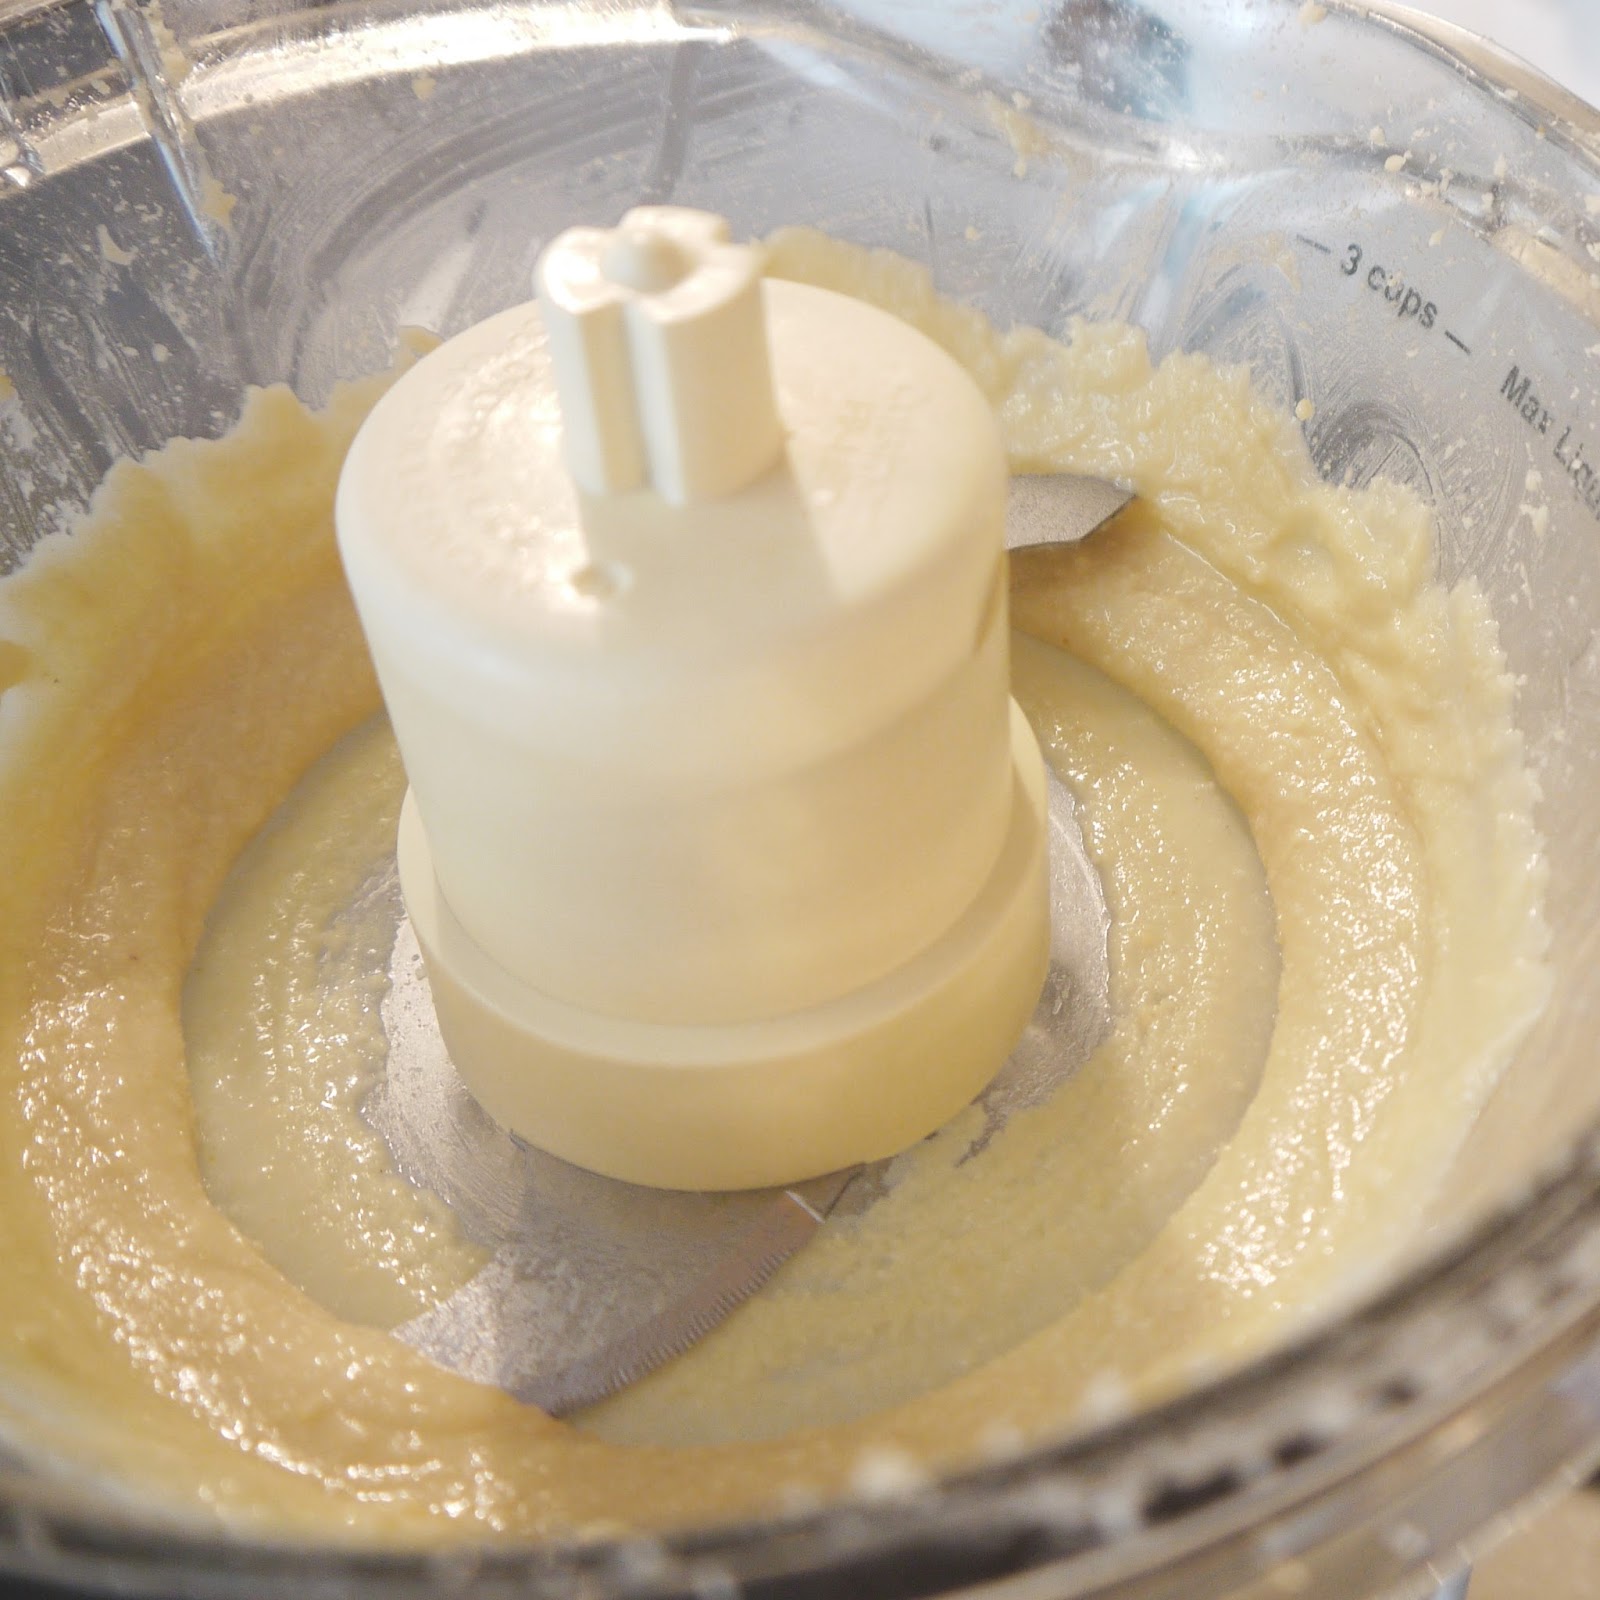

Add the remaining filling ingredients and process until completely smooth. 


Pour the filling into the tart shells, dividing it evenly among the six cups. 


Place the muffin tin in the refrigerator and chill for at least 8 hours or till set. 

Store the set tartlets in airtight containers in the fridge until ready to serve, up to one week. 


If desired, garnish with some finely chopped macadamia nuts and fresh lime zest, or try a dollop of Whipped Coconut Cream.


Makes 6 tartlets.

Thanks for reading! Here's to Being the Secret Ingredient in your life.

Sunday, September 1, 2013

Chocolate, Pistachio, and Mascarpone Tartlets


The inspiration for this recipe was threefold:

1) We haven't been eating a lot of dessert lately, and Hoosband asked if we could try making some small tarts-- nothing too out-of-control on the healthometer, but something that would still seem like an indulgence.

2) On a recent trip to Central Market (a fabulous, Whole-Foods-esque, Texas chain), I picked up a Chocolate Almond Butter Hail Merry Miracle Tart (a heavenly, raw, vegan, and gluten-free tartlet) that was too good not to borrow from.

3) I had some raw pistachios on hand and a little mascarpone leftover from my Goat-Cheese-Stuffed Cherries that were just begging to be turned into something scrumptious.

Like the incredible Hail Merry tarts, my creation is miraculously gluten free. It is also is raw in the sense that no baking is required.* With the addition of the mascarpone, however, I clearly departed from the truly raw (as in none of the components have ever been exposed to high heat) and vegan aspects.

While I typically prefer to use natural cocoa, I used dutch-process cocoa (which has been treated with alkali) in the crust here to achieve a deeper chocolate color and slightly less-acidic flavor.

Pistachios can be a pain to shell, and raw, unsalted, shelled pistachios can be hard to find. Mine were labeled "raw pistachio meats" and found in the bulk section.

As for the sweeteners, I have just begun to experiment with coconut palm sugar, and I love it. With a production method somewhat similar to that of maple syrup, coconut palm sugar is minimally processed and has a rich, caramel color, scent, and flavor. Not surprisingly, it can be pretty pricey, so I always look for it on sale. Substitute with brown sugar if desired.

In the filling I turn to honey, which, enlivened with a sprinkle of cinnamon, is a perfect pairing for pistachios, reminiscent of baklava and a myriad of Mediterranean confections.

Don't go overboard with the cinnamon, but definitely don't leave it out. You don't want the tarts to taste like Christmas, you just want to compliment the other flavors.

Because of the pistachios, the filling will be green. If left ungarnished, the surface of the filling will darken and become glossy, which can look a little unappetizing--so don't skip that garnish!


Chocolate, Pistachio, and Mascarpone Tartlets
for the crust:
1/3 cup raw, shelled pistachios
1/3 cup dutch-process cocoa
3 T coconut palm sugar
2 T coconut oil at warm room temperature (liquid but not hot)
dash ground cinnamon

for the filling:
1/2 cup raw, shelled pistachios
2 oz mascarpone cheese
2 T honey

for the garnish:
1/4 cup raw, shelled pistachios, finely chopped
2 T finely chopped dark chocolate

*Note: If you plan to keep the tartlets out of refrigeration for more than 10 minutes before/during serving, or if you plan on serving them in a very hot environment (such as outdoors in the summer), you may want to bake the crusts prior to filling them. If desired, bake the crusts at 350 degrees F for 6 minutes and allow them to cool completely before filling. Baked crusts may be stored in their liners in an airtight container at room temperature for up to two days before being filled. Filled tartlets should be refrigerated until ready to serve.

Place muffin liners in each of six large muffin cups. I use regular-sized muffin liners in large cups--the larger cups just allow the liners to lay out a little wider. If you do not have a large-cup muffin pan, just use six cups in a standard-size muffin pan.


Place the crust ingredients in a food processor and process until the mixture resembles wet, black, sand.


Deposit a tablespoon of the mixture into each prepared muffin cup.


Use clean fingers to firmly press the mixture evenly across the bottom and about 1/2 inch up the sides of each muffin liner, creating little tart shells.


Chill (or bake--see above note) the shells in the muffin tin while you prepare the filling.

Rinse and dry the food processor bowl, and add the filling ingredients.


Process until the mixture is very smooth, almost like a dense mousse, pausing to scrape down the bowl every 45 seconds or so. It will take a few minutes to get to the right consistency, so keep at it and taste as you go. Evenly divide the mixture between the six prepared crusts, using a piping bag if desired.


Cover the tops completely with the chopped pistachios and chocolate.


For the best flavor, let the tarts rest in the fridge for at least 6 hours. The flavors will intensify even more overnight.

Store tartlets in airtight containers in the fridge until ready to serve (up to five days).

Makes six tartlets.


Thanks for reading! Here's to Being the Secret Ingredient in your life.

Tuesday, November 27, 2012

Honey-Walnut Pie and Homemade Butter Crust


The Setting: Blue and gray are duking it out in the sky...looks like gray is winning.

The Soundtrack: The dishwasher. Oh, how I love that thing! Seriously, sonnets are in order.

Steaming up the Oven: Nothing. So far, it's been a peanut butter and Kashi kind of day.

The Scenario: An alternative to the sweet Southern staple that's become a holiday hit.

Growing up, I never liked nuts until I tried pecan pie. The first bite of that gooey, ultra-sweet filling transformed the nut from just another thing I'd been avoiding (like veggies or the obligatory glass of milk with dinner) to something I actually wanted to eat (like ice cream, or, well, pie).

Last year I all but burnt myself out on pecan pie attempting to perfect my recipe. So this year I decided to do something slightly different but equally festive for the holidays.

Honey and walnuts are a classic combination. Here, they are complimented by butter for richness, brown sugar for depth, and a combo of cinnamon and cardamom for subtle complexity.

The flavor will vary marginally depending on the type of honey used. Honeys are a lot like wines in that they can be blends or varietals. Tupelo, orange blossom, clover, and other varietals are made from nectar gathered from their namesake blossoms, while "local honey" and your standard supermarket squeeze-bear are generally blends. I have no idea what combination of plants the bees of Northern Indiana and Southern Michigan prefer to pollinate, but that's what went into my pie. Whatever honey you choose will bring its own nuances to the recipe--select accordingly.

When fully cooked, the top of this pie will puff and crack slightly, almost reminiscent of the top of a cake. But don't be fooled: underneath the puffy, nutty exterior lies a gooey, honeyed caramel that is nothing but pie.


Honey Walnut Pie
This is one of those recipes that makes you get why people say "easy as pie." Simply whisk up the filling, pour it over the walnuts in the unbaked crust, and bake!

1 unbaked pie crust (recipe follows), fitted into a greased pie pan, placed on a baking sheet
2 cups walnut halves
3 large eggs
1 ¼ cups brown sugar
1/3 cup honey
4 T melted butter
¼ tsp fine salt
1 tsp pure vanilla extract
¼ cup flour
¼ tsp cinnamon
Dash cardamom

Preheat the oven to 350 degrees Fahrenheit, and make sure a rack is positioned in the center of the oven.

Prick the bottom of the pie crust all over with a fork.


Spread the walnuts out evenly in the unbaked pie crust.


In a medium-sized bowl, whisk together the remaining ingredients.


Pour this mixture over the walnuts.


Cover the pie with aluminum foil, and bake for 35 minutes.  Carefully remove the foil, rotate the pan in the oven, and bake an additional 32-35 minutes.  Don’t worry if the pie cracks slightly--this is normal and can actually be a good indication that the pie has cooked enough to set.

Allow the pie to cool at least 20 minutes to set before cutting.

The pie will keep, covered with aluminum foil, at room temperature for up to 5 days, but it is best eaten within 1-2 days.


All-Butter Crust
Shortening is often used either in place of or in combination with butter to produce flaky pie crusts, but I prefer an all-butter approach. Butter is more flavorful and is naturally free of trans fats. My favorite butter to bake with is Kerrygold, but more often than not, I use the cheap, store-brand stuff. For the liquid component, I have used everything from water to cream to coconut milk, and even spiced rum. Whatever liquid you choose, be sure that it is cold, and use only as much as it takes for your dough to come together. The instructions below are for the food-processor method, but this dough can also be made by hand. Use a fork or a pastry cutter to cut very cold (but not frozen, which is too hard to cut in effectively by hand) butter into the dry ingredients until the largest clumps are the size of a pea and the rest of the mixture looks like grated Parmesan cheese. Add the liquid about 1 T at a time, using either a fork or a wooden spoon to incorporate just enough of the liquid so that if you press a clump of the mixture together, it will form a soft dough.

3/4 cup (12 T, or 1 1/2 regular sticks) cold, unsalted butter
1 2/3 cups all-purpose flour (or whole wheat pastry flour), plus a little extra for sprinkling
2 T sugar
½ tsp fine salt
3-6 T ice water or very cold milk or cream (substitute some of the liquid with vodka if desired*)

Use a knife to cut the butter into cm-sized cubes. Freeze the butter cubes for at least 15 minutes.

Pulse the flour, sugar, and salt together in a food processor several times to mix.

Add the butter to the processor and pulse several times until the mixture has a sandy appearance and the largest clumps are about the size of a pea. The mixture will resemble Parmesan cheese.


Remove the liquid-shoot insert from the processor. Turn the processor on and pour about 1 T of the liquid through the shoot at a time, just until the mixture starts to come together in a mass. Use only as much liquid as necessary and avoid over-mixing.


Turn the dough out onto a large piece of parchment paper and press into a large, flat disk.


Wrap gently in the parchment, and place in the fridge until ready to use (or up to 48 hours).  Allow the dough to sit at room temperature for 15-20 minutes before rolling if it has been in the fridge for more than an hour. This will make it easier to roll out.

When ready to use, unwrap the disk, lightly sprinkle it all over with flour, and place another sheet of parchment on top so that the dough is sandwiched between the two sheets. Use a rolling pin to roll the dough out to a thickness of ¼-1/8th inch.


Gently peel the dough off the parchment and transfer to a buttered pie pan, aiming to align the center of the dough with the center of the pan.


Gently lift the edges of the dough and ease it into the sides of the pan to avoid stretching the dough, which would cause it to shrink during baking. 


Trim the overhanging edges of the dough so that about 1 inch hangs over the edge of the pan all the way around.


Gently tuck or roll the overhanging dough under itself so that it sits up on the edge of the pan.


Use your fingers and thumb to crimp the edges if desired. 


Gently press parchment paper or plastic wrap onto the surface to cover and chill until ready to use. The unbaked crust can be stored like this in the fridge for 1-2 days.

Note 1: I used to make this dough using my food processor's dough blade, but I have found that the metal blade mixes the dough more quickly and more evenly.

Note 2: If desired, dough scraps can be re-rolled, cut out with festive mini-cutters, and placed atop the pie either before baking or before the second phase of baking (after the foil is removed).


Use a paring knife to add detail, such as veins on leaves.


*Aggressively mixing water and flour helps to develop the flour's gluten, which makes for strong, crusty French baguettes, but tough, chewy, gluey pie crusts. This is why it is best to use as little liquid as possible and to mix the dough as little as possible. Alcohol does not activate the gluten like water does, so it may be used in place of some of the liquid to achieve lighter, flakier results.

Thanks for reading! Here's to Being the Secret Ingredient in your life.