Showing posts with label oxo. Show all posts

Friday, August 23, 2013

Goat-Cheese-Stuffed Cherries


As I mentioned in the last post, I received a pretty stellar assortment of summer fruit tools as part of OXO's Blogger Outreach Program. Now I am not required to blog about all (or any) of the tools I receive, but when something makes my life easier and more fruitful (bad pun intended), I want to share.

Last time, I sang the praises of OXO's large fruit scoop, mango splitter, and pineapple slicer, but there was one more tool I simply had to get my hands on before we said adieu to summer: the cherry pitter.

I am a huge fan of fresh cherries, but eating them around my two-year-old can be a bit of a pain. She always wants what Mommy is eating, and giving her a big bowl of cherries with the pits intact is as good as scheduling myself a Heimlich-maneuver practice session. In the past I'd bite around the pit and hand her bits of the flesh as I'd go, or I'd forget about buying cherries in the first place.

Fortunately for me, the cherry pitter has changed all that. Now Oia and I can share a bowl of cherries, our fingers taking on deep shades of crimson, as we watch Dora the Explorer and prepare to take on the world.

This recipe is inspired by my love of the union of dark chocolate, cherries, and goat cheese, and by the easy-to-use OXO cherry pitter. I mean, after you put holes in a whole mess of cherries, it's only right to fill them with something yummy, don't you think?

This recipe can be made in whatever quantity desired, exact measurements not necessary.

The mascarpone adds creaminess, smooths out the texture of the filling, and slightly softens the flavor of the goat cheese. Though often compared to cream cheese, mascarpone tends to have a creamier mouthfeel, and a subtler (less tart) flavor, and a slight, inherent sweetness not found in commercial cream cheese. You could substitute cream cheese for the mascarpone if necessary, but you would probably want to add a little sugar to cut the tartness.


Goat-Cheese-Stuffed Cherries
Fresh, sweet cherries (such as Bing)
Equal parts fresh goat cheese (chevre) and mascarpone cheese, both at room temperature
Very dark chocolate (I used Endangered Species 88% cocoa), for finely chopping or grating

Wash the cherries and pat dry before pitting. Pit the cherries with the stem-sides up.


Beat together the cheeses until smooth and fluffy--the mixture will be somewhat firm but airier and very well combined.


Transfer the cheese mixture into a small piping bag, snip off a small opening at the end, and pipe a small amount of the mixture into the bottom of each cherry. The cherries will sit upside down (stem-side down), with the puffs of filling peeking out from the bottoms (now the tops).


Sprinkle the chocolate over the tops of the stuffed cherries and transfer to a platter to serve or to an airtight container to chill until ready to serve.


The stuffed cherries make an excellent sweet hors d'oeuvre for a cocktail party or a perfect tiny bite to serve with coffee at the end of a large meal. Minus the chocolate, they were also a pretty major hit with my two-year-old, who now can't stop asking for more stuffed cherries--yea! They'll keep well, stored in an airtight container in the fridge for up to 5 days.


Thanks for reading! Here's to Being the Secret Ingredient in your life.

Monday, August 12, 2013

Sparkling Summer Sangria


A couple of months ago, as part of OXO's Blogger Outreach Program, I received a rather impressive box of summer fruit tools.

I was so excited to dig into the box (and into some juicy summer fruits) and see what kind of goodies I could come up with for the blog, but as you may have read in my last post, things have had me a bit tied up this summer.

Plus, in the midst of settling into our new house here in Texas, enjoying the company of visiting family (Hoosband's and then mine), and shopping for a minivan (that's right, soccer-mom-in-training here, people), we managed to severely wreck the one car we already had.

We were going straight at a green light, and someone left-turned right into us. Hoosband, his mom, and I were a little banged up, but the little one was completely unharmed. The car was totaled, but I'd never felt so blessed.

Adventures aside, it's good to be back at the blog. Summer may be wrapping up--the back-to-school aisles are dominating the stores where swimsuits and sunscreen recently prevailed--but there's still plenty of time to send it off sweetly.

So with that in mind, I present you with Sparkling Summer Sangria: a celebration of perfect peaches, juicy mangoes, candy-sweet pineapple, and the ability to kick back--even for just a moment--with some cold sparkling wine and raise a toast to everything we love about summer.

This is a bit of a before-and-after recipe: it starts as a simple sangria with fresh fruit and wine. After the wine has been consumed, the drunken fruit is blitzed in the blender and frozen into Sangria Cubes that can be plopped into the bottom of champagne flutes and topped off with fresh bubbly whenever the mood strikes--even if summer is long gone.

OXO's Pineapple Slicer, Mango Splitter, and Large Fruit Scoop are the heroes of this recipe--I used to dread cutting mangoes and pineapples, but now I leave their skins and cores trembling in my dust!

I used Cava in the first part of the recipe because it is Spanish (like sangria) and tends to be cheap, but I switched to Andre Extra Dry in round two because it is even cheaper (and actually one of my favorites). I like dry (less sweet) sparkling wines best in this application, but you can use whatever you have on hand.


Sparkling Summer Sangria
1 pineapple
1 mango
1-2 peaches (I used a white peach, but yellow would be fine, too), rinsed and patted dry
1-2 bottles of dry, white sparkling wine, such as Cava, chilled

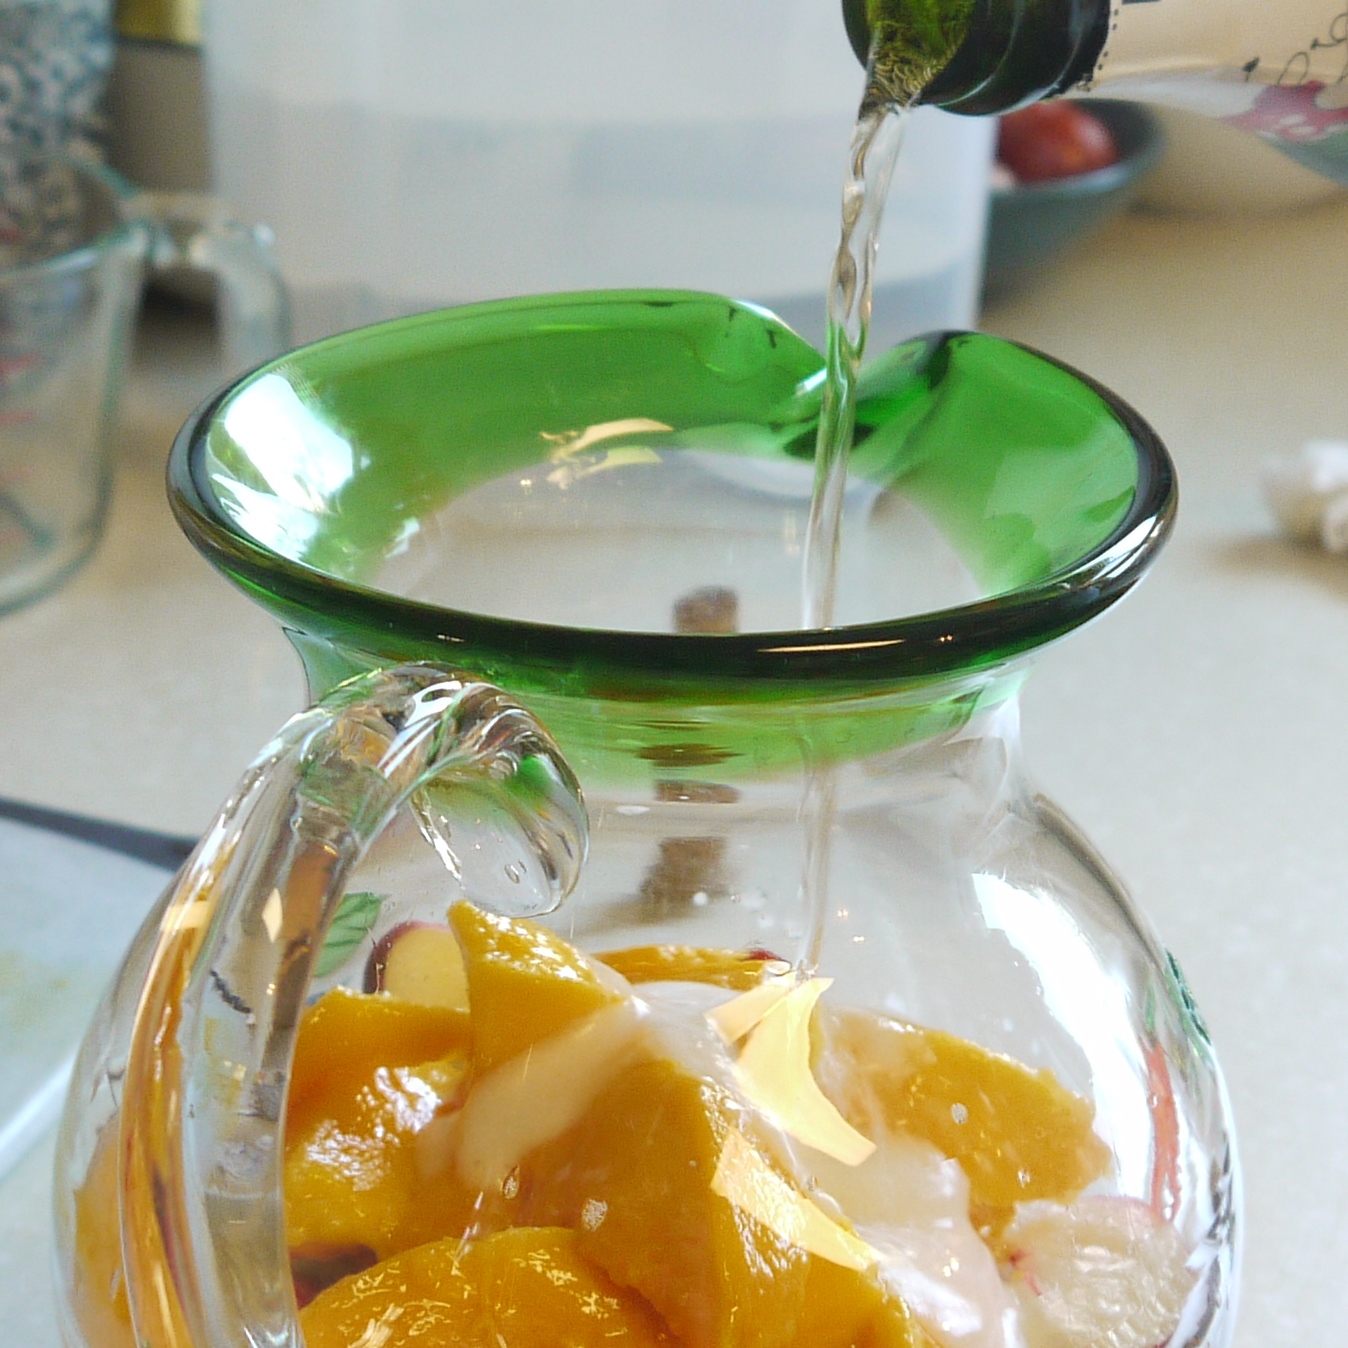
Cut the pineapple into rings, discarding the skin and core, and place the rings in the bottom of a large glass pitcher (or serving vessel of your choice).


Cut the mango into slices, discarding the skin and core, and place in pitcher on top of the pineapple.


Cut the peach(es) into slices, leaving the skin on but discarding the pit, and place on top of the mango--reserve a few extra-thin slices of peach for garnish, if desired.


Slowly pour the sparkling wine over the fruit, pausing to allow bubbles to subside as necessary.


Use a wooden spoon or plastic tamper from a blender to muddle the fruit if desired--this will distribute the flavors of the fruit into the drink more quickly but will greatly increase the amount of pulp in your poured beverage. The drink can be strained to remove pulp before serving if preferred. Garnish champagne flutes with reserved peach slices, if desired, and serve immediately.


Once the sangria has been consumed, transfer the drunken fruit to a blender and blend till completely smooth. Pour this mixture into ice-cube trays and freeze. 

Transfer the frozen sangria cubes to a large, freezer-safe zip-top bag and store in the freezer until ready to use. 


To serve, place two sangria cubes in each of the desired number of champagne flutes.


Pour chilled sparkling wine over the cubes, pausing to allow bubbles to subside and topping off as necessary.


Thanks for reading! Here's to Being the Secret Ingredient in your life.

Wednesday, March 6, 2013

Cider-Vinegar Soda Bread


The Setting: The day after a snow storm.... The roads are now clear, but my car is still buried. I think I'll be staying in today.

The Soundtrack: Boy Meets World (I'd say it was on for the wee one, but we all know I'm just indulging my inner twelve year old).

On the Stovetop: Cabbage and onion soup.

The Scenario: When snow storms roll in, the oven warms up.

Winter may be almost over, but here in the Midwest, it's still soup-and-soda-bread weather.

More than just a staple on St. Patrick's Day tables, soda bread is a hearty, make-anytime treat that can be mixed up, shaped, and pulled from the oven in little more than an hour--no rising or forethought necessary.

Traditionally, buttermilk (acidic) and baking soda (basic) are used to give this loaf its lift. This version uses acidic and flavorful unfiltered-cider vinegar instead of buttermilk to activate the baking soda, resulting in an especially tangy loaf with a pleasing complexity.

If you can't find (or don't want to use) a raw, organic, unfiltered-apple-cider vinegar (such as Bragg or Spectrum Naturals) add a pinch of yeast to regular cider vinegar (when you mix it with the milk) to approximate the taste.

I like to use a mixture of unbleached all-purpose flour and whole-wheat pastry flour to keep this loaf tender. If you don't have pastry flour, substitute 1/4 cup cornstarch for an equal amount of the flour. This will reduce the amount of gluten in the recipe and help prevent the bread from becoming too tough.

As with all quick-breads, it is also important to work the dough as little as possible after adding the liquids to keep gluten-development (and thus toughness) to a minimum.

Whether topped with butter and jam or dunked in stew, this bread is best served within a few hours of baking. Leftovers, however, make excellent toast.


Cider-Vinegar Soda Bread
1 3/4 cups milk (skim is fine)
1/4 cup unfiltered apple cider vinegar (or regular apple cider vinegar plus a pinch of yeast)
2 cups whole wheat pastry flour
2 cups all-purpose flour
1 1/2 tsp baking soda
1 1/2 tsp fine salt
2 tsp malted milk powder
2 T brown sugar
3 T cold, unsalted butter, chopped into pieces
1 T butter, melted

Preheat the oven to 400 degrees Fahrenheit. Line a baking sheet with parchment paper.

In a small bowl combine the milk and cider vinegar (plus yeast, if using). Set aside.


In a large bowl whisk together the flours, soda, salt, malted milk powder, and brown sugar until thoroughly mixed.


Use a pastry cutter (or fork) to cut the butter into the flour mixture, raking the chunks of butter through the dry ingredients until the mixture resembles fluffy, slightly damp sand.


By now the milk mixture should look like this:


Use a wooden spoon or rubber spatula to slowly incorporate the milk mixture into the flour mixture, striving to get the dry ingredients as evenly wet as possible, while working the dough as little as possible. Use your hands to finish incorporating the dry ingredients, adding an extra teaspoon or so of milk if needed.


Pat the dough into a round loaf and place it on the prepared baking sheet. Brush the top of the dough with the melted butter and use a paring knife to slice an X across the top of the loaf.


Bake at 400 degrees Fahrenheit for 40 minutes, rotating the pan halfway through for even cooking. Let cool at least 15 minutes before cutting.

Once completely cool, store tightly wrapped at room temperature. Eat or freeze within two days.

Thanks for reading! Here's to Being the Secret Ingredient in your life.