Showing posts with label sandwich cookies. Show all posts

Wednesday, December 12, 2012

Elf Cookies: An homage to E.L. Fudge


The Setting: A cozy apartment on a chilly winter's day.

The Soundtrack: A marathon of HGTV's Love it or List it. And Oia's lovely warbles.

Steaming up the Oven: Cheese toast.

The Scenario: The Great Food Blogger Cookie Swap and something sweet for Santa's little helpers....

If you follow this blog, you probably know by now I have a bit of an obsession with re-creating childhood treats.

I've never been much of a hard-cookie girl, always opting for Soft Batch over Chips Deluxe.

But if there were one crunchy supermarket cookie that could call me back to childhood as quickly as my treasured, squishy Oatmeal Creme Pie, it would be the firm and buttery Keebler sandwich cookie, shaped like an elf and filled with fudgy goodness--man, those things were good.

So when my recent attempt at Homemade Oreos came out better than I could have imagined, my very first thought was, "I wonder if I could tweak this recipe to make my own version of E.L. Fudge?!"

Aside from switching chocolate out of the cookies and into the filling, I had to get more flavor into the cookies themselves. To accomplish this, I brought a bit of buttermilk powder to the mix to accentuate the flavor of the butter and compliment the chocolate in the filling.

Since these cookies benefit from a richer buttery flavor, the neutral-flavored coconut oil was replaced with more butter, and a touch of malted milk powder was added to round out the flavor profile.

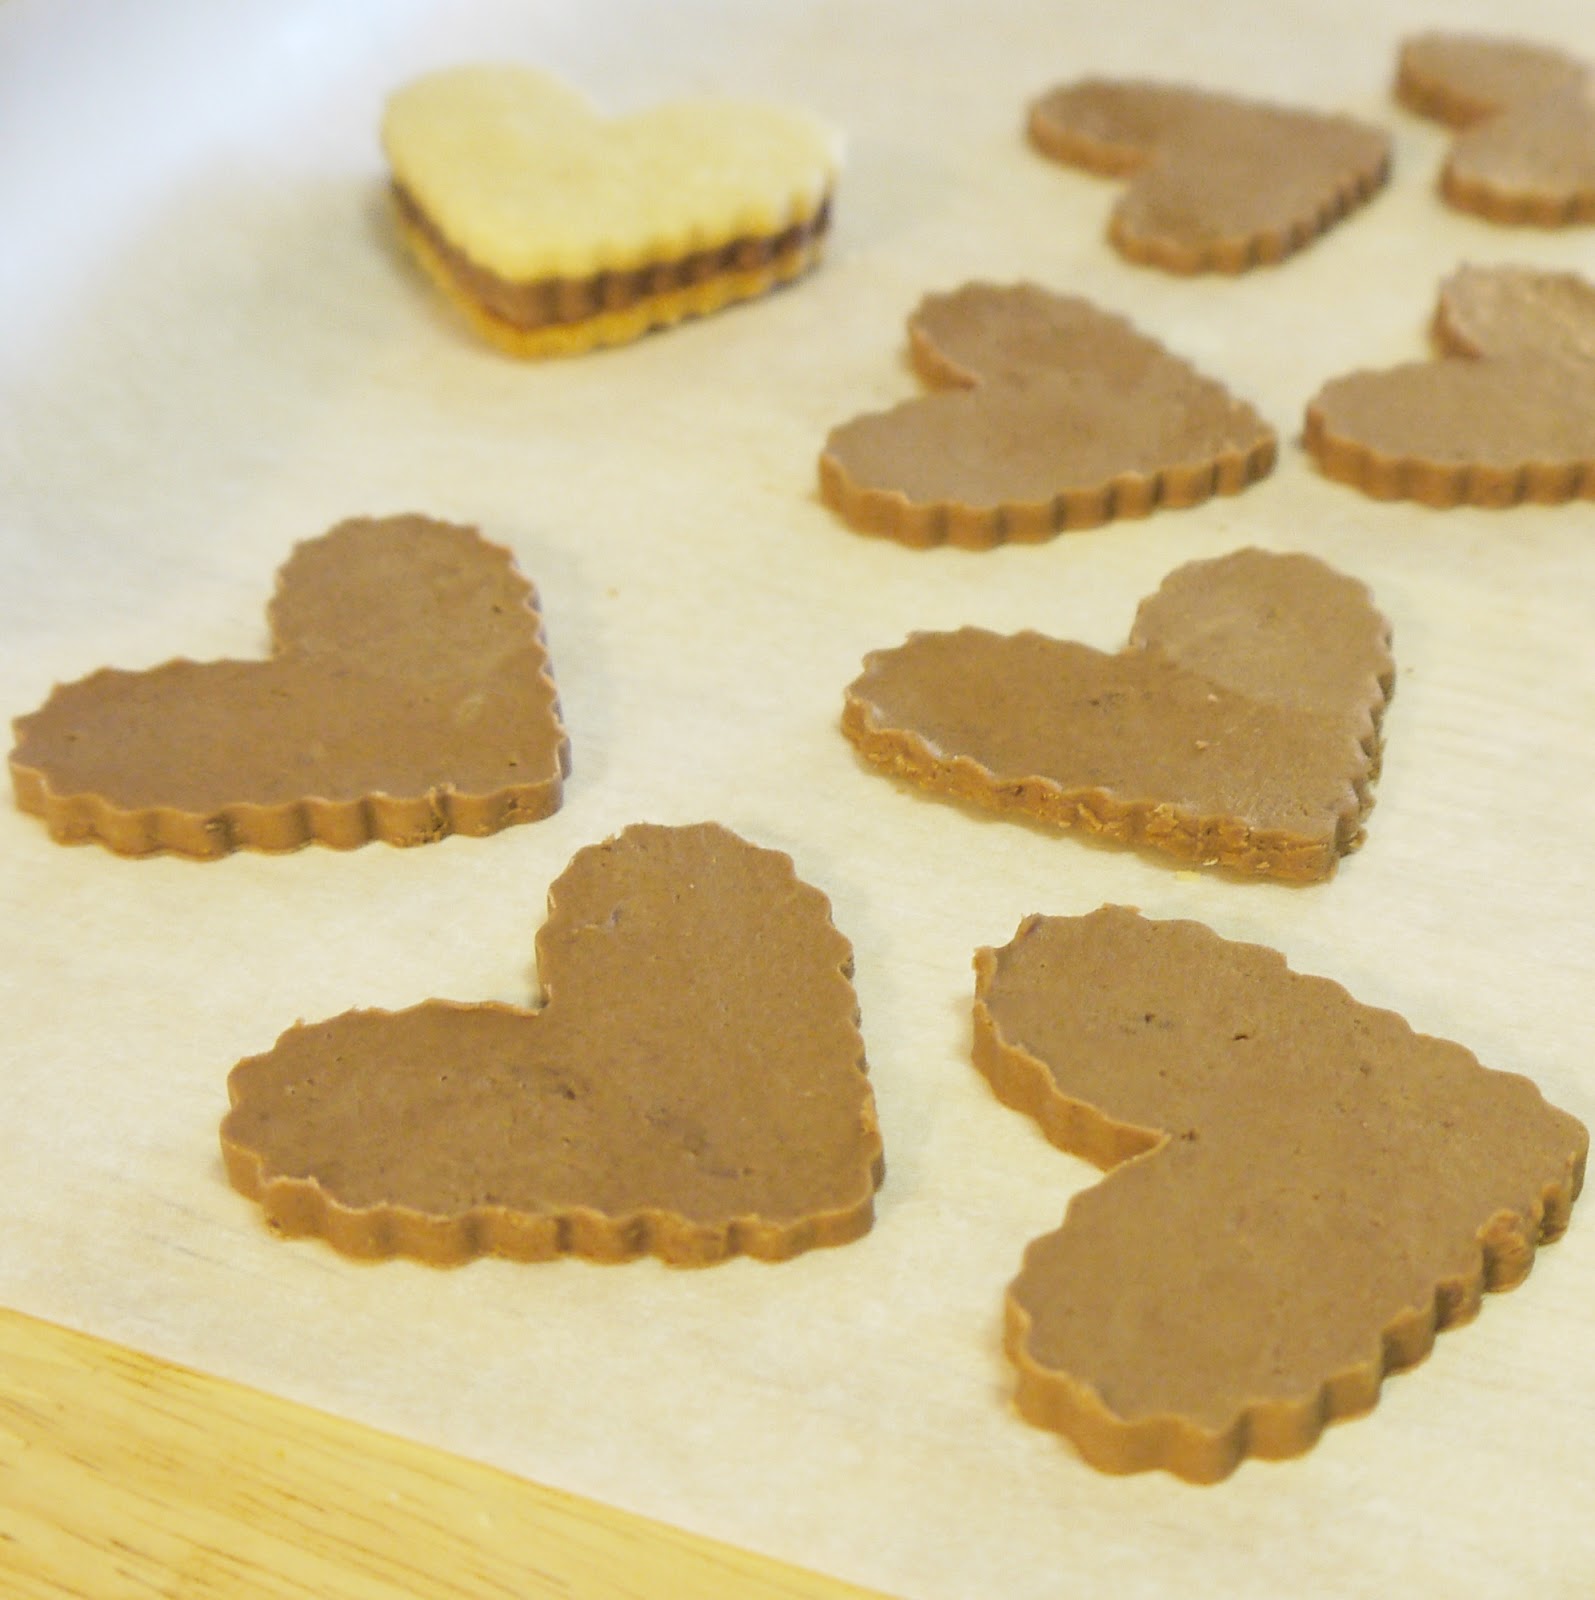
While I wasn't about to track down an elf-shaped cookie cutter for this endeavor, I also knew I wanted a shape quite distinct from the simple, circular Oreos--these are an E.L. Fudge remake, not Oreos gone blond. I used a heart-shaped cutter I had on hand, and I love its rippled edges. Try a two-inch, Christmas-tree-shaped cutter for a more festive alternative.


Elf Cookies
The name Elf Cookies is an homage to their inspiration, Keebler E. L. Fudge--and bonus, it's quite appropriate for the season. Santa always gets cookies for Christmas--why not leave a little something for his helpers?

~for the cookies~
3 cups all-purpose flour
1 T powdered buttermilk
3/4 tsp fine-grain salt
1 tsp baking soda
2 sticks (1 cup) unsalted butter
2/3 cup granulated sugar
1/4 cup corn syrup
1 1/4 tsp pure vanilla extract

~for the filling~
10 T unsalted butter
pinch salt
1 tsp pure vanilla extract
2 1/2 cups powdered sugar
1 tsp malted milk powder
1 cup semisweet chocolate chips, melted and cooled but still pourable

Preheat oven to 350 degrees F. Position a rack in the center of the oven.

In a medium-sized bowl, whisk together the flour, buttermilk powder, salt, and baking soda. Set aside.

Beat the butter and sugar together until light and fluffy. Beat in the corn syrup and vanilla until smooth. Add the flour mixture, beating on low speed until fully incorporated. The dough should be crumbly but malleable.


Turn the dough out onto parchment paper, divide in half, and use wet hands to shape each half into a flat disk.


Working with one half (or disk) of the dough at a time, sandwich the dough between two baking-sheet-sized sheets of parchment paper and use a rolling pin to roll out the dough to a thickness of about 1/4 inch. If the dough is too dry to roll out with out cracking, wet your hands and gently pat the cracked areas back together. Remove the top sheet of parchment and cut out hearts or the shape of your choice. I used a 2-inch-tall, ripple-edged, heart-shaped cookie cutter.


You can either carefully transfer the hearts to a parchment-lined baking sheet, or carefully peel up the excess dough, leaving the hearts where they are, and transfer that sheet of parchment to a baking sheet. Bake at 350 degrees F for 8 minutes. Let cookies cool on the baking sheet for 3-5 minutes before transferring to a cooling rack to cool completely.


Re-roll dough scraps and repeat, using fresh sheets of parchment as needed. Repeat whole process with remaining half of dough.

To prepare the filling, beat the cold butter along with a pinch of salt until smooth. Add the vanilla and powdered sugar and beat till well-mixed. The mixture should be thick, white, and almost dough-like. Beat in the melted chocolate.


Turn the filling out onto a sheet of parchment paper and divide in half.


Working with one half at a time, roll the filling out between two sheets of parchment until it is between 1/8- and 1/4-inch thick. Use the same cutter you used for the cookies to cut out shapes of the filling. If you feel like the filling is not stiff enough for easily cutting out shapes, place the rolled-out filling (still between the sheets of parchment) on a baking sheet and chill in the fridge for up to 20 minutes.


Place a filling shape on a cooled cookie, top with another cookie, and press very gently to adhere.


Repeat with remaining cookies and filling.


Makes about 40 sandwich cookies.


These cookies were part of the 2012 Great Food Blogger Cookie Swap, which is a little like secret Santa for food bloggers. I shipped these cookies to three participating food bloggers, and I'll get to sample cookies from three different bloggers. This year, each participant paid a small sign-up fee, and all the money went to Cookies for Kids' Cancer. Not a bad way to celebrate the season!


Thanks for reading! Here's to Being the Secret Ingredient in your life.

Tuesday, October 16, 2012

Homemade Oreos


The Setting: On again, off again blue skies and rain.

The Soundtrack: The Wire.

Steaming up the Oven: Nothing yet...but I'm hungry.

The Scenario: What's black and white and delicious all over?

Grocery shopping a few weeks ago, I came scarily close to plopping a package of Double Stuf Oreos in my cart--a very strange occurrance in my typical "only if it's all-natural" world. But the end-cap display was so appealing, the doubly-stuffed cream between the dark, chocolaty wafers was practically reaching through the plastic packaging and gripping my hand, chanting, "You know you want me."

My hand was set free only by the memory of my last junk-food-induced stomach ache and sugar crash--much in the same way a crippling hangover one weekend will curb a college student's drinking the next. Oreos in my cart today would mean an empty package of Oreos by the morning.

No, I thought. If I'm going to binge on Oreos, I'm going to work for it.

I made a mental note to move Homemade Oreos up a few spots on the recipes-to-develop queue and went about my shopping.

A few days later I was following through with a long-awaited plan to make another addictive childhood treat: Oatmeal Creme Pies.

I was delighted with the way they came out, but I ended up with far more filling than I needed for one batch of cookies.

As I fashioned the remaining filling into a log and wrapped it in plastic wrap for safe-keeping, a light went off. This filling would be perfect for Oreos!

The next day I set to work on a chocolate wafer recipe.

The requirements were these:
  1. The dough must be dark--like, black.
  2. The dough must be easy to roll out.
  3. The cookies must not spread during baking.
  4. The cookies must be crisp--not cakey, not chewy--but also not too brittle or rock-like.
  5. (In summation) The cookies must look as much like, taste as much like, and have as similar a texture to Oreos as possible.
I figured a combination of baking chocolate and cocoa would deliver the best chocolate flavor, color, and texture.

Generally, I prefer natural cocoa to Dutch-process cocoa, which has been treated with alkali to soften the acidity. The thing is, natural cocoa is a lighter, rosier shade of brown, while "Dutched" cocoa is the deep, dark color of devil's-food-cake mix. And I needed dark. Also, I had a feeling the flavor of the alkali-softened cocoa would better approximate the packaged, processed cookies.

To get the best of both worlds, I used Hershey's Special Dark cocoa, which is a blend of natural and Dutched cocoa powders.

To make sure my dough would roll out well and resist spreading in the oven (and that the baked cookies would have the proper crunch), I took a cue from my Homemade Graham Crackers and the Golden Cookies from my Homemade MoonPies. In both these recipes, a large proportion of flour and minimal leaveners help keep spread in check so that the small, flat disks you put in the oven are equally small and flat when you take them out.


Homemade Oreos
While the filling for the Oreos is the same as the filling for the Oatmeal Creme Pies in the last post, here the filling is shaped into a log and sliced into rounds instead of piped onto the cookies.

~for the cookies~
2 1/4 cups all-purpose flour
3/4 cup unsweetened cocoa (preferably a blend of Dutched and natural cocoas such as Hershey's Special Dark)
1/2 tsp fine-grain salt
1/4 tsp baking soda
2 sticks (1 cup) unsalted butter
2/3 cup granulated sugar
3 T corn syrup
2 oz semisweet baking chocolate (I used Baker's), finely chopped, melted, and cooled (but still pourable)
1 tsp pure vanilla extract

~for the filling~
1 stick (1/2 cup, or 8 T) unsalted butter
pinch salt
3 T refined coconut oil, cool room temperature (solid but soft)
1 tsp pure vanilla extract
2 1/2 cups powdered sugar
1 cup white "chocolate" chips, melted and cooled but still pourable (I used Nestle)

Preheat oven to 350 degrees F. Position a rack in the center of the oven.

In a medium-sized bowl, whisk together the flour, cocoa, salt, and baking soda. Set aside.

Beat the butter and sugar together until light and fluffy. Beat in the corn syrup, chocolate, and vanilla until smooth. Add the flour mixture, beating on low speed until fully incorporated. The dough should be firm, black and malleable.

Turn the dough out onto parchment paper and divide in half.

Note: At this point you can refrigerate one or both of the halves for up to 5 days if desired. If refrigerating, flatten the dough into a disk approximately 2 inches thick (this will make it much easier to roll out when you are ready to use it). Wrap the flattened disk tightly in plastic wrap and refrigerate. Remove the dough from the fridge 20 minutes before you are ready to roll it out.

Working with one half (or disk) of the dough at a time, sandwich the dough between two baking-sheet-sized sheets of parchment paper and use a rolling pin to roll out the dough to a thickness of about 1/4 inch between the sheets. Remove the top sheet of parchment and use the cardboard cylinder from a roll of paper towels to cut out perfect, Oreo-sized cookies.

Carefully lift up the excess dough, leaving the circles on the parchment.


If desired, use a toothpick or the tip of a paring knife to create designs (such as family initials) on the cookies.


Transfer the parchment with the dough rounds to a baking sheet and bake at 350 degrees F for 12 minutes. Let cookies cool on the baking sheet for 3-5 minutes before transferring to a cooling rack to cool completely.


Re-roll dough scraps and repeat, using fresh sheets of parchment as needed. Repeat whole process with remaining half of dough.


To prepare the filling, beat the cold butter along with a pinch of salt until smooth. Add the coconut oil and vanilla, beating just to combine. Add the powdered sugar and beat till well-mixed. Beat in the melted white chocolate. The mixture should be thick, white, and almost dough-like.


Turn the filling out onto a sheet of parchment paper and shape into a log.

Roll the filling into a log the thickness of the cardboard paper-towel roll.

Place a long string of unflavored dental floss under the log, about 1/4-inch back. Crisscross the floss over the top of the log and pull, slicing a 1/4-inch thick round of filling.


Place the filling round on a cooled cookie, top with another cookie, and press very gently to adhere.


Repeat with remaining cookies and filling.


Makes about 40 sandwich cookies.


Thanks for reading! Here's to Being the Secret Ingredient in your life.