Showing posts with label no-bake desserts. Show all posts

Sunday, September 1, 2013

Chocolate, Pistachio, and Mascarpone Tartlets


The inspiration for this recipe was threefold:

1) We haven't been eating a lot of dessert lately, and Hoosband asked if we could try making some small tarts-- nothing too out-of-control on the healthometer, but something that would still seem like an indulgence.

2) On a recent trip to Central Market (a fabulous, Whole-Foods-esque, Texas chain), I picked up a Chocolate Almond Butter Hail Merry Miracle Tart (a heavenly, raw, vegan, and gluten-free tartlet) that was too good not to borrow from.

3) I had some raw pistachios on hand and a little mascarpone leftover from my Goat-Cheese-Stuffed Cherries that were just begging to be turned into something scrumptious.

Like the incredible Hail Merry tarts, my creation is miraculously gluten free. It is also is raw in the sense that no baking is required.* With the addition of the mascarpone, however, I clearly departed from the truly raw (as in none of the components have ever been exposed to high heat) and vegan aspects.

While I typically prefer to use natural cocoa, I used dutch-process cocoa (which has been treated with alkali) in the crust here to achieve a deeper chocolate color and slightly less-acidic flavor.

Pistachios can be a pain to shell, and raw, unsalted, shelled pistachios can be hard to find. Mine were labeled "raw pistachio meats" and found in the bulk section.

As for the sweeteners, I have just begun to experiment with coconut palm sugar, and I love it. With a production method somewhat similar to that of maple syrup, coconut palm sugar is minimally processed and has a rich, caramel color, scent, and flavor. Not surprisingly, it can be pretty pricey, so I always look for it on sale. Substitute with brown sugar if desired.

In the filling I turn to honey, which, enlivened with a sprinkle of cinnamon, is a perfect pairing for pistachios, reminiscent of baklava and a myriad of Mediterranean confections.

Don't go overboard with the cinnamon, but definitely don't leave it out. You don't want the tarts to taste like Christmas, you just want to compliment the other flavors.

Because of the pistachios, the filling will be green. If left ungarnished, the surface of the filling will darken and become glossy, which can look a little unappetizing--so don't skip that garnish!


Chocolate, Pistachio, and Mascarpone Tartlets
for the crust:
1/3 cup raw, shelled pistachios
1/3 cup dutch-process cocoa
3 T coconut palm sugar
2 T coconut oil at warm room temperature (liquid but not hot)
dash ground cinnamon

for the filling:
1/2 cup raw, shelled pistachios
2 oz mascarpone cheese
2 T honey

for the garnish:
1/4 cup raw, shelled pistachios, finely chopped
2 T finely chopped dark chocolate

*Note: If you plan to keep the tartlets out of refrigeration for more than 10 minutes before/during serving, or if you plan on serving them in a very hot environment (such as outdoors in the summer), you may want to bake the crusts prior to filling them. If desired, bake the crusts at 350 degrees F for 6 minutes and allow them to cool completely before filling. Baked crusts may be stored in their liners in an airtight container at room temperature for up to two days before being filled. Filled tartlets should be refrigerated until ready to serve.

Place muffin liners in each of six large muffin cups. I use regular-sized muffin liners in large cups--the larger cups just allow the liners to lay out a little wider. If you do not have a large-cup muffin pan, just use six cups in a standard-size muffin pan.


Place the crust ingredients in a food processor and process until the mixture resembles wet, black, sand.


Deposit a tablespoon of the mixture into each prepared muffin cup.


Use clean fingers to firmly press the mixture evenly across the bottom and about 1/2 inch up the sides of each muffin liner, creating little tart shells.


Chill (or bake--see above note) the shells in the muffin tin while you prepare the filling.

Rinse and dry the food processor bowl, and add the filling ingredients.


Process until the mixture is very smooth, almost like a dense mousse, pausing to scrape down the bowl every 45 seconds or so. It will take a few minutes to get to the right consistency, so keep at it and taste as you go. Evenly divide the mixture between the six prepared crusts, using a piping bag if desired.


Cover the tops completely with the chopped pistachios and chocolate.


For the best flavor, let the tarts rest in the fridge for at least 6 hours. The flavors will intensify even more overnight.

Store tartlets in airtight containers in the fridge until ready to serve (up to five days).

Makes six tartlets.


Thanks for reading! Here's to Being the Secret Ingredient in your life.

Friday, August 23, 2013

Goat-Cheese-Stuffed Cherries


As I mentioned in the last post, I received a pretty stellar assortment of summer fruit tools as part of OXO's Blogger Outreach Program. Now I am not required to blog about all (or any) of the tools I receive, but when something makes my life easier and more fruitful (bad pun intended), I want to share.

Last time, I sang the praises of OXO's large fruit scoop, mango splitter, and pineapple slicer, but there was one more tool I simply had to get my hands on before we said adieu to summer: the cherry pitter.

I am a huge fan of fresh cherries, but eating them around my two-year-old can be a bit of a pain. She always wants what Mommy is eating, and giving her a big bowl of cherries with the pits intact is as good as scheduling myself a Heimlich-maneuver practice session. In the past I'd bite around the pit and hand her bits of the flesh as I'd go, or I'd forget about buying cherries in the first place.

Fortunately for me, the cherry pitter has changed all that. Now Oia and I can share a bowl of cherries, our fingers taking on deep shades of crimson, as we watch Dora the Explorer and prepare to take on the world.

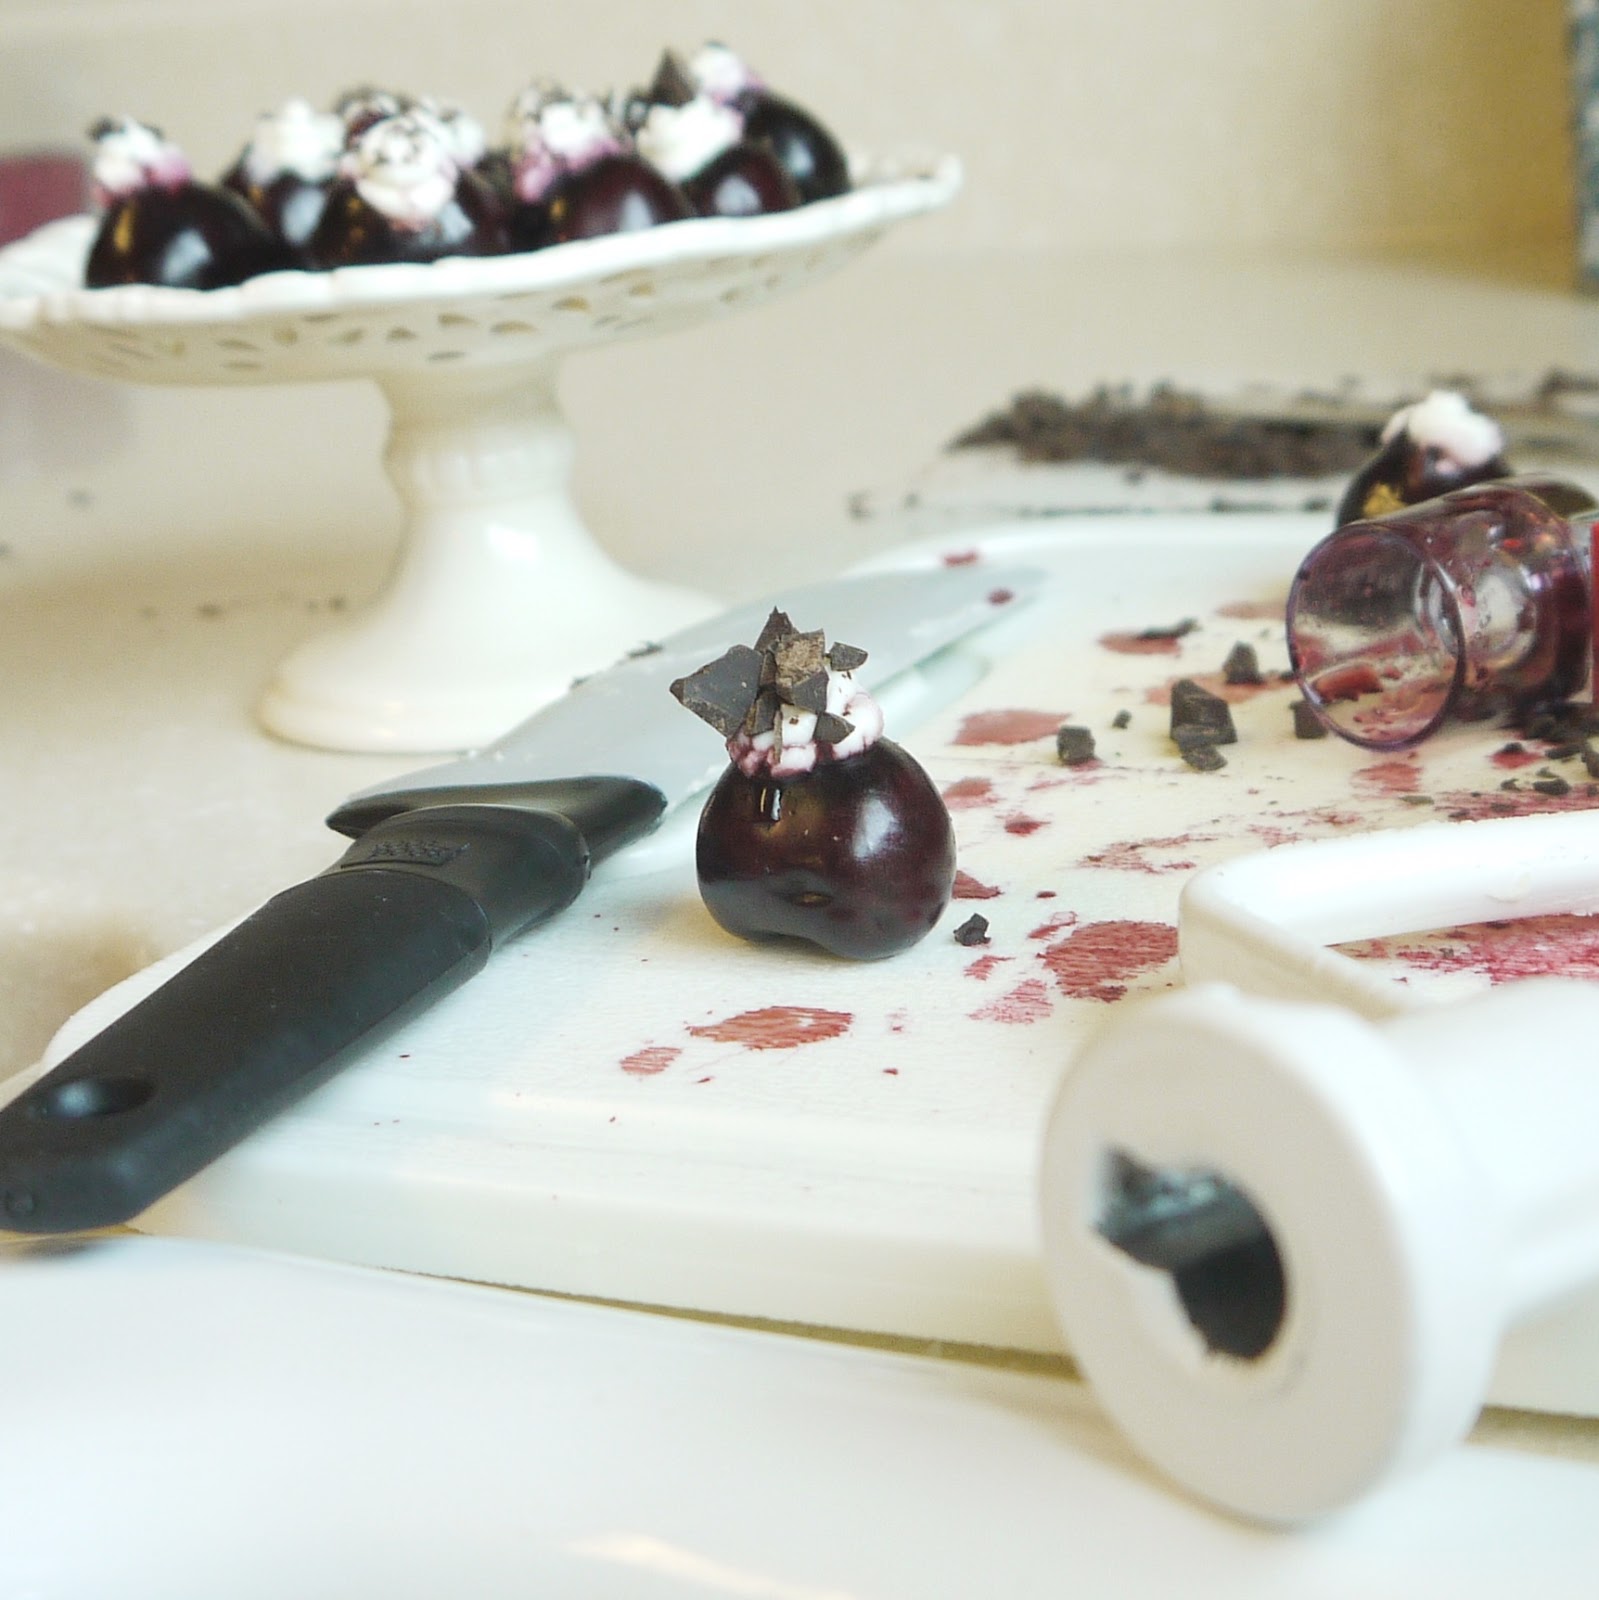
This recipe is inspired by my love of the union of dark chocolate, cherries, and goat cheese, and by the easy-to-use OXO cherry pitter. I mean, after you put holes in a whole mess of cherries, it's only right to fill them with something yummy, don't you think?

This recipe can be made in whatever quantity desired, exact measurements not necessary.

The mascarpone adds creaminess, smooths out the texture of the filling, and slightly softens the flavor of the goat cheese. Though often compared to cream cheese, mascarpone tends to have a creamier mouthfeel, and a subtler (less tart) flavor, and a slight, inherent sweetness not found in commercial cream cheese. You could substitute cream cheese for the mascarpone if necessary, but you would probably want to add a little sugar to cut the tartness.


Goat-Cheese-Stuffed Cherries
Fresh, sweet cherries (such as Bing)
Equal parts fresh goat cheese (chevre) and mascarpone cheese, both at room temperature
Very dark chocolate (I used Endangered Species 88% cocoa), for finely chopping or grating

Wash the cherries and pat dry before pitting. Pit the cherries with the stem-sides up.


Beat together the cheeses until smooth and fluffy--the mixture will be somewhat firm but airier and very well combined.


Transfer the cheese mixture into a small piping bag, snip off a small opening at the end, and pipe a small amount of the mixture into the bottom of each cherry. The cherries will sit upside down (stem-side down), with the puffs of filling peeking out from the bottoms (now the tops).


Sprinkle the chocolate over the tops of the stuffed cherries and transfer to a platter to serve or to an airtight container to chill until ready to serve.


The stuffed cherries make an excellent sweet hors d'oeuvre for a cocktail party or a perfect tiny bite to serve with coffee at the end of a large meal. Minus the chocolate, they were also a pretty major hit with my two-year-old, who now can't stop asking for more stuffed cherries--yea! They'll keep well, stored in an airtight container in the fridge for up to 5 days.


Thanks for reading! Here's to Being the Secret Ingredient in your life.

Saturday, February 23, 2013

Cookie Dough Truffles

The Setting: Winter. Snow. Etc.

The Soundtrack: Gilmore Girls, season 6.

Sizzlin' on the Griddle: Blueberry pancakes.

The Scenario: Chocolate plus cookie dough equals happiness. And they say math isn't my strong suit.

Every now and then I get the opportunity to lead a cooking workshop (which I love, even though I'm always afraid I come off a little spazzy).

I've got a "cooking with kids" class coming up soon, so I've been furiously and excitedly brainstorming for the perfect kid-friendly recipes.

I thought it would be fun to make cookie-dough pops, little chocolate-enrobed balls of egg-less cookie dough on sticks.

Testing my recipe, I realized that while the kids would probably relish the chance to dunk balls of dough in melted chocolate, it was sure to turn into a much bigger mess than either I or the other parents would care to deal with (or, more importantly, clean up after), especially since most of the kids would be under the age of five.

The recipe needed some tweaking along the way as well. My first run produced a dough with a texture a tad bit too granular from the sugar, so I swapped out half the brown sugar for powdered sugar and used dark brown sugar instead of light to help maintain the characteristic chocolate-chip-cookie-dough flavor.

By the end of the day, I had ditched the sticks, come up with another idea for my kids class (more on that later), and ended up with cookie dough truffles pretty enough for company and tasty enough for midnight snacking.

These truffles would be a fun and easy project for older kids and patient parents to tackle together. For the little-kid version, stay tuned!


Cookie Dough Truffles
1/2 stick butter, softened slightly at room temperature (leave it out for about 30 minutes)
1/8 tsp fine salt
1/2 tsp pure vanilla extract
1/4 cup dark brown sugar
1/4 cup powdered sugar
1/2 cup all-purpose flour
1/2 cup semisweet mini-chips
3/4 cup semisweet chocolate chips or choped chocolate
3 T chopped unsweetened chocolate
2 tsp coconut oil
1 T milk chocolate chips or white chocolate chips (optional)

In a small-to-medium-sized bowl, use a fork to combine the butter, salt, vanilla, brown sugar, and powdered sugar, raking the tines through the butter to break it down and distribute it evenly. You should have a very sandy-looking mixture.


Add the flour and use the fork to work it into the mixture.


Add 1/2 cup mini-chips, mixing with the fork just until distributed.


Pinch off tablespoon-sized nubs of the dough mixture and roll each one into a ball between your hands. You should have about 10 balls. Place the balls on a parchment-paper lined baking pan and place in the refrigerator while you prepare the chocolate.


Place 3/4 cup semisweet chocolate chips or chopped chocolate in a microwave safe bowl and microwave for 30 seconds. Stir, making sure to redistribute the hotter chips from the bottom of the bowl. Microwave 30 seconds and stir again, this time trying to stir until smooth. If needed, microwave an additional 20 seconds.
Add the 3 T unsweetened chocolate and the coconut oil and stir until smooth, microwaving an additional 10 seconds if necessary.


Drop a dough ball into the chocolate and use a clean fork to coat it in the chocolate.


With the dough ball cradled on the tines of the fork, hold it over the melted chocolate and gently shake the fork from side to side so that the excess chocolate cascades off, forming a sleeker coating on the ball.


Lightly run the bottom of the tines over the edge of the bowl so that the excess chocolate on the fork stays in the bowl. Gently slide the ball off the fork and back onto the parchment. Repeat with remaining balls. Do not wash out the bowl with the melted chocolate.


Allow the balls to set at cool room temperature (60-70 degrees). Once set, add the milk chocolate or white chocolate chips to the bowl with the remaining melted chocolate (if desired). Microwave the chocolate for 30 seconds and stir until smooth. Use a fork to drizzle the lighter-colored melted chocolate over the truffles to create a design. Allow to set completely at room temperature before serving. Store in an airtight container at room temperature for up to one week.


Makes about 10 truffles.


Thanks for reading! Here's to Being the Secret Ingredient in your life.


Friday, December 21, 2012

Biscoli


The Setting: A dark and stormy day.

The Soundtrack: House Hunters.

On the Stovetop: Nothing yet.

The Scenario: Biscoff Mania continues with possibly the best thing I've ever made.

Okay, here's the deal. I've been going back and forth over whether to write this post now or wait until I could take more drool-inspiring photos of this ridiculous dessert, but NOW won for two reasons.

A) I've tried twice, and I just don't think I can capture Biscoli's awesomeness in photo form.

and

B) I felt like it was necessary to get this out into the blogosphere in time for it to make its way onto Christmas menus--maybe even yours.

So don't let the sub-par photos fool you. This delicious combination of Biscoff cookies and cannoli filling is easy to prepare, make-ahead convenient, and show-stopping good.

Make it in a loaf pan and serve it with a spoon for casual get-togethers or potlucks, or double the recipe and make it in a springform pan for a more stunning, slice-able Biscoli Cake.

Either way, make it, make it, you've got to make it! Promise?


Biscoli
For the Biscoli Cake variation, double the recipe (except for the vanilla bean--one of those will be enough) and layer the cookies and filling in a springform pan instead of a Pyrex loaf pan. Place the pan in the freezer for 10-20 minutes before serving  to help firm up the edges. Top with crumbled cookies and sprinkle with powdered sugar and cinnamon. Place the pan on a cake stand if desired. Run a knife around the inside of the pan before removing the springform edge. Use a cake knife to cut and serve.

15 oz whole-milk ricotta
1/2 cup heavy whipping cream
1 T orange marmalade
1 cup powdered sugar
1 vanilla bean
1 tsp Marsala wine (substitute with pure vanilla extract if desired)
1 cup mini semisweet chocolate chips
1 package Biscoff cookies (crumbled, whole, or in pieces) (you'll have some leftover)
extra powdered sugar and cinnamon for sifting over the top

Combine the first six ingredients (ricotta through Marsala) until smooth. I like to do this in a food processor for extra smoothness, but you could use an electric mixer or even a whisk if desired.


Stir the chocolate chips into the ricotta mixture.


Layer cookies evenly into the bottom of a Pyrex loaf pan.


Pour one quarter of the filling mixture over the cookies. Repeat until you have four layers each of cookies and filling.


(In a springform pan you will have fewer layers)


Cover and refrigerate for at least 6 hours or up to two days.When ready to serve, crumble more Biscoff cookies over the top and dust with powdered sugar and cinnamon (I just put a little of each in one sieve and shake it over the top).


Thanks for reading! Here's to Being the Secret Ingredient in your life.