Showing posts with label peanut butter. Show all posts

Tuesday, April 15, 2014

Individual Peanut Butter and Jelly Pies


If you read the last post, you saw solution number one to Hoosband's peanut-butter-pie deprivation issues: Individual Peanut-Butter S'mores Pies.

Today I present variation number two: Individual Peanut Butter and Jelly Pies.

Not exactly a novel concept, but easy and delicious all the same.


I have to admit, growing up I was never a fan of the peanut-butter-and-jelly combo. Peanut-butter-and-honey sandwiches were the pride of my lunchbox--no jelly allowed.

But somehow, over the years, as I've sampled variations on the PB and J (especially variations that include chocolate) I've grown to find the combo not only appealing but down right addictive.


This recipe layers strawberry jelly, simple peanut-butter-custard filling, and easy chocolate ganache in homemade graham-cracker crusts to create perfectly portioned pies that effortlessly elevate a childhood favorite to something truly party worthy.


Individual Peanut Butter and Jelly Pies
2 cups graham cracker crumbs (preferably homemade)
2 T dark brown sugar or coconut palm sugar
3 T melted butter
1/3 cup strawberry jelly
1 (14 oz) can sweetened condensed milk
1/3 cup peanut butter (I used Jiff Natural)
2 egg yolks (the whites can be frozen and thawed for later use if desired)
1/2 cup heavy whipping cream
1/2 cup dark chocolate chips (I used Guittard Extra Dark)


Preheat the oven to 350 degrees Fahrenheit and line a 12-cup, standard-sized muffin pan with muffin liners.

Use a fork to thoroughly combine the crust ingredients. Divide the mixture evenly among the prepared cups, and use your fingers to press the mixture firmly into the bottoms and up the sides of the liners. Place a rounded teaspoon of jelly into the bottom of each prepared crust (use the bottom of the spoon to gently spread out the jelly blob if desired). Set aside.

In another bowl, whisk together the condensed milk, peanut butter, and egg yolks until very thoroughly combined. Divide the mixture evenly among the prepared crusts, and bake at 350 degrees Fahrenheit for 20 minutes. Remove from the oven and allow to cool completely.

While the pies are cooling, place the heavy whipping cream in a two-cup, microwave-safe bowl or Pyrex measuring cup. Microwave on high for one minute. Add the chocolate chips and stir until completely smooth--this will take a few minutes. Divide the chocolate mixture evenly among the pies and allow to cool completely at room temperature before placing in airtight containers to store in the fridge. The pies will keep, stored this way, for up to one week.


Makes 12 Individual Peanut Butter and Jelly Pies.


Thanks for reading! Here's to Being the Secret Ingredient in your life.

Friday, April 11, 2014

Individual Peanut-Butter S'mores Pies


I can't remember what we were watching, but Hoosband and I saw some reference to peanut-butter pie on TV a couple weeks ago, and he got that dreamy look in his eye. There might have also been an audible tummy response and a rogue drop of drool making a run for his chin.

"Oh man, I used to make peanut-butter pie all the time," I reminisced. 

He looked at me as if he'd learned I'd been skimming half his income into a private account in the Caymans. "And you've been keeping this from me?" the betrayed inquired.

My penance was clear. 

A bag of homemade graham crackers leftover from creating a fresh chevre cheesecake for a Mother Earth News post sat on my counter, so the timing was perfect for pie.


Now a custard-y peanut-butter filling in a crumbly homemade graham cracker crust is a fine thing on its own, but I wanted to have a little fun with it. I settled on two variations, and since I'm only really fond of one of my pie pans, I decided to make a bunch of mini-pies instead of two large ones. Portion control is an added bonus.


I knew right away I wanted to do a Peanut-Butter S'mores Pie, but I didn't have time to make homemade marshmallows, and I really didn't want to go to the store to get the Jet-Puffed variety.

Then I realized I had a perfectly marshmallow-y substance right at my disposal in the two egg whites I'd be reserving from the filling. Since crunchy-on-the-outside, marshmallow-y-on-the-inside meringues are an all-time Hoosband favorite on their own, I figured it was a fair swap out.

What do you think?


Individual Peanut-Butter S'mores Pies

~for the crust~
2 cups homemade-graham-cracker crumbs
2 T dark brown sugar or coconut palm sugar
3 T melted butter

~for the filling~
1 (14 oz) can sweetened condensed milk
1/3 cup peanut butter (I use Jiff Natural)
2 egg yolks
3/4 cup chocolate chips (I used Guittard Extra Dark)

~for the meringue~
2 egg whites
1/8 tsp cream of tartar
3/4 cup sugar (I used Wholesome Sweeteners Organic)
1 tsp pure vanilla extract

Preheat the oven to 350 degrees Fahrenheit and line a 12-cup, standard-sized muffin pan with muffin liners.

Use a fork to thoroughly combine the crust ingredients. Divide the mixture evenly among the prepared cups, and use your fingers to press the mixture firmly into the bottoms and up the sides of the liners. Set aside.

In another bowl, whisk together the condensed milk, peanut butter, and egg yolks until very thoroughly combined. Divide the mixture evenly among the prepared crusts, and bake at 350 degrees Fahrenheit for 20 minutes. Remove the pan from the oven and wait about two minutes for the filling to settle before evenly distributing the chocolate chips among the pies. Set aside.

Place the egg whites and cream of tartar in the bowl of an electric stand mixer and beat on medium speed until foamy, voluminous, and just able to hold very soft peaks when the beater is lifted out of the mixer. With the mixer on, beat in the vanilla and one tablespoon of sugar at a time until the mixture is extremely white and glossy and able to hold stiff peaks.

Transfer the mixture to a large piping bag, and pipe the meringue in a climbing spiral over the top of each pie so that no chocolate or filling is showing.

Reduce the oven temperature to 300 degrees Fahrenheit and bake 20 minutes more.

Remove pies from the oven and allow to cool completely before very carefully lifting them out of the pan--a fork may be helpful in this process to avoid cracking the meringue.


Store the pies in an airtight container at room temperature for up to 5 days, and stay tuned for variation number two, coming soon!


Thanks for reading! Here's to Being the Secret Ingredient in your life.

Thursday, December 8, 2011

Hoosband Cookies and Spatula Giveaway!

The Setting: A frosty apartment warmed by an over-achieving oven; the aroma of chocolate mingling and melding with butter, sugar, and flour.

The Soundtrack: The Family Stone.

Steaming up the Oven: Hoosband Cookies, Stracciatella Biscotti, Homemade Graham Crackers

The Scenario: Prepping for the bake sale and taking my new spatula for a test drive!

Baking is in full force in the Crumm house today.

On the list for the bake sale:

Hoosband Cookies
Stracciatella Biscotti
Homemade Graham Crackers
Spicy Cheddar Snowflakes
Peppermint Bark

Plus whole wheat bread, cookies, muffins, and more coming from many wonderful volunteers.

I am so excited!

...and nervous.

On one hand I hope we'll have enough baked goods, but on the other hand I hope we won't end up with a table full of yumminess and no one to buy it all.

Here's hoping it all goes well and ends with a decent donation to Cookies for Kids Cancer!

Hoosband Cookies
Called Hoosband Cookies because Hoosband helped develop the recipe, giddily suggesting more and more additions to our standard Crumm House Chocolate-Chip Cookies until we came up with these hearty, delicious, addictive little devils.

2 sticks unsalted butter
1 cup brown sugar
1 egg
1 tsp vanilla
1/3 cup peanut butter
11/2 cups bread flour
1 1/2 tsp large, flaky Celtic salt (or 1 1/4 tsp kosher salt or 3/4 tsp fine grain salt)
1 tsp baking soda
1 tsp baking powder
1 cup semisweet chocolate chips
1 cup oats
1 cup chopped pecans

Preheat oven to 373 degrees F. Line two baking sheets with parchment paper.

Using an electric mixer, cream butter and sugar together on med-high speed till light and fluffy.

Add egg, vanilla, and peanut butter. Beat on medium speed just till evenly incorporated.

In a small bowl whisk together the flour, salt, soda, and powder. Add to butter mixture, beating on low speed till well-mixed.

Add remaining ingredients, beating on low just to distribute.

Drop large, rounded spoonfuls of the dough onto the prepared pans, spacing 2-3 inches apart.

Bake at 375 degrees F for 12 minutes or till golden and crispy on the outsides and slightly underdone in the centers.

Cool completely or at least 10 minutes on baking sheet before eating.

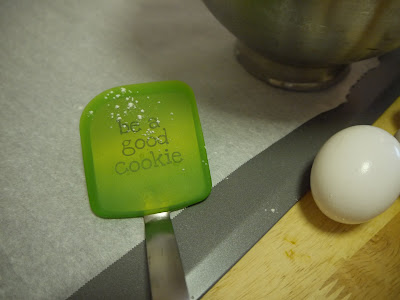
Like my cute, new spatula?

It's a lean, green, cookie-flipping machine, and it (well, one just like it) could be yours!

To enter the giveaway, simply...

1. Become a follower of Being the Secret Ingredient either on the blog, on Facebook, or on Twitter.

2. Then tell Being the Secret Ingredient your all-time favorite cookie either by Tweeting @BeingTSI, commenting on the blog, or leaving a wall post on our Facebook page. Increase your chances by doing all three!

Must enter by January 15, 2012. Winner will be selected by a drawing and announced January 16. Winner must be a resident of the 48 contiguous United States.

For more information on the OXO "Good Cookie" Spatula, see this post: Cookies for Kids' Cancer--And a Giveaway!

For more info on Cookies for Kids' Cancer, visit www.cookiesforkidscancer.org.

Tuesday, November 29, 2011

Jimmie's Chocolate Shop PB&J


The Setting: A kitchen frenzy.

The Soundtrack: Not even sure.

On the Stovetop: Brownies...Strawberry Jam...various components of what should be Peanut-Butter Mousse....

The Scenario: Paying homage to a delicious dessert from my favorite Florida chocolate shop.

I have literally been dreaming about this for months.

When we were living in Florida, I pretty much could not drive down the Dania Beach stretch of US-1 without stopping into Jimmies Chocolates for a chocolate-covered marzipan and a handmade truffle or two.

It wasn't until my last trip to Jimmie's, however, that I finally dined at Jimmie's Cafe.

Knowing my love of chocolate was as big as my nine-months-pregnant belly, Hoosband surprised me with Jimmie's dinner reservations for my birthday.

Our appetizer and entrees were delicious, but the desserts, not surprisingly, stole the show.

One in particular, a rich chocolate torte layered with sweet strawberry jelly and creamy peanut-butter mousse, doused in decadent dark chocolate ganache, has been haunting me ever since.

This, finally, is my attempt, slightly more freeform and sans snazzy ring molds.

It starts with a fudgy brownie--not my recipe, my favorite from Martha Stewart's Baking Handbook (Martha's is my ultimate brownie go-to, but I'm sure your favorite recipe for fudgy--not cakey--brownies would be perfect, too!).

Pouring the batter into a 12-cup, standard-sized muffin pan instead of a brownie pan and cutting down the cooking time to 25-30 minutes makes 12 perfect little canvases for a peanut-butter masterpiece. The centers cave in, creating eager and receptive wells for the jelly.


I used muffin liners this time, but I'll omit them and butter the muffin cups when I do this again. The liners can be a bit of a hassle to remove before assembly of the dessert.


You could just buy strawberry jelly, but if you have a Vitamix or similarly awesome blender, this homemade jam is both simple and scrumptious. 

Strawberry Jam
The pectin in the apple seeds thickens and gels the mixture as it cools. You really need a beast of a blender to process the seeds and skins of the apples into oblivion for a pleasant texture. If you don't have one, you could always strain the jelly over cheesecloth after cooking--you will want to use cheesecloth so that you can squeeze excess juice out of the pulp...or you could simply omit the apples and use commercial pectin.

2 large apples, washed and quartered (do not remove skins or seeds)
2 cups frozen strawberries
1 1/2 cups sugar

Process the apples in the blender on high speed until they resemble applesauce. Add the frozen strawberries and process on high speed until the mixture looks like a smooth strawberry sorbet.

Transfer the mixture to a medium-sized saucepan and add sugar. Cook on med-high heat for 30 minutes, stirring occasionally. Use a splatter guard if desired. Reduce heat to med-low and cook one hour, stirring occasionally.


Cool completely and transfer to an airtight plastic container to store in the fridge for up to two weeks.


The next step is peanut-butter mousse... or semifreddo... or... frozen custard?

Let's just say the idea was mousse, but it sort of became more of an ice cream along the way...which is fine 'cause it's pretty darn tasty and cute to boot. Just use an ice-cream scoop to place the perfect mound of peanut-buttery goodness atop the jam.


The mousse idea may be revisited in future attempts, but for now....

Peanut-Butter Mousse-ifreddo

4 large eggs, separated
1/2 cup granulated sugar, divided
1/4 tsp kosher salt
1 tsp pure vanilla extract
1/4 cup peanut butter
1/8 tsp cream of tartar
1/4 cup heavy whipping cream

Whisk yolks with 1/4 cup sugar and salt over a double boiler till light in color and thick and creamy in texture, about 10 minutes. Place in an ice bath to cool.


Stir in peanut butter. Mixture may seize up a bit.


Whip egg whites with 1/4 sugar and 1/8 tsp cream of tartar over double boiler till stiff peaks form. Place in a water bath to cool.


Gently whisk 1/4 of the meringue into peanut butter mixture, and then very gently fold in the rest.


Whip cream till stiff peaks form and fold into the peanut butter mixture. Transfer the mixture to an airtight plastic container, and stash in the freezer for at least one hour, stirring after 30 minutes. The "mousse" can be stored in the freezer for two weeks.


The crowning glory is the perfect marriage of chocolate and cream known as ganache. Mine is as easy to make as it is to devour.

Chocolate Ganache

1/2 cup heavy whipping cream
1/8 tsp instant coffee or instant espresso granules (not ground coffee)
6 oz mini semisweet chocolate chips

Place cream in a microwave-safe cup or bowl. Microwave on high for 60 seconds.

Stir in instant coffee.

Place chocolate chips in a mixing bowl. Pour cream over chips and whisk until smooth and uniform.

Cooled ganache can be stored in an airtight container in the fridge for two weeks and microwaved for 30 seconds to be spoonable again.


Saturday, October 29, 2011

Tricks and Treats


The Setting: Game Day in South Bend. Pumpkin-carving day at the playground. The smell of charcoal in the air; a patchwork of leaves on the ground.

The Soundtrack: The Notre Dame -v- Navy game on TV.

Steaming up the (once again, microwave) Oven: (what will be) Homemade Butterfingers. Yes, you read that right.

The Scenario: Fresh from Oia's first pumpkin carving, we skip the stadium and prepare some tricks and treats for tomorrow's Halloween festivities.

Here's a crazy trick for you:

Combine equal parts (by weight) melted candy corn (yes, candy corn) and creamy peanut butter, let harden in a parchment-paper-lined pan, cut into pieces, and coat with melted milk chocolate. Voila, homemade butterfingers.

Yes, it is crazy, yes, it works, and no, I am not the genius who came up with it.

For me, part of the joy of recreating childhood treats is finding a way to make them all-natural and completely from scratch.

I try to avoid artificial colors and flavors (and candy in general most of the time), but when I saw this evil recipe on Pinterest (my devilish new addiction, www.pinterest.com) I had no choice.

One minute I’m pondering the possibilities of keeping my daughter’s future Halloweens artificial-ingredient free without depriving her of the joys of trick-or-treating, and the next minute I’m running to the store to stock up on neon-colored candies.

I don’t know who came up with this originally—I tried to find out, scouring the Internet (well, a brief but well-intending scour) to give proper credit. I found references dating back as far as 2005 to a post on some Taste of Home forum (http://www.tasteofhome.com/, I believe), but I could not find the post itself.

The source of the current viral click-a-thon seems to be http://www.plainchicken.com/2010/11/homemade-butterfingers.html. So, Plain Chicken, I blame you.

I blame you for your easy-to-follow instructions, your enticing photo, and your prolific Pinterest presence.

These slightly-softer-and-chewier-than-the-real-thing betterfingers are way too tasty to take to the Halloween party for which I was making them—not that I do not wish to share…it’s just that I fear there will be none left by party time tomorrow.

I plan instead to take meringue ghosts, a simple treat that has served me well in the past.

We’ll see how it goes.