Showing posts with label mint. Show all posts

Thursday, June 4, 2015

Malibu Mojito Cupcakes


Ah, the mojito. Its refreshing combination of lime and mint beckons me back to South Florida, transporting me to sunny Miami beaches and laid-back Key West bars.

Mojitos are usually made with plain white rum, but (as you can read in this post from 2012) that is not typically available in Casa de Crumm. Coconut rum is my poison of choice for daiquiris, pina coladas, and, yes, our friend the mojito.

So that is what you'll find in this cocktail-inspired cupcake. A subtle kiss of coconut complements the flavors of mint and lime ever so nicely, making this one bar-born confection I simply can't stop craving.

Fresh mint leaves are processed with sugar to permeate the cake batter, and more fresh mint is steeped in heavy cream to enliven a whipped white-chocolate ganache icing. A delightfully tart homemade lime curd fills the center of the cakes for a high-impact flavor combination that sends me straight to the Keys.


As you can see from the photos, I have a tendency to overfill the muffin cups. This recipe will produce enough batter for about 18 standard-sized cupcakes, or 12 that look like these. Personally, I don't mind a little crunch around the edges, but if you're feeling like a cupcake perfectionist, don't overfill the muffin cups!

Also, if you are used to making cakes by the creaming method, this recipe is going to sound totally wack. But trust me. Mixing the oil into the dry ingredients first helps coat the flour with fat to keep gluten formation to a minimum, producing that elusive, tender-crumb texture that's not too dense and not too light.


Malibu Mojito Cupcakes

~for the cake~
11 oz granulated sugar
1/3 cup (loosely packed) fresh mint leaves
8 oz all-purpose flour
2 oz cornstarch
1 T baking powder
3/4 tsp kosher salt (Morton or another coarse variety)
2 fl.oz vegetable oil
2 oz unsalted butter, softened at room temperature
6 fl.oz whole milk
2 fl.oz Malibu coconut rum
1 tsp pure vanilla extract
2 large eggs

~for the icing~
5 fl.oz, plus 4 T heavy whipping cream, divided
1/3 cup (loosely packed) fresh mint leaves
10 oz chopped white chocolate
1 T Malibu coconut rum

~for the filling~
1 cup homemade lime curd

Make the cake:
Preheat the oven to 350 degrees Fahrenheit and place muffin liners in each cup of a standard 12-cup muffin pan (and line an extra pan with 6-or-so liners if you don't want to overfill your muffin cups).

If you need to rinse your mint leaves, pat them very dry between two kitchen towels. Excess water will not be your friend.


Process the mint and sugar in a food processor for about two minutes or until completely integrated.


In a large mixing bowl (the one that comes with your electric stand mixer if that's what you'll be using) thoroughly whisk together (by hand) the flour, cornstarch, baking powder, and salt. Whisk in the mint-sugar, and then switch to an electric mixer fitted with the paddle attachment. With the mixer on low, beat in the oil until the mixture looks quite sandy. Add the softened butter a tablespoon at a time, continuing to beat on low while you prepare the wet ingredients.


In a clean bowl (preferably one with a spout), thoroughly whisk together the milk, rum, vanilla, and eggs. Increase the mixer speed slightly, and slowly stream the wet mixture into the flour mixture, beating just till well-incorporated. Use a rubber spatula to give the mixture one final stir by hand before distributing batter among the prepared muffin liners.

Bake the cupcakes at 350 degrees Fahrenheit for 24 minutes or until a toothpick inserted into the center of one of the cakes comes out clean. Let the cakes cool for 5 minutes in the pan and then completely on a cooling rack before filling and frosting.

Make the Icing:
Place the white chocolate in the bowl of an electric mixer and set aside.

Place 5 fl.oz of cream, along with the mint leaves, in a small saucepan over low heat.


Stir frequently, crushing the leaves to release their oils, for about 20 minutes or until the leaves look very dark and the cream looks pale green.

Strain the cream into the bowl with the white chocolate and discard the mint leaves. Mix on low speed using the paddle attachment until the white chocolate is totally melted and the mixture has cooled considerably. Increase the speed to medium and add 1 tablespoon of the remaining cream at a time, beating well between each addition. Increase speed to med-high and beat until fluffy and voluminous. With the mixer on, very gradually stream in the coconut rum.

Fill and frost the cakes:
Make a little well in the center of each cupcake for the filling. I used a cannoli mold--my daughter got a kick out of blowing the cake "cork" out of the mold and into her waiting hands--but a pairing knife would work just fine.


Place the lime curd in a piping bag fitted with a medium-sized tip, or zip-top bag with about 1/4-inch snipped off one of the bottom corners, and pipe the curd into each cupcake.


Transfer the whipped white-chocolate ganache to a pastry bag and pipe onto the tops of the cupcakes.

Serve immediately or store the cupcakes in an airtight container in the fridge for up to 4 days. Allow the cupcakes to warm completely to room temperature (at least 1 hour) before serving.


Thanks for reading. Here's to Being the Secret Ingredient in your life!

Sunday, April 7, 2013

Quinoa and Kale Tabouleh


The Setting: Spring! Yes, it has finally sprung here in the formerly frigid Midwest. Fifty-one degrees Fahrenheit and mostly cloudy never felt so good.

The Soundtrack: Washing machine, dryer, dishwasher...oh, the sounds of productivity!

Steaming up the Oven: Just the memories of yesterday's valiant-but-wanting baking endeavor. I'll save the details for another post, but let's just say even bacon couldn't save it.

The Scenario: A frolic on the lighter side....

I can barely spell tabouleh (tabbouleh, tabbouli), let alone pronounce it correctly, and I certainly won't act like I'm an authority on where it originated or what the most traditional recipe for this delightfully refreshing dish might be.

Here is what I think I know: tabouleh comes from somewhere in the Middle East/Mediterranean, and it generally contains parsley (so underrated), bulgur wheat, tomatoes, olive oil, and lemon juice. Also, it is delicious.

My spin on this sublime spring salad or side substitutes quinoa for the bulgur wheat and adds lots of kale and extra herbs to punch up both the nutrition and the flavor.

Disclaimer: Quinoa is not necessarily healthier than bulgur. Cup for cup, bulgur is much lower in calories and higher in fiber, while quinoa has higher levels of important vitamins and minerals like iron, B-6, magnesium, copper, and phosphorus. Unlike bulgur, quinoa is gluten free and contains all nine essential amino acids (making it a complete protein)...so it all depends on what you're going for. Quinoa is what I generally have on hand, and I love the unique texture and subtle, nutty flavor it brings to this dish.


Quinoa and Kale Tabouleh
1/3 cup freshly squeezed lemon juice
1/4 cup extra virgin olive oil
1/2 tsp freshly cracked black pepper
1 tsp kosher salt
1/4 tsp crushed red pepper flakes
1/4 tsp granulated garlic
1 cup freshly cooked quinoa
5 leaves kale, woody stems removed
1 large handful each of fresh mint, basil, and flat-leaf parsley
1 small, white onion, finely chopped
1 pint cherry or grape tomatoes, halved

In a small bowl whisk together the first 6 ingredients (lemon juice through garlic). This is the dressing.

Place the quinoa in a large bowl and toss with half of the dressing. Set aside.

Place the kale and fresh herbs in a food processor, working in two batches if necessary, and pulse or process just until finely chopped.

Add the chopped kale and herbs to the quinoa bowl along with the onion, tomatoes, and remaining dressing. Stir to combine. Cover and refrigerate until ready to eat (preferably an hour or longer, as it gets better as it sits). Best consumed within 4 days.

This salad makes a great vegetarian meal on its own, but Hoosband likes to serve it as a side dish with lamb or top it with canned salmon for a heartier main-dish salad.


Thanks for reading! Here's to Being the Secret Ingredient in your life.


Tuesday, June 5, 2012

At Home with Jeni's Splendid Ice Creams, Part One: Backyard Mint


The Setting: A lovely apartment made even lovelier by ceiling fans and central air. Oh, how I will miss these luxuries come August!

The Soundtrack: Children playing boisterously somewhere nearby. Sounds like summer.

Steaming up the Oven: Muffins.

The Scenario: It's been a long time in the coming...but finally...at long last...I present to you...courtesy of Artisan Books...Jeni's Splendid Ice Creams at Home!


How can I even begin to express my love for this cookbook?

Hoosband and I first discovered Jeni's Splendid Ice Creams at Hot and Cold, a small coffee/tea/ice-cream/ice-pop shop in Nashville's Hillsboro Village.


With flavors such as Cherry Lambic, Salty Caramel, and Riesling Poached Pear (Hoosband's favorite), the artisan ice creams and sorbets had us clamoring for more with each enticing spoonful.

At first we assumed that Jeni's was native to Nashville, as most of Hot and Cold's offerings come from local artisans (Bongo Java coffee, Olive and Sinclair chocolate, and Las Paletas ice pops), but we were surprised to learn Jeni's is actually a proud product of the Buckeye State.

Whether your allegiance to Jeni's dates back to the original North Market shop in Columbus, Ohio, or you're just hearing about the deliciousness for the first time, you can now make Jeni Britton Bauer's incredible ice creams at home, thanks to this easy-to-follow cookbook that breaks down fan-favorite flavors for reproduction in the average household ice-cream maker.

What are Jeni's secrets?

There are several. Jeni is an ice-cream-science nerd, and proud of it.

She eschews the use of eggs as a thickener, favoring a one-two punch of corn (or tapioca) starch and cream cheese to keep ice crystals in check (meaning this homemade ice cream gets the green light for any pregnant mamas out there avoiding potentially uncooked eggs--woohoo!).

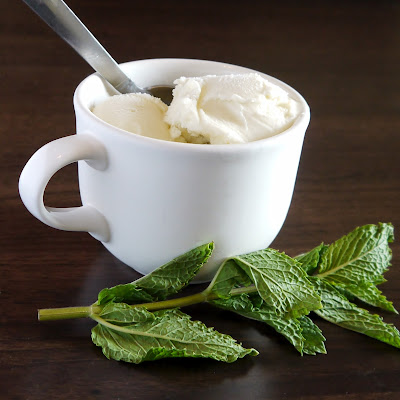
The main secret, however, is Jeni's focus on quality ingredients and fresh, natural flavors, as expressed in my current summer favorite, Backyard Mint, which literally derives its crisp, clean flavor from a big handful of mint leaves fresh from the backyard...or grocery store...you know, whatever works.

The Following recipe is excerpted with permission from Jeni's Splendid Ice Creams at Home by Jeni Britton Bauer. My notes are in red.


Backyard Mint Ice Cream
"Bright and sweet-scented muddled mint and fresh cream--completely refreshing."

2 cups whole milk
1 T plus 1 tsp cornstarch
1 1/2 ounces (3 tablespoons) cream cheese, softened
1/8 tsp fine sea salt
1 1/4 cups heavy cream
2/3 cups sugar
2 tablespoons light corn syrup
A large handful of fresh mint from your backyard or farmers' market, leaves roughly torn into small pieces.

PREP  Mix about 2 tablespoons of the milk with the cornstarch in a small bowl to make a smooth slurry.

Whisk the cream cheese and salt in a medium bowl until smooth. If you have trouble whisking the cream cheese, microwave it for 10-15 seconds to soften it a bit more.

Fill a large bowl with ice and water.

COOK  Combine the remaining milk, the cream, sugar, and corn syrup in a 4-quart saucepan, bring to a rolling boil over medium-high heat and boil for 4 minutes. Remove from the heat, and gradually whisk in the cornstarch slurry.

Bring the mixture back to a boil over medium-high heat and cook, stirring with a heatproof spatula, until slightly thickened, about 1 minute. Remove from the heat.

CHILL  Gradually whisk the hot milk mixture into the cream cheese until smooth. Gradually is the key word--if you add it all at once, it will be very difficult to get out all the lumps. Add the mint. Pour the mixture into a 1-gallon Ziploc freezer bag and submerge the sealed bag in the ice bath. Let stand, adding more ice as necessary, until cold, about 30 minutes.

Refrigerate to steep for 4 to 12 hours.

FREEZE  Strain out the mint. Pour the ice cream base into the frozen canister and spin until thick and creamy.

Pack the ice cream into a storage container, press a sheet of parchment directly against the surface, and seal with an airtight lid. Freeze in the coldest park of your freezer until firm, at least 4 hours.


Makes about 1 quart.

Excerpted from Jeni’s Splendid Ice Creams at Home by Jeni Britton Bauer (Artisan Books). Copyright 2011.


Thanks for reading! Here's to Being the Secret Ingredient in your life.