Pages

Monday, April 23, 2012

Asparagus, Leek, and Goat Cheese Tartlets


The Setting: A day far too pretty not to be enjoyed outdoors.

The Soundtrack: Disney radio on Pandora.

Steaming up the oven: Nothing right now, but I'm contemplating cookies....

The Scenario: Last night's cooking class was outstanding!

Yesterday Hoosband and I had the privilege of celebrating Earth Day making French tarts, featuring farmer's market finds and the bounties of spring.

I completely regret not getting any action shots of the class, but it was a great group and a great time.

For something on the savory side, we made Asparagus, Leek, and Goat Cheese Tarts with a simple side salad of baby arugula in an Orange-Balsamic Vinaigrette.

Since we only used the tops of the asparagus spears for our tarts and we discarded the overly woody ends, the asparagus "middles" were tossed with a little balsamic vinegar, olive oil, salt, and pepper; roasted; and wrapped by bundles of three in paper-thin sheets of prosciutto--the perfect appetizer to munch on as we baked.

For dessert, delicious Vegan Berry Tarts surprised the class with a tofu-based filling every bit as good as traditional French pastry cream.


Our vegan tart dough was a little crumbly (turns out I left 2 of the 4 T of tofu out of the dough...sorry y'all!), but we churned out perfect little tart shells nonetheless.

Thanks so much to everyone who came to the class. I hope you enjoyed it as much as I did!

Orange-Balsamic Vinaigrette
These measurements are approximate. I usually just wing it and taste it with a leaf of arugula to make sure it's how I want it before tossing it with the rest of the leaves.

1 T orange marmalade or leftover glaze from Vegan Berry Tarts (I used Smuckers)
1 tsp kosher salt
1/2 tsp freshly cracked black pepper
1/2 cup balsamic vinegar
1/4 cup olive oil

Whisk all ingredients together in a large bowl until smooth, add greens of choice (I prefer baby arugula), and toss gently to coat.


Asparagus, Leek, and Goat Cheese Tarts
This recipe looks really long and intimidating, but it is much easier than you think!

~for the crust~
1 1/2 sticks cold unsalted butter
3-6 T cold water
1 2/3 cups whole wheat pastry flour (I used Bob's Red Mill)
1 tsp sugar
1 tsp kosher salt (or 1/2 tsp fine-grain salt)

~for the filling~
8 oz fresh goat cheese
2 large eggs
1-2 T butter
3 leeks
freshly cracked black pepper, to taste
1 1/2 tsp kosher salt (3/4 tsp if using fine-grain), divided
2 cups washed and rinsed asparagus tops, or as much as desired, for topping*

Cut the butter into 1/2-inch cubes, and place in the freezer (for at least 5 minutes) until needed. Place the water in the freezer in a small cup or bowl.

Place a large piece of parchment paper or plastic wrap on your counter.

Fit a large-basined food processor with the dough blade and add the flour, sugar, and salt. Pulse a few times to combine (if doing this by hand, whisk dry ingredients together in a medium-sized bowl).

Add the butter from the freezer to the processor and pulse until the mixture looks like coarse sand, with the largest pieces roughly the size of peas (if doing this by hand, use two forks to cut the butter into the flour, ideally striving to attach butter to every grain of flour without melting the fat).

With the processor on, add 1 T of ice water at a time just until the dough starts to comes together and holds together well when a small bit is squeezed with your fingers (if doing this by hand, continue to use the forks, or switch to a wooden spoon or silicone spoonula).

Turn the dough out onto the parchment or plastic, gently form into a disk, handling minimally, and wrap up tightly in the parchment or plastic. Let chill in the fridge for at least 1 hour or up to 8 (you can freeze the dough at this point if making ahead, but just be sure to thaw in the fridge overnight before using).

Preheat the oven to 350 degrees F, and line 20 standard-sized muffin cups with muffin liners--do not grease.

Roll out the dough between two sheets of parchment paper to a 1/8-1/4-inch thickness (just a little thinner than what you see below).


Use a 3-inch round cookie cutter or jar lid to cut out as many circles as you can, re-rolling dough as necessary (you should end up with 20 circles and a tiny nugget of scrap dough).

Carefully fit each circle into a prepared muffin cup. Poke the bottom of each shell all over with the tines of a fork, and bake at 350 degrees F for 20 minutes or until cooked through but still pale-ish in color. Place on cooling racks and allow to cool completely. Increase oven temp to 375.


To make the filling, set the goat cheese and eggs out at room temperature while you prepare the leeks.

Thinly slice the white and very light green parts of the leeks and rinse very well in cool water to remove any grit. If your leeks look dirty, it may be necessary to set them in a strainer in a large bowl of cold water and let them soak for 5-10 minutes. Discard the darker green parts of the leeks.

Place the rinsed leeks, butter, and black pepper in a large saute pan over med-high heat. Cover and cook 10 minutes. The leeks should be just beginning to blacken in parts along the bottom of the pan--don't worry, this is what you want. Stir in 1/2 tsp kosher salt, reduce heat to low, cover, and cook 10 minutes more. Remove from heat, partially uncover, and allow to cool.


Beat together the goat cheese, eggs, and remaining kosher salt until smooth and creamy. Add the leeks and beat just to incorporate.

Spoon the leek mixture into each prepared tart shell so that it fills the basin and covers the top edges.

Stick 1-3 asparagus tops into the centers of each tart, or decorate as desired.

Bake at 375 degrees F for 25 minutes or till cooked through and very lightly golden on top.

Finish with a sprinkle of coarse black pepper, if desired. Serve warm, room temperature, or cold. Store leftovers in an airtight container in the fridge for up to one week.


*To do the swirly design seen in the first photo, use a mandolin to thinly slice long, fettuccine-like strips of blanched asparagus; tightly roll up one strip at a time, and immediately press into the filling. continue until you have achieved your desired design. I also tried simply mounding up the asparagus ribbons on top of the tarts, but this was rather unpleasant to consume.


Thanks for reading! Here's to Being the Secret Ingredient in your life!

Sunday, April 22, 2012

Vietnamese Chicken Salad


The Setting: A somewhat rainy, somewhat chilly spring day in good ole' South Bend.

The Soundtrack: Cars and buses breezing by; Oia's dreamy breathing.

Steaming up the Oven: Leftover Ham and Kale pizza.

The Scenario: Did the Crispy Rice Chips, Grilled Tomato Salsa, and Spicy Cucumber Salad whet your appetite for more of Alford and Duguid's Southeast-Asian finds?

If so, you're in luck, because today we're headed to Vietnam for ga xe phai, or Vietnamese Chicken Salad, a hot, sour, salty, and sweet entree that'll have you packing your bags and stamping your passport by the time you can ask for seconds.

Vietnamese Chicken Salad may be something you can find at your local Asian-bistro chain in the States, but that doesn't make it any less authentic. Alford and Duguid found this version many years ago at a mom-and-pop establishment in Vietnam, and to this day it's one of their favorite dishes.

One of the things that makes this dish so special to the authors is the inclusion of rau ram, or Vietnamese coriander, a "strong, distinctive-tasting herb" (Hot Sour Salty Sweet, p197) that is not at all reminiscent of the coriander we in the States know as cilantro.

Unfortunately, I have been, as of yet, unable to track down any rau ram in my general vicinity.

Fortunately, the authors suggest a few alternatives. I used a mixture of mint and sweet basil in my salad, and the combo was incredible.

Hoosband and I served the salad atop freshly steamed brown rice, which helped diffuse a bit of the heat from the Serrano peppers and created nice contrasts of hot and cold and soft and crunchy...though honestly, I could easily eat the whole bowl of this stuff by itself if left to my own devices.

With saltiness from the fish sauce and vinegar, sweetness from the sugar, sourness from the lime juice, and heat from the chiles, this dish is a prime example of Southeast-Asian cuisine's mastery of combining opposing-yet-complementary tastes in a single dish.

Easy...tasty...healthy...what more can you ask for?


This recipe is reprinted with permission from Artisan Books; my notes are in red.

Vietnamese Chicken Salad with Rau Ram (ga xe phai --Vietnam)

2 pounds chicken legs and/or breasts, rinsed (see Note below) I used 1 pound boneless, skinless chicken breasts; also I never rinse my chicken--it gets the juces everywhere and creates more opportunities for contamination.
3 tablespoons fresh lime juice
3 tablespoons Thai or Vietnamese fish sauce
2 T rice or cider vinegar
1 tsp sugar, or to taste
2 to 3 bird or Serrano chiles, minced I used 2 Serrano with the seeds and membranes
3 shallots, thinly sliced
1 cup bean sprouts, rinsed I omitted these because my market did not have any at the time
2 cups shredded napa cabbage, or substitute finely shredded Savoy cabbage I used 3 cups of packaged cole slaw shreds with carrot and red cabbage
2/3 cup Vietnamese coriander leaves (rau ram), coarsely torn, or substitute Asian basil or sweet basil leaves, torn, or 1/2 cup finely chopped mint leaves plus extra whole leaves for garnish I used half mint and half sweet basil
freshly ground black or white pepper

Place a heavy pot with about 4 cups water in it on the stove to boil. When simmering, add the chicken and poach until the juices run clear when the flesh id pierced with a skewer, 25 to 30 minutes. Remove the chicken from the cooking liquid and let cool; reserve the broth for another purpose. (The chicken can be cooked ahead, and stored, once cooled to room temperature, in a well-sealed container in the refrigerator, for up to 48 hours. Before proceeding, bring back to room temperature.) My boneless, skinless breasts took about 25 minutes at a very gentle simmer.

Remove and discard the chicken skin, lift the meat off the bones, and pull into shreds. There should be about two cups of meat.


In a small bowl, stir together the lime juice, fish sauce, vinegar, sugar, chiles, and garlic. Separate the shallot slices into rings, then add to the dressing. Let stand for 30 minutes, if you have time. I did this step before I put the chicken on to simmer so the shallots could hang out in the dressing as the chicken poached.


Blanch the bean sprouts in boiling water (or the reserved chicken broth) for about 30 seconds, then refresh with cold water and drain thoroughly. In a large bowl, combine the chicken, bean sprouts, cabbage, and herbs. Pour the dressing over and toss gently to blend well. I mixed up the dressing in a large bowl so I could add everything else straight to the dressing without dirtying extra dishes.


Mound the salad decoratively on a plate. Grind pepper over if you wish, and garnish with herb leaves.

Serves 4 with rice or noodles.

Note: If you already have 2 cups or more of cooked chicken, you can use it. Just shred it into bite-size pieces, then mix up the dressing and assemble the salad as directed. This salad is traditionally served with deep-fried shrimp chips. We like it simply with rice or noodles.


Excerpted from Hot Sour Salty Sweet by Jeffrey Alford & Naomi Duguid (Artisan Books). Copyright 2000.
***

I hope you are enjoying our trip down the Mekong. Stay tuned for more tasty travels and our final entree from Hot Sour Salty Sweet, coming soon!

Thanks for reading! Here's to Being the Secret Ingredient in your life.

Wednesday, April 18, 2012

Spicy Cucumber Salad


The Setting: Wednesday, already?

The Soundtrack: Just the gentle sleep-sounds of my little Oia-bug.

Steaming up the Oven: Nothing yet, but who knows what the night will bring?

The Scenario: The journey down the Mekong continues!

When the authors of Hot Sour Salty Sweet, Jeffrey Alford and Naomi Duguid, first began exploring Southeast Asia in the 1970s, they were limited to visiting Thailand and Myanmar (Burma) because of wartime restrictions prohibiting outsiders from entering China, Laos, Vietnam and Cambodia.

One of the first formerly restricted areas to loosen its restrictions after the war was the Yunnan Province of China, where Alford and Duguid picked up today's tasty tidbit, layou huanggua, or Spicy Cucumber Salad.

This snappy salad that celebrates the tastes of hot, salty, and sweet is as simple to make as it is to inhale.

I snacked on some of the crisp cukes immediately after dousing them with the hot oil, as the recipe suggests, and Hoosband and I savored the rest, slightly softened, as a side dish with some burgers later that night--I know, probably not what the authors intended, but delicious nonetheless.

The only problem I ran into with this recipe was an inability to source Sichuan peppercorns.

I subbed in black peppercorns (no relation to the Sichuan, but I had them on hand) and used an entire jalapeno (instead of the half called for in the recipe) to make up for some of the lost heat. I considered throwing in a dash of Chinese Five Spice powder, since Sichuan peppercorns are one of its five spices, but I held back. Something to try next time!

This recipe is reprinted with permission from Artisan Books; my notes are in red.


Spicy Cucumber Salad (layou huanggua--Yunnan)
In this salad the cucumbers are first dressed with a little vinegar, then dressed again with hot oil. The contrast of smooth chile-warm oil and crisp fresh cucumber is a knockout. The salad has a mild but not aggressive heat made with the 5 dried chiles. Note that the cucumbers will soften if they're left standing, so don't pour the hot oil over them until just before you with to serve the salad.

1 large or 2 medium European cucumbers (1 to 1 1/4 pounds) I used 4 European cucumbers, as I felt mine were especially small
2 T rice vinegar
1 T sugar
2 T peanut or vegetable oil
5 Thai dried chiles, or 3 for milder heat
1/2 jalapeno, minced I minced and used the whole pepper with all the ribs and seeds
7 Sichuan peppercorns I used black peppercorns, but they are not a legitimate substitution from what I've read
1/2 tsp salt
1/4 cup packed torn coriander leaves (cilantro; I finely minced mine)

Peel the cucumber, leaving some thin strips of peel on if you wish, for a decorative effect.


Cut lengthwise into quarters and discard the seeds. I did not discard the seeds, as that would have left me with very little cucumber.


Use the flat side of a cleaver or large knife to bash the cucumber pieces several times.


Cut the pieces lengthwise into thinner strips, then cut crosswise into 2-inch lengths.


Place in a medium bowl. In a small bowl, mix together the vinegar and sugar. Pour over the cucumber, mix well, and set aside.


Place a wok or skillet over high heat. When it is hot, add the oil and swirl to coat the pan.


Toss in the dried chiles, jalapeno, and peppercorns and stir-fry for 20-30 seconds. Pour this over the cucumbers. Sprinkle on the salt and mix well.

Mound the salad in a shallow bowl. Sprinkle on the coriander leaves and serve immediately.

Serves 4 as a salad or as one of many dishes in a rice meal.

Note: The traditional way to make this uses 3 tablespoons of oil, giving a well-oiled texture that may be undesirable. If you wish, try both and see which you prefer.

Excerpted from Hot Sour Salty Sweet by Jeffrey Alford & Naomi Duguid (Artisan Books). Copyright 2000.


Stay tuned for more tasty travels down the Mekong with Alford and Duguid, coming soon!

Thanks for reading! Here's to Being the Secret Ingredient in your life.

Monday, April 16, 2012

The Journey Down the Mekong River Begins!


The Setting: An apartment in need of a good vacuuming, as grains of white rice and other bits of debris from the weekend's culinary adventures are surely lurking in places where a curious, crawling monster is certain to find them.

The Soundtrack: Winds, raging outside my open window to a tune that the wildly rollicking tree limbs never knew they could play.

Steaming up the (microwave) Oven: Water for tea; It's a Lemon Zinger kind of day.

The Scenario: If you read the reference in my last post to a sheet of rice in my oven, you may have wondered what that was all about. You may have even wondered why the heck it was taking me so long to post about it as promised.

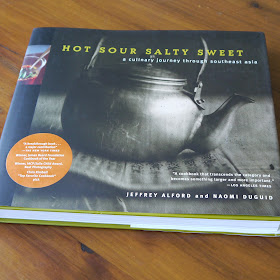
Well, today I am pleased to answer those questions, and in doing so, to invite you on a tasty trip down the Mekong River, as we dive into Hot Sour Salty Sweet (a Culinary Journey through Southeast Asia) by Jeffrey Alford and Naomi Duguid.


When I began to peruse this enormous culinary tome that reads half like a cookbook and half like an anthropological travel guide through Southeast Asia, I could tell it would take a while to select the five or so recipes I'd post on the blog.

Where to begin?!

Should I approach the recipe selection geographically, beginning with a dish from China or Myanmar and working my way down through Laos, Thailand, Cambodia, and Vietnam?

Should I stick with one region and explore it in depth?

I decided, at last, to approach the task as the book does, organizing recipes into standard categories of appetizers, salads, main courses, and desserts, and celebrating the ties the unique regional cuisines share with each other through the artful mingling of tastes: hot, sour, salty, and sweet.

Today I offer you a delicious appetizer of nam mi he man, or Grilled Tomato Salsa, from the Dai area of Southern Yunnan, China; and khao tang, or Crispy Rice Crackers, from Laos and Thailand.

These dishes, as you would expect, primarily play up the tastes of salty and hot, but charring the garlic and tomatoes before making the incredibly simple salsa helps to slightly concentrate and highlight their inherent sweetness as well.

With a flavor somewhat reminiscent of homemade popcorn, the Thai-Lao Crispy Rice Crackers are a delightful alternative to tortilla chips...if, that is, you can manage to make them.

It took me three tries (and most of the weekend), but my final batch was a big success. Check out the end of the post for my blooper reel and tips to help you avoid my blunders.

The following recipes are reprinted with permission from Artisan Books; I have added my notes in red.


Grilled Tomato Salsa (nam mi he man--Dai area of Southern Yunnan)

4 cloves garlic
3 medium juicy tomatoes
1 to 2 Serrano or bird chiles, minced (optional) I used 1 Serrano with the seeds and membranes
1/2 tsp salt, or to taste
1/2 cup chopped coriander (cilantro)

Heat a charcoal or gas grill. Place the garlic and tomatoes on a fine-mesh rack on the grill and grill until well blackened in spots on one side, then use tongs to turn them. Continue to cook, turning the tomatoes as necessary to expose all sides to the heat, until the garlic and tomatoes are well scorched and softened, 8-10 minutes. Alternatively (I used this method), heat a heavy skillet over high heat. Place the garlic and tomatoes in the skillet and lower the heat to medium-high.


As soon as the garlic and tomatoes blacken on one side, use tongs to turn them and cook, until well scorched and softened, 8 to 10 minutes.


Peel the garlic, chop or mash, and place in a food processor. Coarsely chop the tomatoes, saving the juice, and add the tomatoes and juice to the processor. Add the chiles, if using, and pulse several times to blend; do not process to a puree. Transfer to a bowl and stir in the salt. Store refrigerated no more than 2 days.

Stir in the coriander just before serving.

Makes 1 1/2 cups salsa.

Excerpted from Hot Sour Salty Sweet by Jeffrey Alford and Naomi Duguid (Artisan Books). Copyright 2000.


Thai-Lao Crispy Rice Crackers (khao tang--Laos, Thailand)

2 cups or more just-cooked jasmine rice I used 2 cups "enriched white long grain rice"
Peanut or other oil for deep-frying I used peanut oil

Use warm to hot rice. With a rice paddle or wooden spoon, spread rice onto a lightly oiled baking sheet to make a layer about 1/2 inch thick. Press down with your paddle to compact the rice so that it sticks together. Don't worry about ragged edges, as you will be breaking up the rice into large crackers after it dries. My rice was very sticky and hard to spread out; with my final batch I lined the baking sheet with parchment paper, and I found that if I wetted my hands and used them to gently pat out the rice, re-wetting as necessary, the rice was easier to work with--just be careful, as the rice is hot. Also, press the grains so that they stick together, but avoid compacting the grains too much, as this results in tougher crackers.


Place the baking sheet in a preheated 350-degree F oven and immediately lower the temperature to 250 degrees F. Let dry for 3 to 4 hours. The bottom will be lightly browned. I left my final batch in for 2 1/2 hours. The top was drier and more off-white in color, while the bottom was stickier and whiter.

When the rice is dry, lift it off the baking sheet in pieces.


Break it into smaller pieces (about 2 inches across, or as you please), then store well sealed in a plastic bag until ready to use. I waited a day before frying my successful batch.


To fry the crackers, heat 2 to 3 inches of peanut oil in a large well-balanced wok, deep fryer, or large heavy pot to 325 to 350 degrees F.

To test the temperature, drop a small piece of fried (dried) rice cake into the oil: It should sink to the bottom and immediately float back to the surface without burning or crisping. Adjust the heat as necessary.


Add several pieces of dried rice cracker to the hot oil and watch as the rice grains swell up. When the first sides stop swelling, turn them over and cook on the other side until well puffed and just starting to brown (about 30 seconds in all). Use a slotted spoon to remove them immediately to a paper towel-lined platter or rack to drain.


Gather up any small broken pieces; these make delicious croutons. Fry the remaining pieces of rice cracker the same way, making sure that the oil is hot enough each time. Serve hot and fresh, to accompany soup or salsa. Store in a cool place for no more than a week.


Excerpted from Hot Sour Salty Sweet by Jeffrey Alford and Naomi Duguid (Artisan Books). Copyright 2000.

Bloopers

I admit I've been on Hoosband-enforced rice-cooking probation for most of my marriage due to my lack of finesse with the finicky grain. So if someone was going to mess this recipe up, it's no surprise that it would be me.

Mistake number 1: I disregarded the recipe's call for jasmine rice and used the generic white rice I had on hand. I got the recipe to work in the end, but had I followed instructions from the beginning, perhaps it wouldn't have taken all weekend.

Mistake number 2: Speaking of following directions, if I'd only followed those printed on the bag my generic white rice came in, I might have avoided the gluey mess that was batch one.


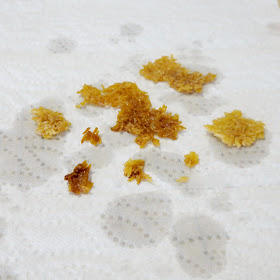
You want to start with rice, not rice pudding. I boiled too much rice in too much water for too much time, spread the starchy mess in a well-greased jellyroll pan, and found THIS 3 hours later:


You are looking at one of TWO midnight-blue alien rice circles that materialized while this bad boy was in the oven. Someone call Mulder and Scully.

Freakish occurrences aside, it's likely sheet one would have been scrapped anyway, as the top and edges were a shatterable sheath atop a gross, goopy interior.

Once I made my peace with the instructions on the side of the bag and produced something recognizable as rice, I thought I had the recipe tied up with a bow. I used less rice and spread it out on an un-rimmed baking sheet to facilitate the drying.


I popped this sheet in the oven and came back 3 1/2 hours later to a dry and spot-free sheet of rice. Woohoo!

Mistake number 3: Despite promising appearances, it soon became clear the rice had over-dried. The crackers sank to the bottom of the frying oil like anchors and never rose back up. Eventually I fished them out to give one a taste.


Not something I recommend; my teeth still feel violated.

However, biting into savory success in round three made up for all the failures.

My suggestions: Follow directions when making your rice, use wetted hands to gently pat out the rice on a parchment-paper-lined unrimmed baking sheet, and check the rice after 2 1/2 hours--it should be just dry enough that you are able to lift up and break off large pieces as directed.

May your first batch be as tasty as my third!


Stay tuned for more exciting exerpts from this delightful cookbook as the journey down the Mekong continues.

Thanks for reading! Here's to Being the Secret Ingredient in your life.

Thursday, April 12, 2012

Eat Mor Chikin


The Setting: Not a cloud in the sky.

The Soundtrack: Birds squawking away outside the window.

Steaming up the Oven: A sheet of rice. More on that next time.

The Scenario: Uh-oh. Chick-fil-A is even more wonderful than I thought.


Disclaimer: what you are about to read is an unapologetic, and definitely unsolicited, love letter to a fast-food chain. And yet, I encourage you to read on.


Hoosband and I eat fast food very rarely--far, far, less than he would like, and a little more than I'd like to admit--mostly on road trips.

There are very few fast food establishments whose food I actually crave on a regular basis, but Chick-fil-A is one of them.

Chick-fil-A founder, Truett Cathy, was the keynote speaker once at a philanthropy conference I attended in college, and his humble message of giving made me proud to be a Chick-fil-A addict.

The warm, and somehow seemingly genuine, welcome I receive every time I approach a Chick-fil-A counter or drive-through, no matter the location, season, or time of day, affirms my addiction.

And when I unfailingly get a craving for a chicken biscuit every Sunday, the "closed" sign I see, though saddening, both deepens my respect for the establishment and keeps my addiction in check.

After the introduction of the spicy chicken sandwich, I didn't think it was possible that I could love Chick-fil-A any more deeply.

But the other day I went into a Chick-fil-A and saw a basket overflowing with little to-go cups of Cheerios.

Behind it, a sign read roughly:

Parents,

Are your children too small to Eat Mor Chikin?

Please help yourself to some free Cheerios, on us.

As a parent who's been breaking off pieces of pancake to pacify the little one at breakfast joints and toting around "banana puffs" to dole out when mommy and daddy do lunch, I almost started clapping when I saw this thoughtful gesture.

I'm not sure if the Cheerios are a nationwide initiative for Chick-fil-A, or simply something a local store thought up, but either way, I am impressed.

As I'm certain other moms with wee ones would also appreciate Chick-fil-A's consideration, I simply had to share.


Thanks for reading! Here's to Being the Secret Ingredient in your life.

Wednesday, April 11, 2012

Back in the Straddle Again

The Setting: Beautiful blue skies, punctuated with white, puffy clouds.

The Soundtrack: Oia's precious babbles.

Steaming up the Stove-top: Brown rice.

The Scenario: Every so often I feel like I'm in a good rhythm, like I've hit my stride, like I can actually put a check next to every item on my to-do list. Other times, I'm straddling the Twister mat of my life, one hand on baby, the other hand on blog, waiting for the spinning arrow to dictate my next move, and hoping my balance is better than my quivering muscles suggest.

It's been a game of Twister lately.

Between the everyday coos and poos of the little one, a trip home to Nashville for Easter, and preparing (myself, mentally, and the apartment, physically) for two big moves this summer (more on that soon), the blog has been a little neglected.

I've been working through the fridge and freezer, trying to make sure we knock out as many of the perishables as we can before we pack things up in May, and getting the apartment organized.

I am also, theoretically, working on a cookbook.

But fear not, for I have many exciting bloggables in the works!

Courtesy of Artisan Books, I will be cooking from and reviewing two very intriguing cookbooks in the coming weeks.

Hot, Sour, Salty, Sweet (a Culinary Journey through Southeast Asia) by Jeffrey Alford and Naomi Duguid will take us down the Mekong River, with recipes like Grilled Tomato Salsa and Thai-Lao Crispy Rice Crackers, Spicy Cucumber Salad, and Fried Bananas.

Jeni's Splendid Ice Creams at Home by Jeni Britton Bauer will expose us to a world of creamy, frozen ecstasy and exotic flavor combinations, replicating the country's best artisan ice-creams, frozen yogurts, and sorbets in the comfort of our own kitchens.

Also stay tuned for a post on my Earth Day cooking class, featuring Vegan Berry Tarts and the long-awaited recipe for Asparagus, Leek, and Goat Cheese Tarts!

Thanks for reading! Here's to Being the Secret Ingredient in your life.

Friday, April 6, 2012

You Little Tart!

The Setting: Beautiful blue skies!

The Soundtrack: GCB on Hulu.

Steaming up the oven: Nada...but I'm contemplating pizza.

The Scenario: Testing recipes for a cooking class I'm teaching on the 22nd (Earth Day).

Since it's finally spring, and the markets are beginning to come alive with the vibrant colors and welcome flavors of juicy berries and fresh asparagus, I figured...

What better way to celebrate spring than to proudly flaunt its bounty atop French tarts?

For something savory, Asparagus, Leek, and Goat Cheese Tarts.

And for something sweet, berry tarts--but not just any berry tarts--Vegan Berry Tarts!

My test run for the asparagus tarts went off without a hitch, but the vegan tarts presented a couple of hiccups.

My first fling with the butterless tart shells resulted in cookie-shaped mini-scones with a flavor and mouthfeel somewhere between super-crumbly shortbread and flaky croissants--pleasant enough, but not what I was going for.

A reduction in the amount of coconut oil and the addition of just a touch of tofu yielded an easy-to-work-with dough and perfect vegan tart shells.

As for the filling, the combination of orange marmalade, vanilla bean, powdered sugar, and tofu, when blended to oblivion, provided a surprisingly dead-on substitution for traditional pastry cream.

I'm shocked, and pleased, to say I could just about replace the real pastry cream and tart shells in my repertoire with the simpler and more healthful vegan versions from here on out.


Vegan Berry Tarts
The crust and filling for these tarts share one package of tofu. For the crust, do your best to measure level tablespoons of the coconut oil and tofu. Using measuring spoons instead of measuring cups keeps the oil and tofu in small increments that will break up more easily in the food processor without over working the dough or melting the fat.

~for the crust~
8 T coconut oil, room temp
4 T (from a 12.3 oz package) firm tofu (I used Silken)
1 1/3 cup whole wheat pastry flour
1/3 cup powdered sugar
1 tsp kosher salt
3 T non-dairy dark chocolate chips

~for the filling~
remainder of the package of tofu
1/4 cup orange marmalade
1/2 cup powdered sugar
1 vanilla bean
assorted berries for topping, cleaned and patted dry if necessary

~for the glaze~
1/2 cup orange marmalade
2 T water

Preheat the oven to 350 degrees F., lay a sheet of parchment paper on your counter, and line two standard size, 12-cup muffin pans with muffin liners.

Measure out the coconut oil and the tofu for the crust, tablespoon by tablespoon, into a cup or small bowl. Place in the freezer just while you prepare the dry ingredients.

Place the pastry flour, 1/3 cup powdered sugar, and salt in a food processor fitted with the dough blade and pulse several times to combine. Remove the coconut oil and tofu from the freezer, use a knife to break up any large clumps, and add to the flour mixture. Pulse until dough comes together in one large ball.

Turn dough out onto the parchment, pat into a flattened disk, wrap up in the parchment, and let rest in fridge for 10 minutes.

Unwrap dough, place another sheet of parchment on top, and roll out to about 1/8 of an inch. Use a jar lid or 3-inch biscuit cutter to cut out 24 circles, re-rolling as necessary. Carefully fit each circle into a muffin cup, pressing gently to avoid tearing or excess stretching. Prick the bottoms of each cup all over with a fork, and bake at 350 for 16 minutes, rotating pans halfway through. Cool completely. Remove tart shells from muffin liners.

Place the dark chocolate in a microwave-safe bowl, and heat for 30 seconds. Stir until smooth. Use a pastry brush to paint a thin layer of chocolate in the bottom of each tart shell. Let set completely at room temperature.

Place the remaining tofu, 1/4 cup marmalade, and 1/2 cup powdered sugar in a blender or in a small-basined food processor fitted with the metal blade. Split the vanilla bean, scrape out the seeds, and add them to the filling ingredients (the pod can be stashed in a bag of sugar or added to a bottle of vanilla extract to boost its flavor). Blend or process till completely smooth and creamy.

Fill each tart shell with the pastry cream and arrange berries on top as desired. Place tarts in a baking pan or wide plastic container, and let chill in the fridge while you prepare the glaze.

Whisk together 1/2 cup marmalade and 2 T water in small saucepan over medium heat. Bring to a gentle boil, reduce heat to low, and cook 2 more minutes. Strain if desired. Cool 5 minutes.

Use a clean pastry brush to gently paint the tops of the tarts with glaze. Refrigerate tarts 20 minutes or until ready to serve. Tarts will keep in the fridge for up to 3 days.


Thanks for reading! Here's to Being the Secret Ingredient in your life.