Pages

Monday, December 19, 2011

Peppermint Bark Meringues


Don't forget to enter the "Good Cookie" spatula giveaway--details at bottom of post!

The Setting: My mommy's house.

The Soundtrack: The holiday playlist on my mom's iPod.

Steaming up the Oven: Peppermint Bark Meringues.

The Scenario: Baking for two parties, and, well, just for fun.

Did I tell you I am obsessed with using peppermint bark as an ingredient right now?

I also have limited time and a bag of leftover (and scraggly looking) peppermint bark to which I'd like to give new life, so the path is clear: Peppermint Bark Meringues.

Meringues are spectacular in their versatility (i.e. meringue ghosts) and simplicity--well, they can be kind of complicated (Italian and Swiss), but the way I do it (French) is a cinch.

Also they are fat free--before you start adding chocolate, anyway--which is definitely a welcome bonus around the holidays.

These Peppermint Bark Meringues are crisp on the outside and marshmallowy on the inside, with a burst of melting chocolate and mint crunch.

So without further ado....


Peppermint Bark Meringues
3 egg whites
1/4 tsp cream of tartar
1 tsp vanilla
3/4 cups granulated sugar
1 cup crushed peppermint bark (place peppermint bark in a gallon-sized zip-top bag, place over a large cutting board, and use a wooden mallet to crush the bark into small pieces)


Preheat oven to 275 degrees F. Line two baking sheets with parchment paper or brown paper (a new use for any paper grocery bags you may have hanging around).

With an electric mixer on med-high speed, beat egg whites, cream of tartar, and vanilla just till stiff peaks form.

With the mixer still on, add sugar 1 T at a time, allowing it to be beaten into the mixture after each addition. Use a rubber spatula to fold in the crushed peppermint bark.


Transfer meringue to a pastry bag and pipe little "kisses" onto the parchment or brown paper, spacing about 1/4-inch apart.


Each cookie should contain about 2 T of the meringue mixture.


Bake at 275 degrees F for 15 minutes. Larger meringues may require more time, while smaller meringues will require less. Allow to cool completely before carefully removing from the paper--in some spots the chocolate or peppermint may want to stick to the paper, so not every cookie will remove cleanly, but you should be able to maintain the structure of the cookie.


Don't forget to enter the OXO "Good Cookie" Spatula Giveaway!


This spatula rules, and it will be given away FREE to one of my lucky readers! OXO is even paying for the shipping!

To enter the giveaway, simply...

1. Become a follower of Being the Secret Ingredient either on the blog, on Facebook, or on Twitter.

2. Then tell Being the Secret Ingredient your all-time favorite cookie either by Tweeting @BeingTSI, commenting on the blog, or leaving a wall post on our Facebook page. Increase your chances by doing all three!

Must enter by January 15, 2012. Winner will be selected by a drawing and announced January 16. Winner must be a resident of the 48 contiguous United States.

For more information on the OXO "Good Cookie" Spatula, see this post: Cookies for Kids' Cancer--And a Giveaway!

For more info on Cookies for Kids' Cancer, visit www.cookiesforkidscancer.org.

Sunday, December 18, 2011

Peppermint Bark Cupcakes

Don't forget to enter the "Good Cookie" spatula giveaway! Details at bottom of post!


The Setting: The air outside may be cold and damp, but the air inside smells like chocolate!

The Soundtrack: Amy Grant holiday radio on Pandora.

Steaming up the Oven: Dark Chocolate Cupcakes.

The Scenario: Because it is the holiday season, because I am newly obsessed with the theme of peppermint bark, and because I have committed to bringing two dozen cupcakes to a party tonight, dark-chocolate cupcakes, peppermint-flecked whipped-white-chocolate ganache, and spears of peppermint bark will come together to make sweet, sweet, Peppermint-Bark-Cupcake love.


Step one: Peppermint Bark


See last post for the how-to. Reserve 1/4 cup of very finely crushed peppermints and powdery bits.

Step two: White Chocolate Ganache

1 pint heavy whipping cream
12 oz white chocolate chips (for an airier frosting, or 16 oz for a thicker, richer frosting)
1/4 tsp pure vanilla extract

In a large microwave-safe bowl or 4-cup Pyrex measuring cup, microwave cream for 70 seconds. Stir and microwave an additional 70 seconds. You want the cream to be hot enough to melt the chocolate, but not quite to a simmer.

Whisk in the white chocolate, whisking till completely melted. Whisk in the vanilla. Allow to cool completely at room temperature. Cover with plastic wrap and chill in the fridge overnight or in the freezer for two hours.

Step three: Dark Chocolate Cupcakes


Make dark chocolate cupcakes and allow to cool completely.

The recipe I use comes from Cooks Illustrated and includes both cocoa powder and semisweet chocolate for deep, dark chocolaty-ness and butter and sour cream for richness. Unfortunately, it is not my recipe, so I cannot disclose it to you, but if you are an online subscriber of Cooks Illustrated, definitely check it out! Otherwise, I'm sure a chocolate cake mix or your favorite chocolate cupcake recipe will be perfect.

A totally unsolicited note on Cooks Illustrated: If you are not an online subscriber to Cooks Illustrated (the publication from the folks at America's Test Kitchen), you can generally sign up for a free 14-day trial, which is how they got me. If you are like me, though, you'll go ahead and let your credit card be charged once your trial is up, as Cooks Illustrated is one of, if not THE best resources online for TESTED and perfected recipes, kitchen-gadget recommendations and tips, and they have absolutely no advertising, which is why they charge a subscription fee.

Step four: Assembly

Remove white chocolate mixture from fridge and whip with an electric mixer on low one minute. Increase the speed to med-high and whip till fluffy and able to hold stiff peaks. Avoid overbeating, which could cause the mixture to separate.


Break up/fluff reserved 1/4 cup peppermint powder with a fork if it is caking together.

With mixer on low speed, pour peppermint powder into the white chocolate ganache, whipping just till incorporated.

Transfer icing to a pastry bag and pipe onto cooled cupcakes.


Stick a spear of peppermint bark into the top of each iced cupcake. Enjoy!


Don't forget to enter the OXO "Good Cookie" Spatula Giveaway!


This spatula rules, and it will be given away FREE to one of my lucky readers! OXO is even paying for the shipping!

To enter the giveaway, simply...

1. Become a follower of Being the Secret Ingredient either on the blog, on Facebook, or on Twitter.

2. Then tell Being the Secret Ingredient your all-time favorite cookie either by Tweeting @BeingTSI, commenting on the blog, or leaving a wall post on our Facebook page. Increase your chances by doing all three! I have been told some people have had trouble leaving comments on this blog. If you have any issues commenting, always feel free to comment on my Facebook page, tweet me, or email me!

Must enter by January 15, 2012. Winner will be selected by a drawing and announced January 16. Winner must be a resident of the 48 contiguous United States.
For more information on the OXO "Good Cookie" Spatula, see this post: Cookies for Kids' Cancer--And a Giveaway!

For more info on Cookies for Kids' Cancer, visit www.cookiesforkidscancer.org.

Sunday, December 11, 2011

Peppermint Bark--And the "Good Cookie" Giveaway Continues!

The Setting: A chilly apartment with a stack of dirty dishes as big as the kitchen--I'm getting to it. And be it known that Hoosband has promised me a bottle of Billecart-Salmon rose if we ever actually finish unpacking from our move, so it's on. Operation organization will be in full force...after the holidays.

The Soundtrack: The furious frenzy of graphite on college rule and the flipping and stacking of papers as Hoosband studies for finals.

Steaming up the oven: Toast. We bought two loaves of home-ground whole-wheat bread at the bake sale yesterday, and they are delicious!

The Scenario: Wrapping up after the bake sale.

It may not have been the sale of the century, but I'd say the Village put on a good sale.

By the time we folded up the card table last night, we'd made $53.50 and sold 3 loaves of bread and 34 bags of cookies or muffins. Not bad, considering we're all a bunch of poor graduate students and spouses!

We still had a bunch of tasty treats leftover, so we set up shop again this morning to catch the post-Mass crowd, bringing the total to...drum roll please...$72.50!

My favorite treat from the sale was a sweet and spicy gingersnap with lemon icing, but the first to sell out was the peppermint bark.

Peppermint Bark
"Real" white chocolate contains cocoa butter but no cocoa solids, the parts that become cocoa powder or blend with cocoa butter to form dark or milk chocolate. Similar products containing no cocoa butter may be sold as white or vanilla "candy coating." The better the dark chocolate you use, the better the bark will be, but it's pretty darn good with just the cheap stuff!

16 oz semisweet chocolate chips or finely chopped bulk semisweet, bittersweet, or any dark chocolate

2 cups hard candy peppermints, unwrapped

16 oz white chocolate chips or finely chopped bulk white chocolate

Line a baking sheet, jellyroll pan, or your kitchen counter with parchment paper.

Place dark chocolate in a microwave-safe bowl or a large Pyrex measuring cup, and microwave for 30-second intervals, stirring well after each interval until chocolate is melted. Do not heat more than necessary. Alternatively, melt the chocolate over a double boiler.

Pour chocolate onto the parchment paper, using a spoon or offset spatula to smooth out into large, even rectangle. 

Allow to harden slightly. For a quicker hardening, place in fridge or freezer, or place over a tray of ice.

Meanwhile, place unwrapped peppermints in a gallon-sized zip-top bag, making sure to eliminate any excess air from the bag before zipping it closed.

Using a rolling pin, a cast-iron skillet, or wooden mallet, whack the peppermints until they are all crushed. If desired, strain out the smaller pieces halfway through, and continue with the larger pieces that remain.

Melt the white chocolate in the microwave or over a double boiler. Drizzle the white chocolate evenly over the dark chocolate, and use a spoon or offset spatula to smooth out. Don't agitate too much, or the dark chocolate will melt and blend with the white. Immediately sprinkle the crushed peppermints, including all the powdery bits, evenly over the top of the white chocolate.


Once the chocolate is thoroughly coated, lightly press on the peppermints with your hands to help them adhere. Allow to harden completely.

Once hard, break into pieces with your hands, or cover with a sheet of parchment paper and whack all over with a wooden mallet. Voila, peppermint bark!

Don't forget to enter the OXO "Good Cookie" Spatula Giveaway!

This spatula rules, and it will be given away FREE to one of my lucky readers! OXO is even paying for the shipping!

To enter the giveaway, simply...

1. Become a follower of Being the Secret Ingredient either on the blog, on Facebook, or on Twitter.

2. Then tell Being the Secret Ingredient your all-time favorite cookie either by Tweeting @BeingTSI, commenting on the blog, or leaving a wall post on our Facebook page. Increase your chances by doing all three!

Must enter by January 15, 2012. Winner will be selected by a drawing and announced January 16. Winner must be a resident of the 48 contiguous United States.

For more information on the OXO "Good Cookie" Spatula, see this post: Cookies for Kids' Cancer--And a Giveaway!

For more info on Cookies for Kids' Cancer, visit www.cookiesforkidscancer.org.

Saturday, December 10, 2011

Stracciatella Biscotti and a Giveaway!

The Setting: An apartment full of baked goods ready to be sold!

The Soundtrack: Me scuttling around trying to get everything out the door and ready on time.

Steaming up the Slow-Cooker: Red-Pepper-Jelly Pork

The Scenario: Day of the bake sale!

It's game on.  Day of. All systems are a go.

...except that I forgot to get change for the cash box...

Well, here's hoping all goes well!


Stracciatella Biscotti
Named for the chocolate-flecked stracciatella gelato common to most Italian gelaterias.

3 cups all-purpose flour, plus extra for shaping
2 tsp baking powder
1/2 tsp kosher salt
1/8 tsp cinnamon
1/4 cup unsalted butter, softened slightly at room temperature
1 cup granulated sugar, plus 1 tsp for sprinkling
3 large eggs
1 1/2 tsp pure vanilla extract
1/2 tsp pure almond extract
1 cup mini semisweet chocolate chips
1 1/2 cups melted semisweet chocolate for dipping, if desired

Preheat the oven to 375 degrees F and line a baking sheet with parchment paper.

In a med-large mixing bowl, whisk together the flour, baking powder, salt, and cinnamon. Set aside.

With an electric mixer, beat the sugar into the butter until the mixture is light and fluffy. Add the eggs one at a time, beating just to combine after each addition. Add the extracts, beating just to combine.

Add flour mixture and beat on low till well-blended. Add mini chocolate chips and beat on med-low speed to distribute, allowing the chips to get a little banged up.

Lightly flour your working surface and your hands. Turn the dough out onto your work surface and gather into a fat log. Divide the log in two.


Roll each half into a longer log, 2 1/2-3 inches in diameter. Place the logs 2-3 inches apart on the prepared pan and sprinkle with sugar.


Bake at 375 degrees F for 25 minutes or till logs are almost firm and just slightly golden. Cool for 25 min before cutting. Reduce oven temp to 300 degrees F.


Transfer logs to a cutting board and make 2-inch slices on the diagonal. Place slices, cut sides down, in a single layer on the baking sheet, and bake at 300 degrees F for 15 minutes.


Remove baking sheet from oven and carefully flip over each biscotti. Return to the oven for 15 minutes more. Cool biscotti on a wire rack.

If desired, dunk the long, skinny, uncut bottom of each biscotti in melted chocolate, and place on clean parchment to harden.

I melted regular semisweet chocolate chips in a glass bowl over 2 inches of simmering water, but I often do it in the microwave, stirring after every 30 seconds until fully melted, no water required. 


Isn't my spatula nifty?

It's a lean, green, cookie-flipping machine, and it (well, one just like it) could be yours!

To enter the giveaway, simply...

1. Become a follower of Being the Secret Ingredient either on the blog, on Facebook, or on Twitter.

2. Then tell Being the Secret Ingredient your all-time favorite cookie either by Tweeting @BeingTSI, commenting on the blog, or leaving a wall post on our Facebook page. Increase your chances by doing all three!

Must enter by January 15, 2012. Winner will be selected by a drawing and announced January 16. Winner must be a resident of the 48 contiguous United States.

For more information on the OXO "Good Cookie" Spatula, see this post: Cookies for Kids' Cancer--And a Giveaway!

For more info on Cookies for Kids' Cancer, visit www.cookiesforkidscancer.org.

Friday, December 9, 2011

Spicy Cheddar Snowflakes and the Lean, Mean, Cookie-Flipping Machine Giveaway

The Setting: Large white flakes falling outside an uncharacteristically quiet apartment.

The Soundtrack: Only the blissful striking of the keys as the melody of my one-handed typing takes life. I am attempting to curb the amount of television exposure Oia gets, per the AAP's request. They request that she gets none. I generally allow a full day's worth. Today is a compromise.

Steaming up the oven: Remaining batches of Hoosband Cookies, Homemade Graham Crackers, and Spicy Cheddar Snowflakes.

The Scenario: Wrapping up the baking for tomorrow's sale.

I love to bake...in case you couldn't tell.

Hoosband sometimes complains that his pants don't fit as well as they should, which is my signal to cut back on the regular production of mass sweetness. I received just such a signal recently.

But then came the bake sale.

Suddenly, to my great joy, was an excuse to bake and bake and bake and not (necessarily) expand the waistlines of those residing in Casa de Crumm.

I had visions of French almond macaroons, stunning layer cakes, delicate pastries, and a myriad more never-get-to-bake delights.

But then a realization came over me:

Woman, you have a four-month-old, nipple-munching time-suck (whom of course you love and adore, but) who negates your ability to be Wonder Woman with a whisk.

Simpler fare would be in order.

Cookies, peppermint bark, and incredibly simple spicy cheese wafers.

All was going according to plan.

Doughs were made and frozen ahead of time; cookies were baked in batches between playtimes and feedings.

Then came time to bake off the cheese wafers.

In my personal-chef days I used to make these in great variation all the time for parties and functions. I was pretty sure I new what I was doing and could bang them out from memory, no problem.

Turns out I should have searched harder for my recipe.

In the place of the savory, shortbread-like cookies I had envisioned pulling out of the oven were sizzling cheddar tuiles.

Flavor? Excellent.

Texture? Fragile...a little crisp...a little chewy.

Appearance? Thin, delicate, each one a little bit different...a little like...snowflakes.

C'est la vie!


Spicy Cheddar Snowflakes
2 sticks unsalted butter, softened slightly at room temperature
1 T hot sauce
1/8 tsp ground cayenne pepper
1/8 tsp ground cumin
2 tsp kosher salt
1/2 tsp garlic powder
8 oz shredded sharp cheddar cheese
1/4 cup whole wheat flour
3/4 cup all-purpose flour, plus a touch extra for sprinkling

In an electric mixer fitted with a paddle attachment, beat butter with hot sauce and seasonings until soft and fluffy. Add cheese and flours. Beat till well-combined.

Turn dough out onto a large piece of plastic wrap sprinkled with flour. Sprinkle a little extra flour on your hands, roll the dough into a log about 1 1/2 inches in diameter, and wrap in the plastic. Chill for at least 1 hour or up to 1 week in fridge or freeze for at least 30 minutes or up to 2 weeks.

Preheat oven to 425 degrees F and line a baking sheet with parchment paper.

Allow the dough to sit out at  room temp for 15 minutes if frozen solid. Slice the log into 1/4-inch rounds and place rounds 2 inches apart (and not too close to the edges) on the the cookie sheet. Bake at 425 degrees F for 8 minutes or till golden, sizzling, and crispy on the edges.

Want a lean, green, cookie-flipping machine like mine?

Don't forget to enter the "Be a Good Cookie" Giveaway!

To enter, simply...

1. Become a follower of Being the Secret Ingredient either on the blog, on Facebook, or on Twitter.

2. Then tell Being the Secret Ingredient your all-time favorite cookie either by Tweeting @BeingTSI, commenting on the blog, or leaving a wall post on our Facebook page. Increase your chances by doing all three!

Must enter by January 15, 2012. Winner will be selected by a drawing and announced January 16. Winner must be a resident of the 48 contiguous United States.

For more information on the OXO "Good Cookie" Spatula, see this post: Cookies for Kids' Cancer--And a Giveaway!

For more info on Cookies for Kids' Cancer, visit www.cookiesforkidscancer.org.

Thursday, December 8, 2011

Hoosband Cookies and Spatula Giveaway!

The Setting: A frosty apartment warmed by an over-achieving oven; the aroma of chocolate mingling and melding with butter, sugar, and flour.

The Soundtrack: The Family Stone.

Steaming up the Oven: Hoosband Cookies, Stracciatella Biscotti, Homemade Graham Crackers

The Scenario: Prepping for the bake sale and taking my new spatula for a test drive!

Baking is in full force in the Crumm house today.

On the list for the bake sale:

Hoosband Cookies
Stracciatella Biscotti
Homemade Graham Crackers
Spicy Cheddar Snowflakes
Peppermint Bark

Plus whole wheat bread, cookies, muffins, and more coming from many wonderful volunteers.

I am so excited!

...and nervous.

On one hand I hope we'll have enough baked goods, but on the other hand I hope we won't end up with a table full of yumminess and no one to buy it all.

Here's hoping it all goes well and ends with a decent donation to Cookies for Kids Cancer!

Hoosband Cookies
Called Hoosband Cookies because Hoosband helped develop the recipe, giddily suggesting more and more additions to our standard Crumm House Chocolate-Chip Cookies until we came up with these hearty, delicious, addictive little devils.

2 sticks unsalted butter
1 cup brown sugar
1 egg
1 tsp vanilla
1/3 cup peanut butter
11/2 cups bread flour
1 1/2 tsp large, flaky Celtic salt (or 1 1/4 tsp kosher salt or 3/4 tsp fine grain salt)
1 tsp baking soda
1 tsp baking powder
1 cup semisweet chocolate chips
1 cup oats
1 cup chopped pecans

Preheat oven to 373 degrees F. Line two baking sheets with parchment paper.

Using an electric mixer, cream butter and sugar together on med-high speed till light and fluffy.

Add egg, vanilla, and peanut butter. Beat on medium speed just till evenly incorporated.

In a small bowl whisk together the flour, salt, soda, and powder. Add to butter mixture, beating on low speed till well-mixed.

Add remaining ingredients, beating on low just to distribute.

Drop large, rounded spoonfuls of the dough onto the prepared pans, spacing 2-3 inches apart.

Bake at 375 degrees F for 12 minutes or till golden and crispy on the outsides and slightly underdone in the centers.

Cool completely or at least 10 minutes on baking sheet before eating.

Like my cute, new spatula?

It's a lean, green, cookie-flipping machine, and it (well, one just like it) could be yours!

To enter the giveaway, simply...

1. Become a follower of Being the Secret Ingredient either on the blog, on Facebook, or on Twitter.

2. Then tell Being the Secret Ingredient your all-time favorite cookie either by Tweeting @BeingTSI, commenting on the blog, or leaving a wall post on our Facebook page. Increase your chances by doing all three!

Must enter by January 15, 2012. Winner will be selected by a drawing and announced January 16. Winner must be a resident of the 48 contiguous United States.

For more information on the OXO "Good Cookie" Spatula, see this post: Cookies for Kids' Cancer--And a Giveaway!

For more info on Cookies for Kids' Cancer, visit www.cookiesforkidscancer.org.

Wednesday, December 7, 2011

Cookies for Kids' Cancer--and a Giveaway!


The Setting: Watching my five-foot pre-lit twinkle.

The Soundtrack: The 1985 classic Santa Claus, The Movie.

Steaming up the Oven: Cookies!

The Scenario: Preparing to host a Cookies for Kid's Cancer bake sale, and teaming with OXO to bake one reader's day!

When I heard about www.CookiesForKidsCancer.org, I immediately jumped at the chance to get involved and host a bake sale at my community center.

This week I'm baking up a storm in preparation for the big sale on Saturday.

OK, I probably shouldn't say "big" since we are quite limited in time and resources, and I have no idea how many guests we'll actually attract...but if we raise any money at all, it will be a success!

Want to get in on the fun?

OXO has provided me with a free Be a Good Cookie Spatula to give away to one lucky reader!


Cookies for Kids' Cancer was actually founded by OXO employees Gretchen and Larry Witt whose son battled pediatric cancer.

When they learned that more than 25% of kids diagnosed with cancer fail to survive due to a lack of effective therapies, they decided to raise money for more intensive research, and Cookies for Kids Cancer was born.

After the Witts created Cookies for Kids' Cancer, OXO got on board, and so can you!

When you buy an OXO Limited Edition "Good Cookie" Spatula (see www.oxogoodcookies.com for a list of retailers), 50% of the profits benefit pediatric cancer awareness, up to $100,000.

If you register and host a Cookies for Kids' Cancer Bake Sale or fundraising event before Dec 31st, 2011, OXO will match all proceeds up to $100,000.

If you happen to be in the South Bend area this Saturday, Dec 10, you could swing by the bake sale at the community center, or, if you can't make it out but want to make a donation, visit my donation site.

I'll be posting some pictures and recipes from my bake-sale prep this week and updates after the sale, so stay tuned!


Pretty cute, huh?

Enter the giveaway to win one of your own!

To enter the giveaway, simply...

1. Become a follower of Being the Secret Ingredient either on the blog, on Facebook, or on Twitter.

2. Then tell Being the Secret Ingredient your all-time favorite cookie either by Tweeting @BeingTSI, commenting on the blog, or leaving a wall post on our Facebook page. Increase your chances by doing all three!

Must enter by January 15, 2012. Winner will be selected by a drawing and announced January 16. Winner must be a resident of the 48 contiguous United States.

Tuesday, November 29, 2011

Jimmie's Chocolate Shop PB&J


The Setting: A kitchen frenzy.

The Soundtrack: Not even sure.

On the Stovetop: Brownies...Strawberry Jam...various components of what should be Peanut-Butter Mousse....

The Scenario: Paying homage to a delicious dessert from my favorite Florida chocolate shop.

I have literally been dreaming about this for months.

When we were living in Florida, I pretty much could not drive down the Dania Beach stretch of US-1 without stopping into Jimmies Chocolates for a chocolate-covered marzipan and a handmade truffle or two.

It wasn't until my last trip to Jimmie's, however, that I finally dined at Jimmie's Cafe.

Knowing my love of chocolate was as big as my nine-months-pregnant belly, Hoosband surprised me with Jimmie's dinner reservations for my birthday.

Our appetizer and entrees were delicious, but the desserts, not surprisingly, stole the show.

One in particular, a rich chocolate torte layered with sweet strawberry jelly and creamy peanut-butter mousse, doused in decadent dark chocolate ganache, has been haunting me ever since.

This, finally, is my attempt, slightly more freeform and sans snazzy ring molds.

It starts with a fudgy brownie--not my recipe, my favorite from Martha Stewart's Baking Handbook (Martha's is my ultimate brownie go-to, but I'm sure your favorite recipe for fudgy--not cakey--brownies would be perfect, too!).

Pouring the batter into a 12-cup, standard-sized muffin pan instead of a brownie pan and cutting down the cooking time to 25-30 minutes makes 12 perfect little canvases for a peanut-butter masterpiece. The centers cave in, creating eager and receptive wells for the jelly.


I used muffin liners this time, but I'll omit them and butter the muffin cups when I do this again. The liners can be a bit of a hassle to remove before assembly of the dessert.


You could just buy strawberry jelly, but if you have a Vitamix or similarly awesome blender, this homemade jam is both simple and scrumptious. 

Strawberry Jam
The pectin in the apple seeds thickens and gels the mixture as it cools. You really need a beast of a blender to process the seeds and skins of the apples into oblivion for a pleasant texture. If you don't have one, you could always strain the jelly over cheesecloth after cooking--you will want to use cheesecloth so that you can squeeze excess juice out of the pulp...or you could simply omit the apples and use commercial pectin.

2 large apples, washed and quartered (do not remove skins or seeds)
2 cups frozen strawberries
1 1/2 cups sugar

Process the apples in the blender on high speed until they resemble applesauce. Add the frozen strawberries and process on high speed until the mixture looks like a smooth strawberry sorbet.

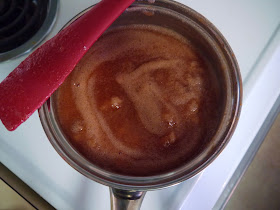
Transfer the mixture to a medium-sized saucepan and add sugar. Cook on med-high heat for 30 minutes, stirring occasionally. Use a splatter guard if desired. Reduce heat to med-low and cook one hour, stirring occasionally.


Cool completely and transfer to an airtight plastic container to store in the fridge for up to two weeks.


The next step is peanut-butter mousse... or semifreddo... or... frozen custard?

Let's just say the idea was mousse, but it sort of became more of an ice cream along the way...which is fine 'cause it's pretty darn tasty and cute to boot. Just use an ice-cream scoop to place the perfect mound of peanut-buttery goodness atop the jam.


The mousse idea may be revisited in future attempts, but for now....

Peanut-Butter Mousse-ifreddo

4 large eggs, separated
1/2 cup granulated sugar, divided
1/4 tsp kosher salt
1 tsp pure vanilla extract
1/4 cup peanut butter
1/8 tsp cream of tartar
1/4 cup heavy whipping cream

Whisk yolks with 1/4 cup sugar and salt over a double boiler till light in color and thick and creamy in texture, about 10 minutes. Place in an ice bath to cool.


Stir in peanut butter. Mixture may seize up a bit.


Whip egg whites with 1/4 sugar and 1/8 tsp cream of tartar over double boiler till stiff peaks form. Place in a water bath to cool.


Gently whisk 1/4 of the meringue into peanut butter mixture, and then very gently fold in the rest.


Whip cream till stiff peaks form and fold into the peanut butter mixture. Transfer the mixture to an airtight plastic container, and stash in the freezer for at least one hour, stirring after 30 minutes. The "mousse" can be stored in the freezer for two weeks.


The crowning glory is the perfect marriage of chocolate and cream known as ganache. Mine is as easy to make as it is to devour.

Chocolate Ganache

1/2 cup heavy whipping cream
1/8 tsp instant coffee or instant espresso granules (not ground coffee)
6 oz mini semisweet chocolate chips

Place cream in a microwave-safe cup or bowl. Microwave on high for 60 seconds.

Stir in instant coffee.

Place chocolate chips in a mixing bowl. Pour cream over chips and whisk until smooth and uniform.

Cooled ganache can be stored in an airtight container in the fridge for two weeks and microwaved for 30 seconds to be spoonable again.