Pages

Tuesday, November 29, 2011

Jimmie's Chocolate Shop PB&J


The Setting: A kitchen frenzy.

The Soundtrack: Not even sure.

On the Stovetop: Brownies...Strawberry Jam...various components of what should be Peanut-Butter Mousse....

The Scenario: Paying homage to a delicious dessert from my favorite Florida chocolate shop.

I have literally been dreaming about this for months.

When we were living in Florida, I pretty much could not drive down the Dania Beach stretch of US-1 without stopping into Jimmies Chocolates for a chocolate-covered marzipan and a handmade truffle or two.

It wasn't until my last trip to Jimmie's, however, that I finally dined at Jimmie's Cafe.

Knowing my love of chocolate was as big as my nine-months-pregnant belly, Hoosband surprised me with Jimmie's dinner reservations for my birthday.

Our appetizer and entrees were delicious, but the desserts, not surprisingly, stole the show.

One in particular, a rich chocolate torte layered with sweet strawberry jelly and creamy peanut-butter mousse, doused in decadent dark chocolate ganache, has been haunting me ever since.

This, finally, is my attempt, slightly more freeform and sans snazzy ring molds.

It starts with a fudgy brownie--not my recipe, my favorite from Martha Stewart's Baking Handbook (Martha's is my ultimate brownie go-to, but I'm sure your favorite recipe for fudgy--not cakey--brownies would be perfect, too!).

Pouring the batter into a 12-cup, standard-sized muffin pan instead of a brownie pan and cutting down the cooking time to 25-30 minutes makes 12 perfect little canvases for a peanut-butter masterpiece. The centers cave in, creating eager and receptive wells for the jelly.


I used muffin liners this time, but I'll omit them and butter the muffin cups when I do this again. The liners can be a bit of a hassle to remove before assembly of the dessert.


You could just buy strawberry jelly, but if you have a Vitamix or similarly awesome blender, this homemade jam is both simple and scrumptious. 

Strawberry Jam
The pectin in the apple seeds thickens and gels the mixture as it cools. You really need a beast of a blender to process the seeds and skins of the apples into oblivion for a pleasant texture. If you don't have one, you could always strain the jelly over cheesecloth after cooking--you will want to use cheesecloth so that you can squeeze excess juice out of the pulp...or you could simply omit the apples and use commercial pectin.

2 large apples, washed and quartered (do not remove skins or seeds)
2 cups frozen strawberries
1 1/2 cups sugar

Process the apples in the blender on high speed until they resemble applesauce. Add the frozen strawberries and process on high speed until the mixture looks like a smooth strawberry sorbet.

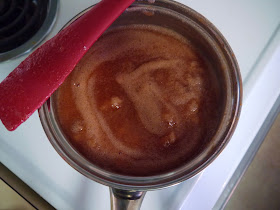
Transfer the mixture to a medium-sized saucepan and add sugar. Cook on med-high heat for 30 minutes, stirring occasionally. Use a splatter guard if desired. Reduce heat to med-low and cook one hour, stirring occasionally.


Cool completely and transfer to an airtight plastic container to store in the fridge for up to two weeks.


The next step is peanut-butter mousse... or semifreddo... or... frozen custard?

Let's just say the idea was mousse, but it sort of became more of an ice cream along the way...which is fine 'cause it's pretty darn tasty and cute to boot. Just use an ice-cream scoop to place the perfect mound of peanut-buttery goodness atop the jam.


The mousse idea may be revisited in future attempts, but for now....

Peanut-Butter Mousse-ifreddo

4 large eggs, separated
1/2 cup granulated sugar, divided
1/4 tsp kosher salt
1 tsp pure vanilla extract
1/4 cup peanut butter
1/8 tsp cream of tartar
1/4 cup heavy whipping cream

Whisk yolks with 1/4 cup sugar and salt over a double boiler till light in color and thick and creamy in texture, about 10 minutes. Place in an ice bath to cool.


Stir in peanut butter. Mixture may seize up a bit.


Whip egg whites with 1/4 sugar and 1/8 tsp cream of tartar over double boiler till stiff peaks form. Place in a water bath to cool.


Gently whisk 1/4 of the meringue into peanut butter mixture, and then very gently fold in the rest.


Whip cream till stiff peaks form and fold into the peanut butter mixture. Transfer the mixture to an airtight plastic container, and stash in the freezer for at least one hour, stirring after 30 minutes. The "mousse" can be stored in the freezer for two weeks.


The crowning glory is the perfect marriage of chocolate and cream known as ganache. Mine is as easy to make as it is to devour.

Chocolate Ganache

1/2 cup heavy whipping cream
1/8 tsp instant coffee or instant espresso granules (not ground coffee)
6 oz mini semisweet chocolate chips

Place cream in a microwave-safe cup or bowl. Microwave on high for 60 seconds.

Stir in instant coffee.

Place chocolate chips in a mixing bowl. Pour cream over chips and whisk until smooth and uniform.

Cooled ganache can be stored in an airtight container in the fridge for two weeks and microwaved for 30 seconds to be spoonable again.


Thursday, November 17, 2011

Corndogs and Crème Brulee


The Setting: A chilly fall day.

The Soundtrack: Gilmore Girls.

On the Stovetop: Piping hot peanut oil for frying up some Homemade Corndogs.

Steaming up the Oven: Crème Brulee, broiler style (I don't have a torch).

The Scenario: Making a surprise dinner of Hoosband's favorite treats to celebrate business-school midterms!


I'm the kind of person who likes to do big, themey dinners: fried chicken with all the Southern fixins, French or Italian feasts...things that go together, that make sense.

But tonight I wanted to celebrate Hoosband's progress in business school by making a few of his favorite things: corndogs, salad, and crème brulee.

And I have to admit...I kind of love the nonsensical nature of it all.

Back in Florida, before there was a bun in my oven, we had a bit of a Sunday ritual.

We never found a church to call home, so we spent Sunday mornings at the scenic and surprisingly serene shotgun range.

Midday was a bite of lunch, any housekeeping or errands leftover from Saturday, and often a bit of bread-baking.

Afternoon was yoga.

We liked to joke that out of all the people who went to the range in the morning or yoga in the afternoon, we were likely the only ones whose day included both.

This dinner reminds me a little of that.

Out of all the people dining tonight on corndogs or desserting on crème brulee, we are likely the only ones whose menu includes both.

I guess the theme tonight could simply be Bifecta.

Corndogs and crème brulee.

That is how we roll.


Homemade Corndogs
peanut oil for frying
8-12 hotdogs ( I like to cut them in half to make mini-dogs)
1 cup flour, plus a little for sprinkling
1 1/3 cup cornmeal
2 tsp baking powder
1 tsp kosher salt
1 tsp sugar
1/4 tsp turmeric (helps make the batter nice and yellow, plus, I like it)
1/4 tsp garlic powder
1 cup milk
2 eggs
popsicle sticks or wooden skewers (I use skewers and break them in half)

Line a baking sheet with paper towels. Set aside.

Skewer the dogs and sprinkle them with flour (this helps the batter stick).

Heat a depth of about 3 inches of oil in a large, heavy-bottomed pot or frying pan with tall sides.

Meanwhile, whisk together the dry ingredients.

Whisk together milk and eggs, and whisk this mixture into the dry ingredients.

Pour the batter into a tall glass or jar.

Test the oil with a small droplet of batter. If the droplet sinks to the bottom and sizzles very minimally, the oil is too cold; if it sizzles violently and quickly burns, the oil is too hot. The droplet should sizzle, brown slowly, and float to the top if the oil is ready.

When the oil is ready, start dunking and frying your dogs! Fry in batches, making sure not to overcrowd the pan. The dogs are done when they are puffy and golden on all sides. Use heatproof tongs to carefully remove dogs from oil and place on prepared baking sheet to absorb any excess oil.

Season leftover batter with a little extra salt, and drop by spoonfuls into the hot oil to make corn fritters (you could also add sauteed onion and celery to make some pretty tasty hushpuppies).

Leftover fritters and corndogs can be stored in the fridge for up to a week and reheated for 15 minutes in a 350-degree-F oven.


Crème Brulee
2 cups heavy cream
1 vanilla bean
4 egg yolks
1/3 cup sugar, plus 1/4 cup for sprinkling
1/4 tsp kosher salt
1 tsp spiced rum (I prefer Sailor Jerry's--if you've never tried it, you really should)

Preheat oven to 300 degrees F.

Place 4 crème brulee ramekins in a roasting pan, and pour water into the pan so that it comes about halfway up the sides of the ramekins (you can place a damp kitchen towel under the ramekins to keep them from sliding around if desired).

Place heavy cream in a small saucepan over medium-to-med-low heat.

Split vanilla bean, scrape out seeds, add seeds and pod to the cream, and simmer gently for 10-15 minutes. Remove from heat, cool slightly, and remove pods.

In a quart-sized Pyrex measuring cup or bowl, whisk together egg yolks, 1/3 cup sugar, and salt.

As you continue to whisk, slowly stream in the warm cream, bringing up the temperature of the yolks gradually so they do not start to scramble.

Whisk the rum into the yolk and cream mixture, and evenly distribute the mixture among the prepared ramekins. Bake at 300 degrees F for 40 minutes or till just set.

Cool completely and chill, covered, in the fridge for at least 2 hours or up to a week.

Preheat the broiler. Place ramekins on a baking sheet. Sprinkle 1 T sugar over each ramekin.

Watching closely, broil just till sugar melts and begins to brown--do not walk away!

This method usually heats up the custard more than I'd like, but it creates a great brulee. So if you are torchless like me, it'll certainly do the trick.

Tuesday, November 15, 2011

Farmer's Market Feast


The Setting: Blue skies. My favorite!

The Soundtrack: House Hunters International.

On the Stovetop: Brussels Sprouts. Smoked Horseradish Mac 'n' Cheese.

The Scenario: Celebrating our farmer's market finds.

One of our favorite things about the weekend--besides just being together-- is going to the farmer's market.

In South Florida the markets were full of mangoes, lychees, avocados, and fresh seafood.

I was a little dubious that the Midwest farmer's markets could compete.

But the South Bend Farmer's Market (http://southbendfarmersmarket.com/) has already become one of our favorite spots in town.

We always pick up some smoked horseradish cheese and fresh, local produce. Now that the colder weather is upon us, we've added a gallon of local cider to the list.

This trip we found some purple broccoli, kale, Brussels sprouts on the stalk, and colorful spicy banana peppers and jalapeños.

Hoosband took charge of the sprouts, while I went to town on some mac 'n' cheese.


The answer to any objection to Brussels sprouts is most definitely bacon, salt, and pepper.

Slice up your sprouts, fry up your bacon, add your sprouts to the rendered nectar of love in the pan, season with kosher salt and freshly cracked black pepper, and cook till sprouts are tender and shellacked in fragrant vitamin P.

I like to use rotini (corkscrew pasta) for my mac 'n' cheese because the sauce gets trapped in all the twists and turns.

Sometimes I like to get a little sophisticated with it, but tonight my method is simple:

Cook the pasta in heavily salted water.

Drain the pasta and return the pasta to the pot. Add a little butter and a little flour.

Stir till butter is melted and flour is hidden.

Add a little milk. Stir till milk is mostly absorbed. Add a little more.

Continue adding and stirring till the noodles are cloaked in white sauce (very well, bechamel!).

Remove from heat and throw in shredded (or chopped or torn) cheese, stirring till melted (hooray, mornay!).

Taste and adjust seasonings as desired.

Wednesday, November 9, 2011

Checkmate


The Setting: A super-grey morning in South Bend.

The Soundtrack: Full House. That's right, I'll own it.

On the Stove-top: Chicken stock.

The Scenario: Searching for a slice of my childhood.


The funniest stories about me as a kid all seem to revolve around food.

My grandfather bribed me with ice-cream to take my first steps.

My mother had to dangle a Snickers® bar behind her back for me to toddle down the aisle in my first appearance as a flower girl.

And one time at my grandparents' house, no one could figure out what had me running 'round the rooms like a Tasmanian devil till an empty pie plate was discovered where a chess pie should have been.

At future holidays and gatherings, the chess pies had to be hidden from yours truly till it was time for dessert.

Now that I am old enough to put my nutritive needs in my own hands, I have determined it's always time for dessert--and about time I mastered my childhood favorite, chess pie.

A Southern staple, chess pie tastes to me like family reunions at the Cedars of Lebanon State Park; like every holiday, any time of the year; like sneaking an extra piece and getting a knowing wink from my grandmother 'cause she was sneaking one, too.

Unfortunately...the older I got...the more I began contributing to the holiday spread...the more health-conscious and then technique-driven and exotic my cooking endeavors became...the fewer appearances the simple, sugary chess pie made at the buffet line.

Every so often I am panged with an intense and lusty craving for its uniquely gooey texture and almost-over-the-top sweetness, but I resign myself to the sad truth that I never really learned to make it.

Though you may never have heard of chess pie if you're not from the South, recipes for this sweet treat are pretty easy to come by.

The thing about chess pies, like with so many Southern delights, is that you could fill a church with all the different takes, opinions, and recipes for the "real thing."

In attempting to track down my grandmother's recipe, I found a cookbook compiled by episcopal ladies of yesteryear with six different versions.

Some recipes contain buttermilk, but others maintain that "buttermilk pie" is its own thing, and the same goes for the recipes that contain vinegar.

Some contain a touch of cornmeal, some a touch of flour, some both, some neither.

Some contain milk, some a mixture of sugars; some are pre-cooked on the stovetop, and some are simply whisked together and poured into the buttery crust.

All chess pies contain sugar, butter, and eggs. Maybe a pinch of salt. Maybe a splash of vanilla.

The first recipe I tried, from a venerable Southern publication, was a tad gritty from the cornmeal and tasted a little too eggy.

The follow-up, from the episcopal gals, was cornmeal-free and a lot closer to the pie of my memories.

Still, the perfect pie evades me.

Soon, my daughter will be starring in her own funny food stories.

Who knows? Maybe I'll have the recipe perfected in time to elicit her first steps.

Friday, November 4, 2011

Apple Butter


The Setting: Rainy day.

The Soundtrack: That 70s Show.

Steaming up the Slow-Cooker:  Apple Butter

The Scenario: Tons of apples in the fridge. Starting to get mealy.

Cracker Barrel is my favorite chain restaurant for a couple of reasons. Aside from having the best food at the best value of just about any place I've eaten, they come from Middle Tennessee like me, and their biscuits and apple butter are amazing.

Scrumptious at CB any time of year, apple butter comes out of my own kitchen primarily in the fall when the comforting aromas fill my chilly apartment with the warmth and wonder of the harvest and the holidays.

Real-estate agents wish they could harness its power.

Here is my recipe.

Warning: this apple butter smells so good by the third hour of cooking, it may induce premature festivity. I put Oia in a "My First Christmas" onesie and started digging out the holiday DVDs.


Apple Butter:
This recipe only yields about one cup of apple butter. If you want to make a larger batch, excess apple butter can be frozen in an airtight container for two-three months. This apple butter is a little more tart than that  of, say, Cracker Barrel. If you'd like to make it a little sweeter, add 1/4 cup brown sugar or 3 T maple syrup.

1 1/4 lbs peeled and cored apples, cut into eighths
1 1/2 tsp ground cinnamon
scant pinch cardamom
3/4 cup water

1. Place all ingredients in a slow-cooker set to high. Cover and cook 4 hours.

2. Uncover, stir, place lid back on ajar, and continue cooking 1-2 more hours or till excess water has evaporated. Mixture should be dark and thick.

3. Use an immersion blender to process mixture till smooth and uniform, or simply stir to break up the largest pieces if desired.

Yields about 1 cup apple butter.

Wednesday, November 2, 2011

Meringue ghosts

 
The Setting: Reaching awkwardly over the sleeping baby on my lap to the laptop perched atop a large cookbook on the kicked-out leg of the loveseat recliner on which I sit. Did that make sense at all?

The Soundtrack: Glee on Hulu.

Steaming up the Oven (the real one this time!): Meringue ghosts.

The Scenario: Bringing a little Halloween cheer to a favorite handed-down recipe dear.


I did make it to the Halloween party with a few of the homemade butterfingers, but let's just say I had to supplement them a little.

Enter Meringue Ghosts.

My recipe for Meringue Kisses, written in sky blue on a folded and worn piece of paper from an Oak Hill School notepad, was given to me by my friend Suzanne's mom in elementary school and remains my favorite light and airy alternative to traditional chocolate-chip cookies.

Here, big chocolate chips throughout are swapped out for mini-chocolate chip eyes, and a piping bag streamlines the shaping.

Meringue Ghosts:
2 egg whites
1/8 tsp cream of tartar
1 tsp pure vanilla extract
2/3 cup granulated sugar
mini semisweet chocolate chips, for eyes

1. Preheat oven to 300 degrees F. Line baking sheet with parchment paper.

2. Beat egg whites with cream of tartar and vanilla till semi-stiff peaks form.

3. Add sugar, 1 T at a time, continuing to beat during and after each addition.

4. Carefully transfer meringue to a disposable piping bag. Snip off end of bag so that the opening is about 1/2 inch in width.

5. Pipe ghosts onto prepared baking sheet and gently press two chocolate chips into the "head" of each. Ghosts will not spread much, but will puff a little, so space at least 1/2 inch apart.

6. Bake for 22-25 minutes or until ghosts will easily separate from the parchment paper. The meringues should be crispy on the outside and slightly marshmallow-y in the center. Yum!