

I first tasted the ethereal confection called honeycomb candy at the South Bend Chocolate Company Cafe in South Bend, Indiana, where the treat was dubbed "Seafoam."
I made that first purchase because I wondered what could possibly be lurking beneath that layer of dark, glossy chocolate to elicit such a mysterious name.
What I sank my teeth into that day was like nothing I had tried before. With the color of honey, the taste of a deeply toasted marshmallow, the crunch of hard toffee, and the airiness of . . .well . . . sea foam, could this be everything I'd ever wanted in a candy?
Most of my subsequent trips to the chocolate cafe were driven almost exclusively by my desire for more of that light, crunchy, caramelized goodness cloaked in chocolate.
Here in Texas, at least at my local grocery store where it's sold in the bulk bins, this candy is called honeycomb. The name is more of a visual description than anything else, as the recipe does not traditionally contain honey.

My recipe is heavily adapted from Nina Wanat's wonderfully instructional book, Sweet Confections, Beautiful Candy to Make at Home (2011, Lark Crafts, page 52). The main difference is that my recipe contains half the baking soda and adds a small amount of apple cider vinegar, which I feel yields a slightly more even airiness. Instructions here are in my own words.

Honeycomb Candy
1 cup granulated sugar
1/4 cup light corn syrup
1/4 cup water
1/4 tsp apple cider vinegar
1 tsp baking soda, sifted through a fine sieve to remove any clumps
8 oz dark chocolate, finely chopped (I used a combination of Chocolove Strong Dark 70% and Green and Black's Organic Maya Gold 60%, which added a tantalizing hint of orange and spices to the mix. Do not use chocolate chips as they contain stabilizers and will result in a clumpy coating.)
Line a cake pan or rimmed baking sheet with parchment paper. The size of the pan is not critical, but a smaller pan will produce thicker (taller) honeycomb.

Place the sugar, corn syrup, water, and apple cider vinegar in a very large saucepan over med-high heat and do not stir. Run a wet pastry brush along the edges to dissolve any sugar crystals.
Allow the mixture to boil just until it turns golden.

At this point, put on oven mitts if desired, remove the saucepan from the heat, quickly stir in the baking soda using a heatproof spatula (the mixture will bubble up immensely), and immediately pour the mixture into the prepared cake pan. Do not spread it out, and try not to agitate it as it cools, as you want to maintain all those airy "sea foam" bubbles.
.JPG)

Let cool completely before using a large serrated knife to cut into irregular pieces.
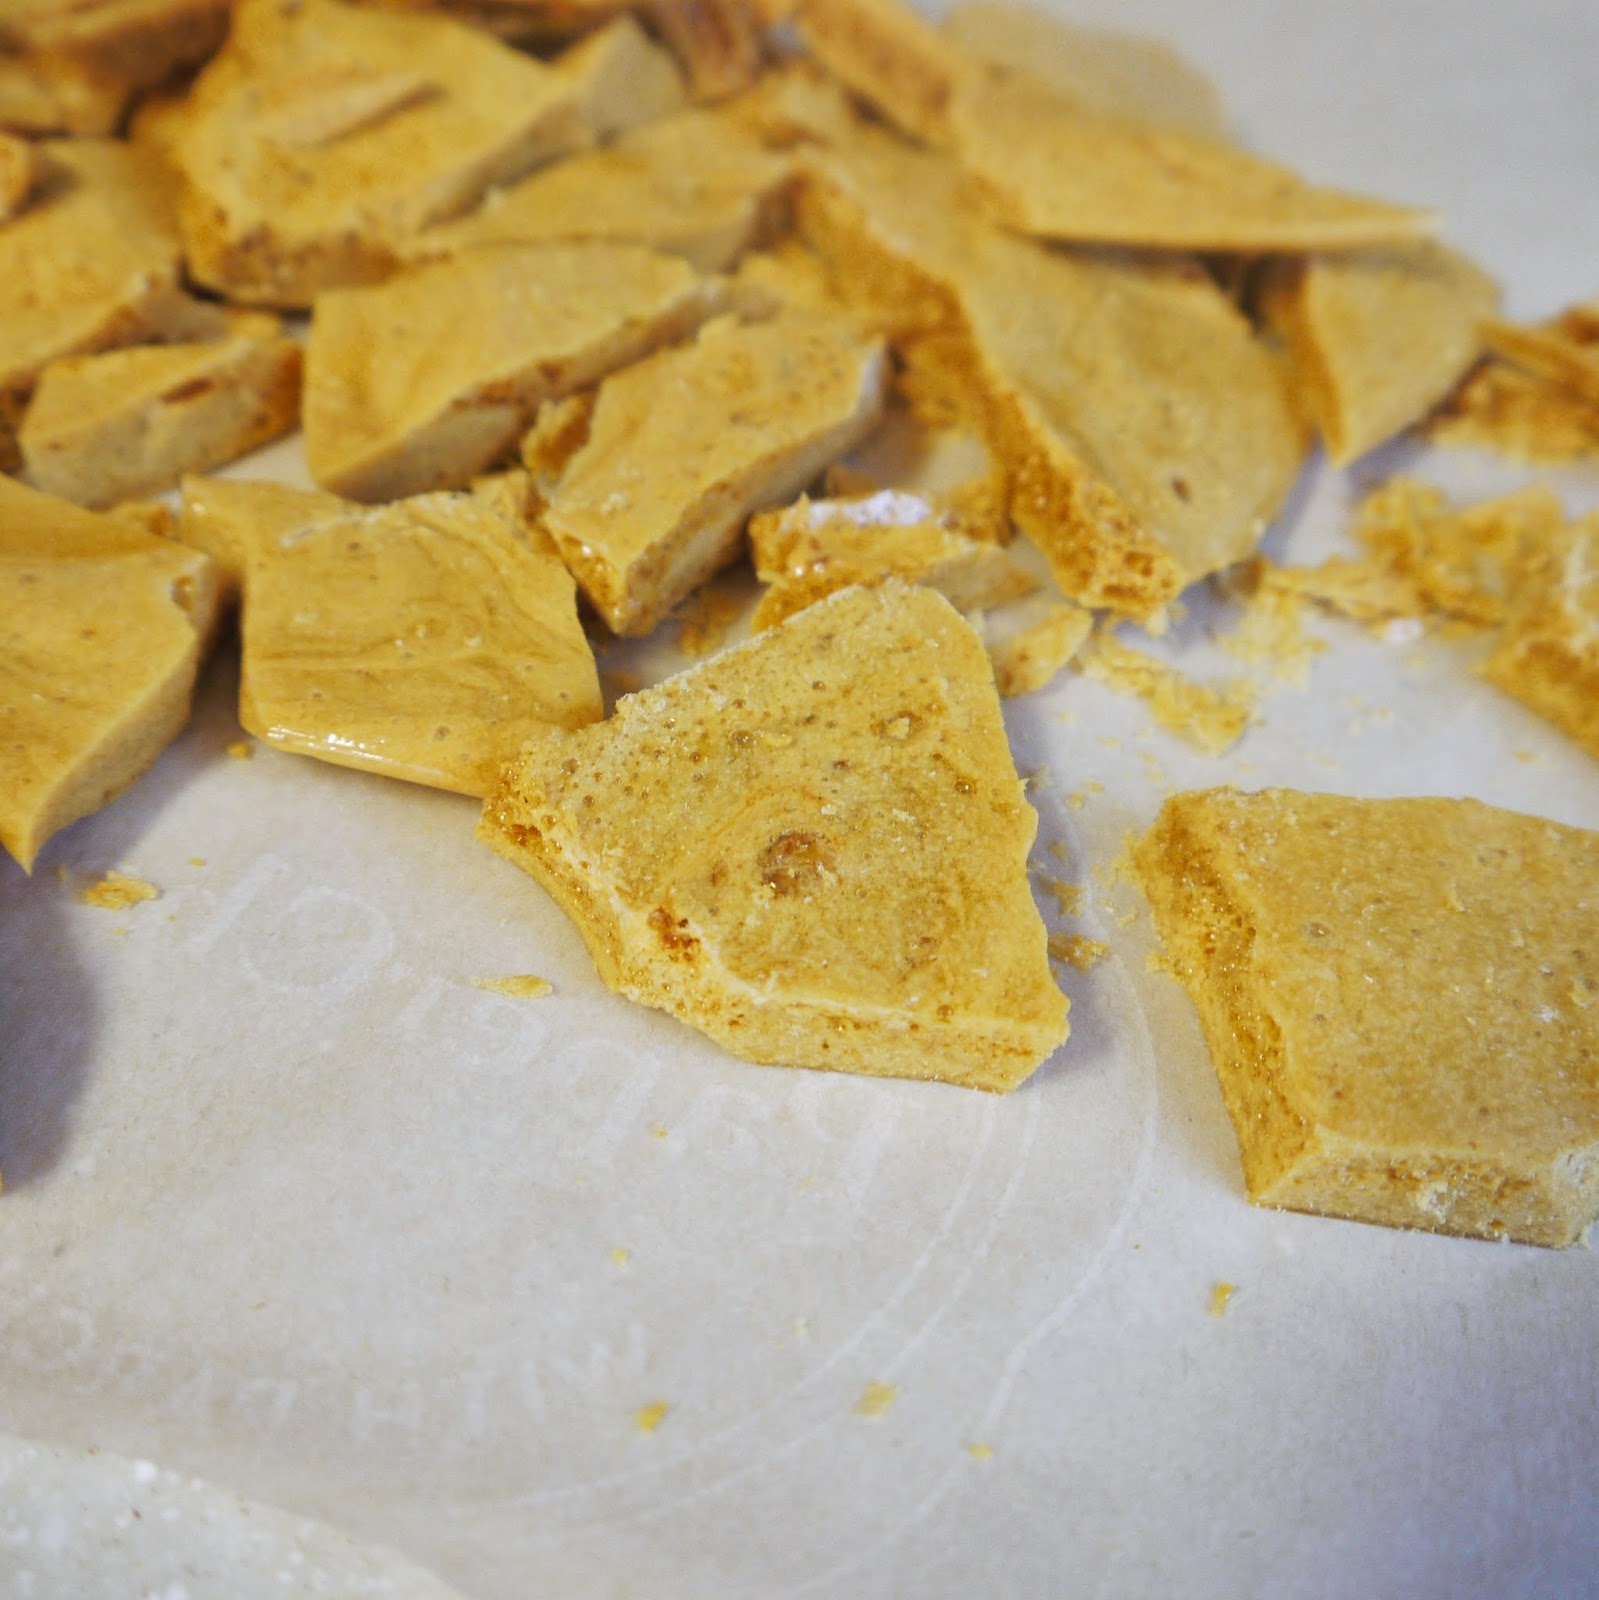
Little fragments make great nibbles and can also be stored for another use in an airtight container for 3-5 days.
To melt the chocolate, place two thirds of the chocolate in a stainless steel bowl set over barely simmering water, and stir gently until totally melted. Carefully remove the bowl from the simmering water (you might want to wear oven mitts when you do this, as the steam can be rather intense . . . yes, I burned myself), and add the reserved chocolate to the melted chocolate, stirring gently until completely smooth.
Note: For once I actually tempered my chocolate, using a candy thermometer to check for precise temperatures and all, but as you can tell from the gray-ish streaks in the photos, that dark, flawless sheen of perfectly tempered chocolate evaded me. If the gray-ish streaks attack your confections as well, never fear: the flavor of the chocolate will not be affected.
Place a fresh sheet of parchment paper on the counter and drop a piece of honeycomb into the chocolate. Use a fork to gently turn the honeycomb over in the chocolate to coat it. Scoop the honeycomb out with the fork and shake the fork back and forth very gently with slight movements of your wrist so that the excess chocolate drizzles back down into the bowl.

Carefully slide the coated honeycomb off the tines of the fork and onto the parchment to set.
.JPG)
.JPG)
Repeat with remaining pieces of honeycomb, gently reheating and stirring the chocolate until smooth as needed. Allow the coated candies to set completely at room temperature (ideally in a 60-to-70-degree Fahrenheit room) before transferring to an airtight container to store at room temperature for up to a week . . . as if they'll last that long.

Thanks for reading! Here's to Being the Secret Ingredient in your life.

.jpg)
.JPG)
.JPG)
.JPG)
.JPG)
.JPG)
.JPG)


.JPG)


yes.JPG)